
Diablo IV: Lord of Hatred Guide | How to Beat Dread Captain Boss
Here's a guide on how to beat dread captain in Diablo IV: Lord of Hatred
Game Guide by Mash Rahman on May 28, 2026
Sanctuary bears the scars of sunken ships and lost sailors, but the Nahantu region's coastal borders harbor a more insidious maritime threat. In their desperate search for Neyrelle, players in the Vessel of Hatred campaign expansion are inevitably drawn towards the hallowed edges of Akarat’s Tomb.
In the important story quest line called In His Footsteps, you and your loyal companion Eru have to make your way through the dangerous, waterlogged sands of the Forgotten Beach at Seta O-Akha. It is on this desolate and atmospheric beach that you meet the Dread Captain.
The Frozen Terror of the Forgotten Beach
This confrontation is one of the defining late-game hurdles in the campaign story, designed to test your situational awareness and environmental management. The Dread Captain is the unrelenting rage of the depths of the ocean, unlike many of the tainted wildlife or fanatical knights that you find deep within the canopy of the jungle. This is a big, menacing undead sailor who sits in the entrance to the tomb, requiring you to undergo a savage trial by combat before you can learn its secrets.
You have to defeat this monstrous maritime commander to move forward in the Vessel of Hatred story, an absolute must. You can’t just slip past him. You can’t ignore his presence to get to the gate of the tomb. The fight requires players to learn the spatial intricacies of a large open arena, while juggling overlapping elemental threats, creating a combat rhythm that is both highly reactive and intensely methodical.
The Beach Ambush
The true boss doesn’t even reveal himself until a grueling series of mob ambushes slowly builds up the tension of the encounter. You and Eru press on along the bleak beach, and the shallow water begins to roil and seethe, vomiting forth gigantic waves of the Drowned. These bloated, water-logged undead soldiers will attempt to swarm your position in an unrelenting onslaught, as a taxing warm-up that can easily burn through your precious defensive cooldowns and healing potions.
You will need good crowd control and good area of effect damage to survive this first Drowned onslaught. You're going to have to focus on thinning their ranks quickly, or you're going to be completely overwhelmed by their numbers. Eru will help you in this stage, but you can’t just rely on his damage output to clear the beach. You have to battle your way through the ranks of the undead, carefully picking your way to manage your resources well so you’re not left open when the actual danger finally rises from the depths.
A moment of uneasy silence passes over the arena with most of the lesser undead horde cleared from the shoreline. The silence is short, broken by the violent entrance of the Dread Captain. He comes at the sand, wielding a huge, splintered ship’s mast as a makeshift weapon, a physically brutal and elementally taxing showdown in the offing.
Pre-Combat Preparation and Resistance Checks
The Dread Captain employs a lot of devastating ice magic and staggering physical blows to crush aggressive players. If you've been neglecting your elemental resistance caps on your trek through the humid jungles of Nahantu, this will be a very painful reminder of reality. Taking a little time to properly audit your gear before entering the Forgotten Beach can save you from a frustrating string of repeated deaths.
Your main goal is to increase your cold resistance so you can absorb the blow of his heavy magical attacks. If your base armor sets are below the seventy percent cap, it is highly recommended to go to your local Alchemist in a major hub and brew a high-tier Elixir of Cold Resistance. This consumable buffer will go a long way towards reducing the sheer burst damage of his icy shockwaves, giving you the precious reaction time needed to recover from a poorly timed dodge.
Also super useful is to upgrade your boots with attributes that increase your base movement speed or give you extra evade charges. You'll be running a lot to evade his long-range attacks because the shoreline arena is so big. The best defense you have against a boss with a whole toolkit of ways to freeze you in place is probably to be able to quickly reposition your character.
Decoding the Huge Mast-Smasher
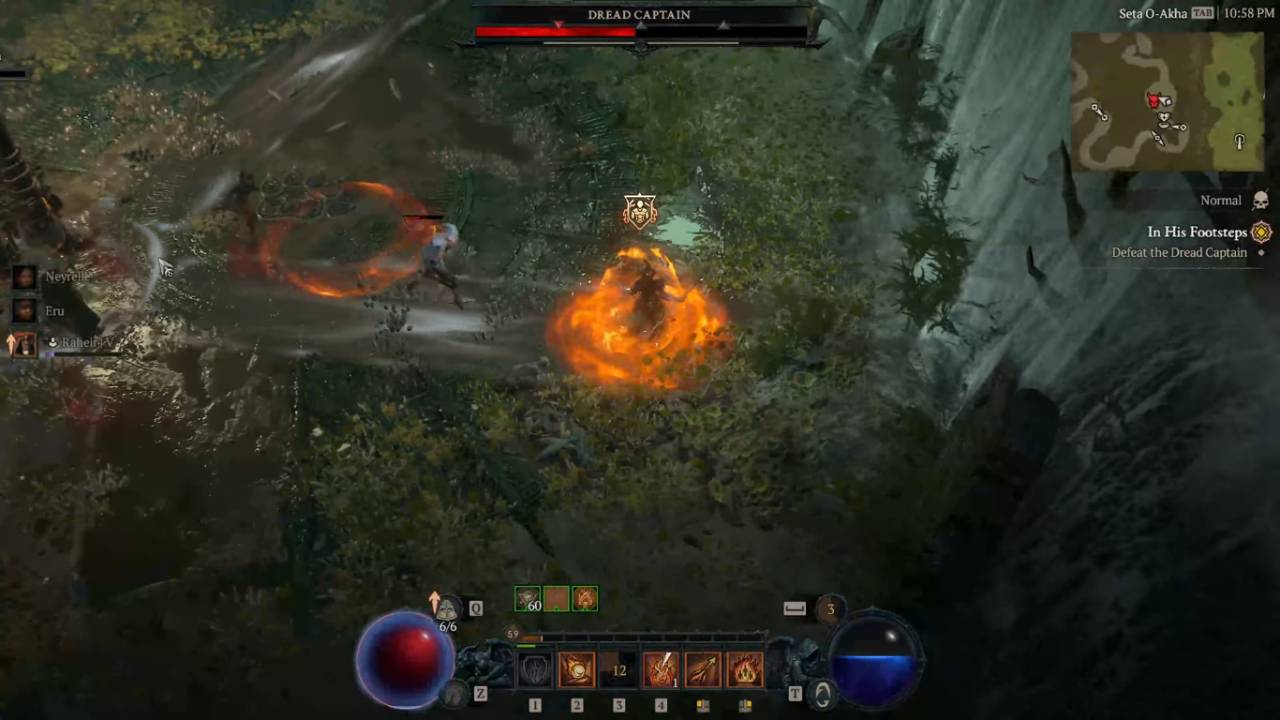
The visual and mechanical centerpiece of the Dread Captain’s arsenal is a huge, shattered ship’s mast that he swings with terrifying ease. He doesn’t use this weapon with any finesse; he uses raw, unadulterated brute strength to smash the sand beneath your feet to powder. His most common and most damaging first attack is called the Mast Smash, a skill that will require your full undivided attention every time you see him lift the huge wooden pillar in the air.
The captain doesn’t merely bang the mast into the ground, causing localized physical damage. The tremendous force of the blow sends out a series of dense, icy shockwaves that ripple outward across the arena floor in a clear, expanding star pattern. The heavy shockwaves propagate surprisingly quickly, and taking a hit from the leading edge will cause heavy cold damage and significantly reduce your character's movement speed.
To survive this star-patterned eruption, you must be able to read the brief accurately, telegraphed warning indicators that flash on the sand just before the mast strikes. Instead of running around in a panic, watch for the gaps that are opening between the lines of ice that are spreading out from the center.
A well-timed dash or micro-adjustment in your positioning will get you cleanly into the safe wedges between the shockwaves, allowing you to continue to maintain your offensive pressure without taking the punishing cold damage.
.jpg)
How to Defeat the Ice Spike Ball
Besides his earth-shattering melee strikes, the Dread Captain has a highly disruptive ranged attack to catch players who try to just kite him from a distance. The boss will periodically get down and launch a large, concentrated sphere of freezing magic directly at your current position. This projectile, often called the Ice Spike Ball, moves with a terrifying intent and calls for a quick dodge.
The true danger of the Ice Spike Ball is not just the initial impact. When it reaches its target, or touches your character, the central sphere explodes violently, sending a dense cluster of smaller, razor-sharp ice shards in all directions. Standing too close to the epicenter of the explosion will cause you to take overlapping damage from multiple spikes, which will quickly break your active barriers and immediately kill your character.
The golden rule to surviving this explosive mechanic is to get as far away from the projectile as possible before it blows up. Once you see the icy sphere leave his hand, use your mobility skills to sprint away from where you think it’s going. The bunch of smaller spikes naturally fan out the further you get from the explosion epicenter, giving you considerably larger gaps to weave through as the projectiles cross the arena.
Handling the Drowned Reinforcements
As the battle progresses and the captain’s health pool starts to dwindle, he will use his control over the sunken dead to turn the fight in his favor. With an ominous cry, he will call new hordes of Drowned to his side, directly from the shallow waters, to help him in battle. These waterlogged minions are a very disruptive secondary threat, flooding the arena and actively interfering with your ability to navigate the boss’s primary mechanics.
These Drowned minions are designed to block your escape routes and soak your single-target damage abilities. If you let their numbers get out of hand, you'll find yourself physically boxed in before you know it, unable to dodge the expanding shockwaves of the Mast Smash or run away from the detonating Ice Spike Balls. You need to actively break away from tunneling your damage into the boss and handle the growing horde quickly.
You’ll want to keep the sandy arena clear with powerful, sweeping area-of-effect skills. As the reinforcements spawn, try to funnel them into a tight cluster around the boss so you can simultaneously damage the Dread Captain and rapidly melt down his undead crew. Plus, clearing these minions gives you a steady stream of health potion drops, keeping your recovery resources topped off as you delve deeper into the encounter.
The Toxic Corrosion of the Sea Serpent
The mechanical complexity peak of the encounter is reached when the Dread Captain throws a massive, slithering sea serpent into the battle. This aquatic horror doesn’t directly engage you in melee combat, but instead acts as a constant environmental hazard that fundamentally changes how you have to approach the arena space. The serpent will spray the sand with mighty globules of very toxic poison and acid corrosion, leaving deadly puddles of sludge that will last for a time.
This thick poison brings a terrifying elemental overlap that really tests your spatial awareness. The captain’s shockwaves are not only freezing cold, but now you have to avoid them while dodging the corrosive puddles that are quickly spreading across the floor. If you are currently affected by the movement speed reduction of the boss’s ice attacks, stepping into the serpent’s poisonous spit will inflict aggressive damage over time that can easily chew through your health bar.
This is the time when you need to keep your cool and focus on avoiding damage rather than dishing it out. You have to constantly scan the local area, mapping out clean paths through the poison pools, while keeping one eye firmly locked on the captain's mast animations. If you’re anywhere near a forming pool of corrosion, never commit to a long, stationary casting animation — the overlapping damage from the boss and the serpent will quickly prove fatal.
Finishing the Final Phase to Open the Tomb
When the Dread Captain is about to lose his last bit of health his attacks become more frantic. The arena will be filled to the brim with exploding ice spikes, expanding shockwaves, summoned Drowned minions and the persistent toxic sludge of the sea serpent. During this frantic climax you need to stay constantly mobile, weaving your damage between your evasive maneuvers.
.jpg)
Don’t let your impatience ruin the try when victory is within reach. You want to avoid taking heavy blows from the captain during his Mast Smash animations. Rather, strike him aggressively during his short recovery periods after his big swings, whittling away at his remaining health while always being ready to dodge the next incoming hazard.
When the last, killing blow has been dealt, the undead mariner will sink down upon the sands of the Forgotten Beach, dropping his huge weapon and losing control of the shore. Defeat the Dread Captain and you’ll be showered in a huge burst of experience, gold and a hail of high-tier gear to enhance your growing power. But most importantly, his defeat clears the way forward for good, paving the path for you and Eru to finally approach the towering gates and boldly stride into the dark mysteries lying within the Tomb of Akarat.
Also, check out our Diablo IV Review, Diablo 4: Vessel of Hatred DLC Review, and other guides below:
- Diablo IV: Lord of Hatred Guide | How to Beat Eidolon of Jualin Boss
- Diablo IV: Lord of Hatred Guide | How to Beat Priestess of Hatred Boss
- Diablo IV: Lord of Hatred Guide | How to Get Doom Transmogs
- Diablo IV: Lord of Hatred Guide | How to Unlock Nahantu Tiger Mount
- Diablo IV: Lord of Hatred Guide | How to Get all the Cat mounts and Armors
- Diablo IV: Lord of Hatred Guide | Understanding Gear and Items
- Diablo IV: Mythic Gear Guide | How to Farm Mythic Items
- Diablo IV: Lord of Hatred Guide | How to Beat Uber Lilith
- Diablo IV: Lord of Hatred Guide | How to Beat Tormented Andariel
- Diablo IV: Lord of Hatred Guide | How to Beat Tormented Duriel
- Diablo IV: Lord of Hatred Guide | How to Beat Tormented Beast in the Ice
- Diablo IV: Lord of Hatred Guide | How to Beat Tormented Lord Zir
- Diablo IV: Lord of Hatred Guide | How to Beat Tormented Grigoire
- Diablo IV: Lord of Hatred Guide | How to Beat Tormented Varshan
- Diablo IV: Lord of Hatred Guide | Forging an Unstoppable Champion
- Diablo IV: Lord of Hatred Guide | Paladin Build: Mastering the Zealous Shredder
- Diablo IV: Lord of Hatred Guide | Paladin Build Mastering the Falling Star Arbiter
- Diablo IV: Lord of Hatred Guide | Paladin Build: Mastering the Holy Purifier
- Diablo IV: Lord of Hatred Guide | Warlock Build Mastering the Umbral Chains Weaver
- Diablo IV: Lord of Hatred Guide | The Ultimate Endgame Build
- Diablo IV: Lord of Hatred Guide | Essential Tips and Tricks for Traversing Sanctuary
- Diablo 4 Guide | Warlock Build Mastering the Blood Pact Invoker
- Diablo 4 Guide | Mastering the Pinnacle Challenges of Sanctuary
- Diablo IV: Lord of Hatred Warlock Build Guide | Mastering the Shadow Summoner
- Diablo IV: Lord of Hatred Guide | How to Choose Your Ideal Class
- Diablo IV: Lord of Hatred Guide | Warlock Build Mastering the Brimstone Apocalypse
- Diablo IV: Lord of Hatred Guide | Mastering the Frost Juggernaut
Editor, NoobFeed
Latest Articles
No Data.