
Jurassic World Evolution 3 Guide | How To Build The Best Lagoons
Make your Lagoon builds look natural, detailed, and truly next-level with these creative tricks.
Game Guide by Jubair Baky on Feb 14, 2026
It can look like Lagoons have not improved in Jurassic World Evolution 3. You still build them with the same circular modules, and there are no extra lagoon settings. However, Modular Building changes everything. With the right shaping and decoration, you can make lagoons feel far more natural, varied, and impressive than they do in the default look.
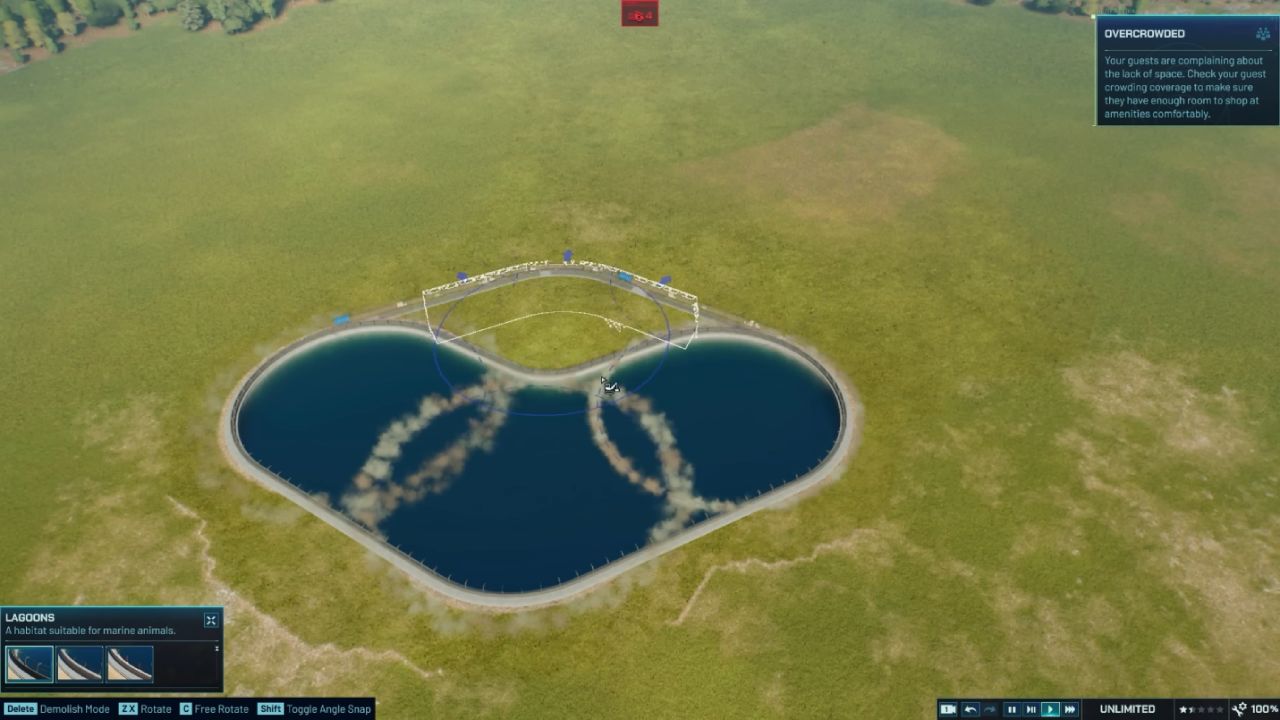
Build A Natural Lagoon With An Irregular Shape
Start by making a weirdly shaped Lagoon. A strange shape instantly looks more natural, and that is the goal. Next, raise the terrain around the lagoon so it sits slightly above the lagoon fence. There is a restriction on how close you can edit terrain near the lagoon edge, but rocks solve that problem.
Pick a rock from any biome set that has a flat surface, and make sure rock collision is toggled on. Use that rock to fill the gaps between the terrain and the lagoon, and hide the fencing. Use the same rock to make the lagoon outline more irregular. Weird is good. It helps you escape the recognizable module shapes.
Do not worry about using one rock repeatedly at first. Lay down the foundation. Once the base shape looks right, add different rocks in varying sizes and shapes to make it feel natural. Add taller rock formations in a few spots to give the lagoon verticality.
Reserve the best “close viewing” spots for attractions, like a Viewing Tower or a Viewing Log, especially where raised terrain can get closest to the lagoon edge.
If you are using tropical rocks, you can often place foliage directly on the rocks. With other rock colors, adding a bit of soil tends to look more realistic. Do not make it too neat. A little dirt should peek through once foliage goes down.
Start with the foliage brush to see how close you can get, then switch to individually placed trees and bushes to make it look good. This is where the lagoon really comes to life.
Add A Natural Island
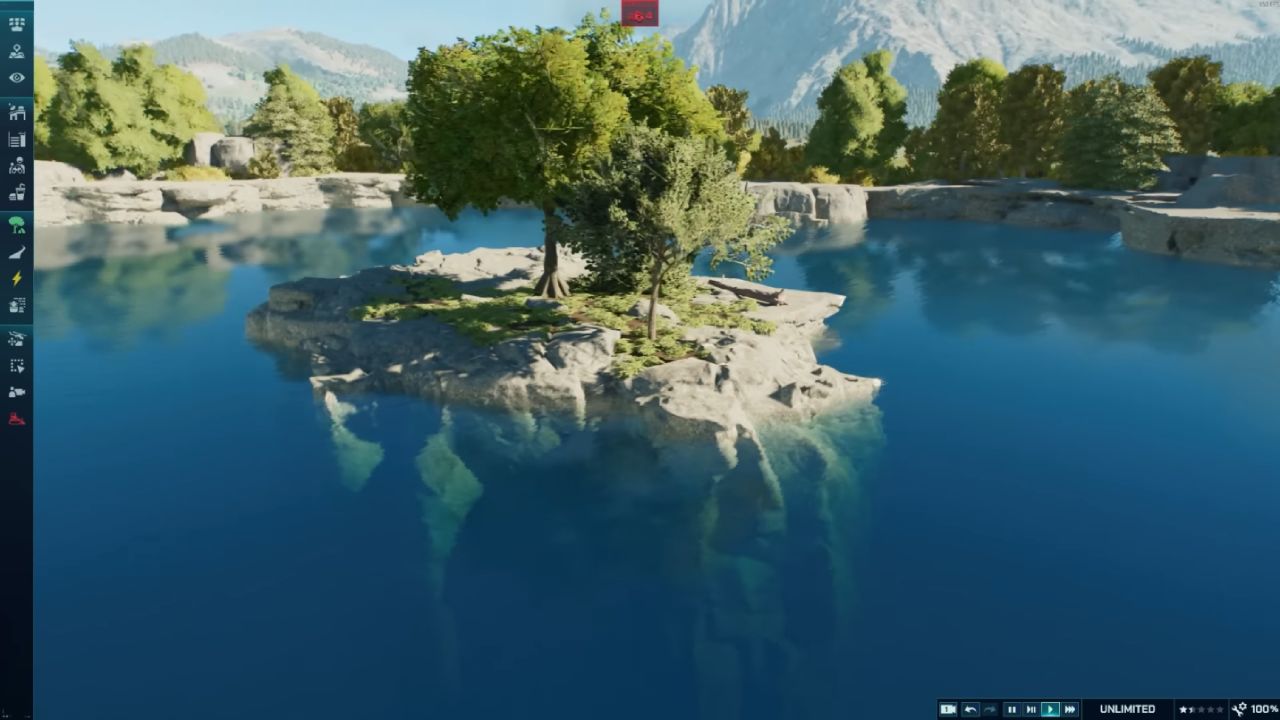
An island fits perfectly inside a natural lagoon, and it works in almost any lagoon style. Build a small island by using the same flat-surface rock for the main shape. Add rocks underneath in the water so the island does not look like it is floating. Keep collision turned on so marine animals cannot swim through the rocks.
Add more rocks as needed, add soil (unless you are already using brown tropical rocks), and then add foliage. The result is a clean, natural island that makes the lagoon feel designed instead of empty.
A top tip is to build in groups. Once you place a couple of pieces, group them, and keep building. When the island is done, it becomes one easy group you can copy around. You can also save it as a blueprint so you can reuse it in other parks and quickly tweak it to avoid it looking like an obvious copy.
Create A “Guest Island” With A Prefab Shell Trick
A big island is where things get fun. Start with a big Lagoon, then build a large island using the same island steps. Keep it flat and empty at first, because this becomes a guest island. It will not be functional, but it can look extremely cool. This can also work on the edge of a lagoon, not only on an island.
You cannot place an amenity building into a lagoon. The workaround is to place a prefab guest building first, such as a large modern Hotel, then edit the group and move a large piece out of the way so you can access the gray amenity box inside. Split the gray box from the group and remove it. The building will no longer function, but you gain freedom to place the shell.
There is still another issue. Some prefab foundations prevent lagoon placement. To fix it, get the camera flat to the ground and use the box selection tool to select all pieces above the foundation. Manually add any missed low planters if needed.
Split that selection from the group again. Now you have the building shell and can move it freely onto your lagoon island.
Sometimes you will also need to remove small items, such as benches. If you still see “obstructed,” but it is not red, it usually means one item is not compatible with lagoons. You can often fix it by raising the building slightly higher, then raising your island to match. If you cannot identify the obstructing piece, a small height adjustment usually solves the issue.
Finish the guest island by adding flooring to mimic paths, plus rocks and foliage to blend it in. Add extra building shells and decorations to create a resort-like area inside your lagoon. A functional lagoon island is also possible if you build the lagoon around a shape you leave open.
Fake Lagoon Depth With Rocks
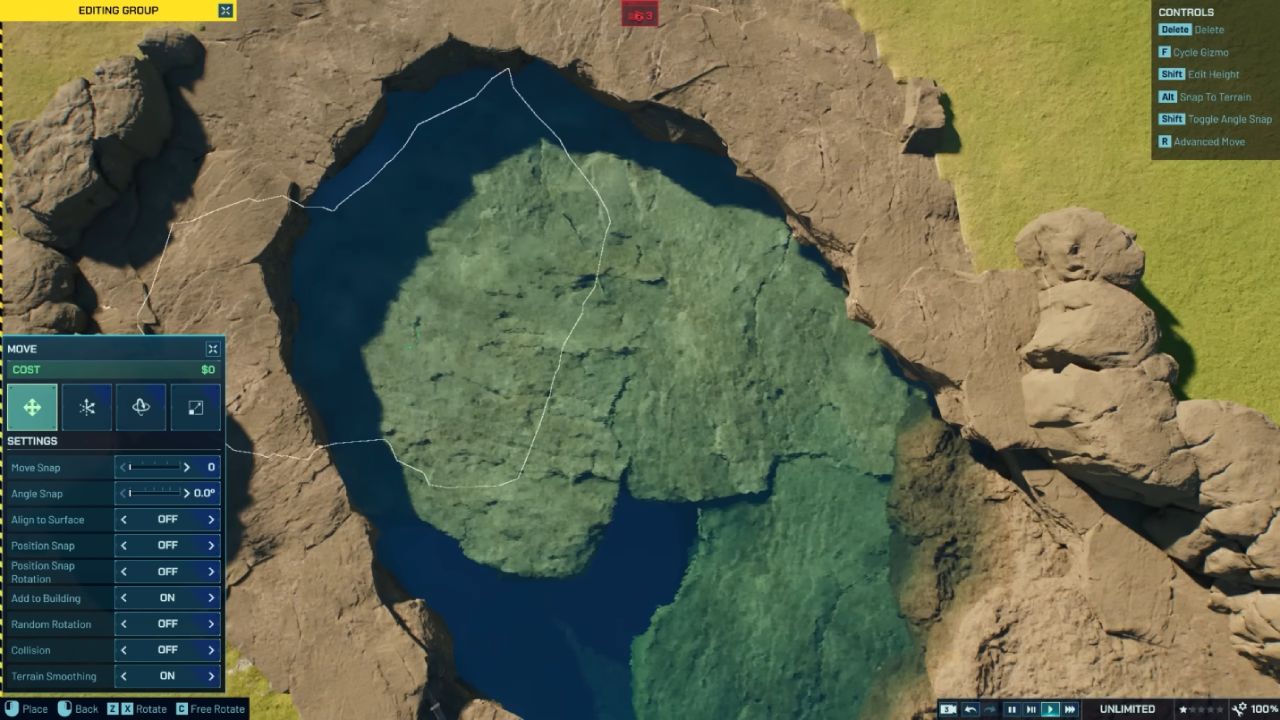
You can vary the lagoon depth using rocks. Collision must be turned on so animals cannot phase through and get stuck below. Any rock can work, but a flat Mediterranean Rock can look like a white sandy lagoon floor, especially when combined with dark tropical rocks. The contrast helps sell the illusion that the white rock is sand.
Scale rocks up quickly to cover large areas. Change “depth” by sinking or raising rocks. To add animals after placing rocks, you can still release them from a Hatchery or drop them in with the Helicopter. If the delivery is obstructed, move a couple of rocks, release the marine animal, and then move the rocks back once it is underway.
Watch for gaps. If there are gaps, a marine animal can slip through and get stuck under the rocks. It is an easy fix, but it is better to avoid it by carefully filling every opening.
One important note is that shark-eating lagoon creatures can have issues with a Shark Feeder. If they try to do the feeding animation, they can freeze in place. A tuna-based feeding setup is safer for those animals.
Use Terrain Drop-Offs To Make Waterfalls Feel Lagoon-Adjacent
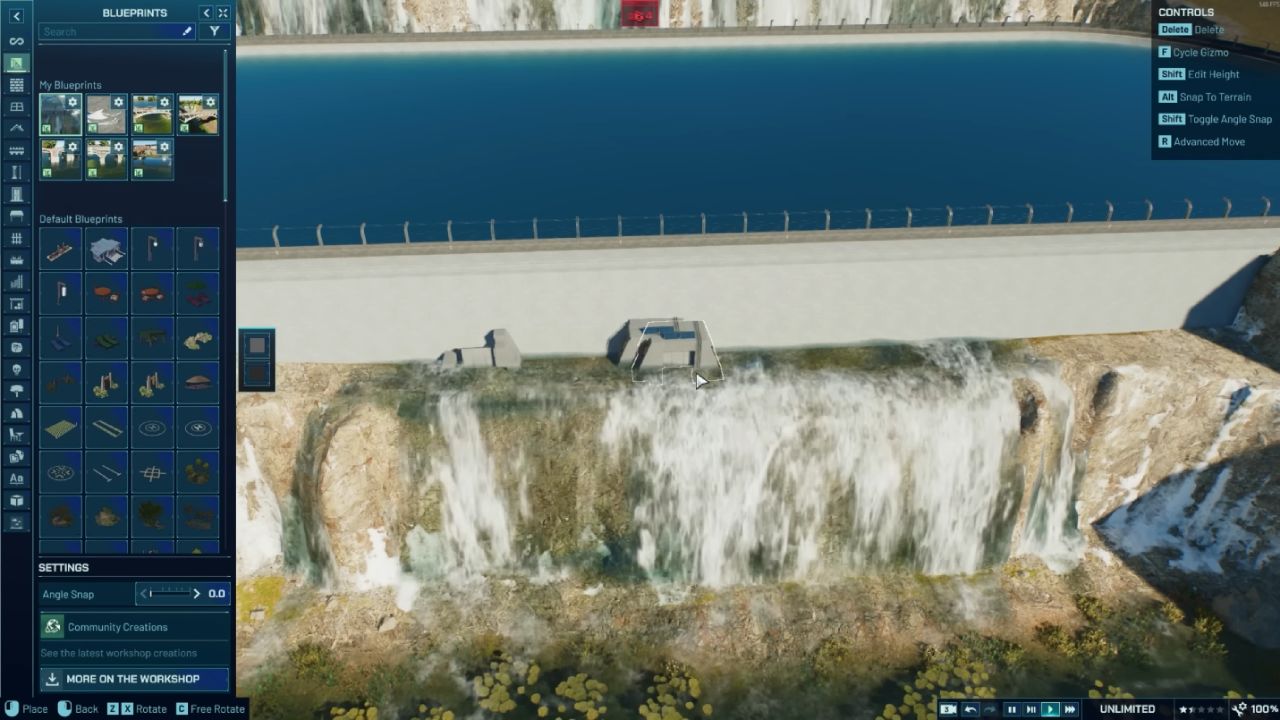
You cannot connect waterfalls directly to lagoons, but you can get them close enough to satisfy that itch. Dig down around the lagoon to expose the base. At normal terrain height, water cannot get close. Once you lower the terrain, water can reach the concrete edge.
You only need a thin strip of water to spawn waterfalls. This creates a dramatic backdrop for your lagoon, and the extra depth does not really matter because you will not see it from the other side anyway.
You can also build the illusion of a lagoon dam. Let waterfalls drop away from the lagoon area so it looks like water is being released for filtration. Add simple structures to convey that water is not literally flowing out of the lagoon.
Shrink the waterfall from a giant wall to a single waterfall if you want it to feel like a controlled drainage point.
Build A Lagoon Dome For A Nursery Lagoon
A final idea is a Lagoon Dome. With Modular Building, you can create indoor lagoons. Covering a big lagoon can take time, but a quick win is building a dome over a small lagoon.
Use a small lagoon for Ichthyosaurus, or use it as a nursery lagoon for baby animals. In Sandbox, you can choose which species are parental and which species need babies separated for better care. A baby Megalodon is a good example. When your adult Megalodon has babies, move the babies into the single lagoon and place the dome over it.
To sell the “guests can see inside” illusion, use the earlier trick with an empty shell of a Viewing Gallery and clip it into the dome. You can also fake underwater viewing by digging down around the lagoon and placing the viewing gallery shell lower. Add a fake entrance and a walkway over the water so it looks like scientists can monitor the babies closely.
To build the dome itself, search for Skylight pieces. There are only a couple of glass parts that truly read as see-through, and they are found there. Build one section of the dome first.
Use angle snap at a low setting to make it easier. For a smoother curve, manually rotate pieces, but shortcuts can help you finish the build without losing motivation.
Once one section is done, copy it, flip it using angle snap so it mirrors perfectly, and move it to the other side of the lagoon. Then rotate the full section around the lagoon, one segment at a time. With glass pieces, patience is key to avoiding messy overlapping at the end as you complete the dome.
Also, check out our other guides:
- Jurassic World Evolution 3 Guide | How to Use the New Island Generator
- Jurassic World Evolution 3 Guide | How to Adjust Slopes and Create Waterfalls
- Jurassic World Evolution 3 Guide | All Attractions
- Jurassic World Evolution 3 Guide | How to Set Up Attractions on Enclosures
- Jurassic World Evolution 3 Guide | Best Attractions of the Game
- Jurassic World Evolution 3 Guide | How to Build Structures Piece by Piece
- Jurassic World Evolution 3 Guide | How to Build Circles in Jurassic World Evolution 3
- Jurassic World Evolution 3 Guide | How to Set Up Expeditions
Editor, NoobFeed
Latest Articles
No Data.