
Jurassic World Evolution 3 Guide | How To Make the Best Aviaries
Make Aviaries look bigger, wilder, and more realistic with simple terrain, rock, and structure techniques.
Game Guide by Jubair Baky on Feb 14, 2026
Building a great Aviary in Jurassic World Evolution 3 can feel limiting at first. The dome shape and the dig depth do not give you much freedom. With a few smart build tricks, you can still make aviaries that look unique, natural, and cinematic. These ideas focus on cliffs, caves, walkways, bridges, biodomes, and waterfalls, while keeping animal movement smooth and the views impressive.
Build A Jurassic Park III-Style Cliff Aviary
A small or slim aviary looks best on a cliff. After putting it down, use the Terrain Tools to set the Slope to the highest level. On one side of the dome, raise the ground until it reaches the same height as the dome or a little taller. There will still be a gap between the raised ground and the dome, so fill it with rocks.
Make a dramatic cliff face that cuts into what would look like the back of the aviary. Use Flat Rocks and arch them over the dome edge to get rocks to the top without taking up half of the inside space. This makes the cliff feel more like a part of the glass than a pile next to it.
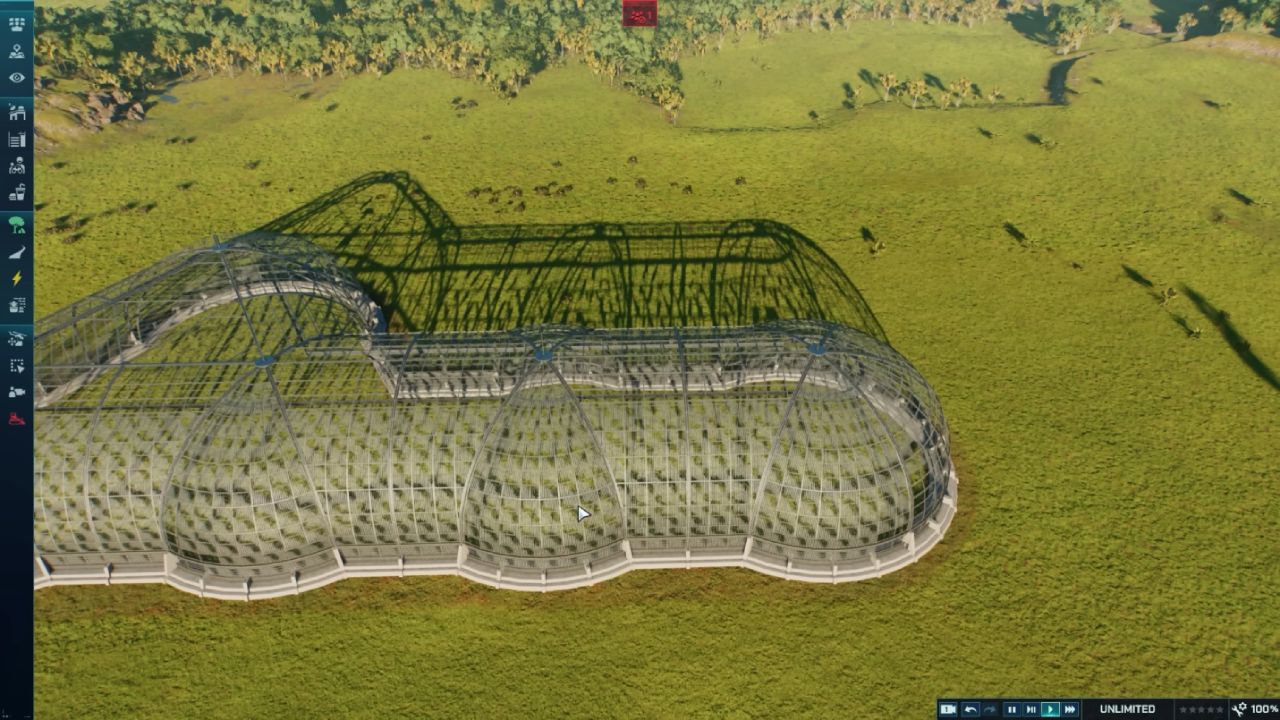
To make the cliff blend into the map, cover the rocks' tops with foliage so they merge with the terrain. A grass-like piece is useful here because it can make the rock edge look like it's growing with grass. Add foliage to the cliff face, too, so it feels alive instead of bare stone.
Turn The Dome Into A Full Cave Aviary
You can push the cliff concept further by making a full cave effect. Use the same rock arch technique, but this time cover the entire dome. Shape the top to look like natural terrain rather than a roof.
A big cave look can feel epic in screenshots and park tours, and it does not interfere with animals moving around inside. The goal is to hide the dome shape as much as possible while keeping the interior open and usable.
Make Pterosaurs “Sit” On Rocks
In Jurassic World Evolution 3, flying reptiles will sit on the ground or on perches, not directly on rocks. A simple trick can fix the look. Sink a small Perch into a rock that has a flat surface so the perch disappears inside it. The Pterosaurs will still recognize the perch, but visually, they will appear to be sitting on the rock.
This makes perching spots look more natural and helps you build detailed aviaries that feel like real habitats rather than staged enclosures.
Create Custom Aviary Walkways With Tour Gates
Aviary walkways can add a strong Jurassic Park III vibe. You can build a custom walkway as simple or as complex as you want. With a skinny Aviary, you can slide the walkway through and line up angled pieces with the glass for a cleaner look.
If you want to cross a bigger dome, split the walkway into two parts and bridge the gap with extra pieces. A simple rock island underneath can work as support, even if it is mostly for visuals.
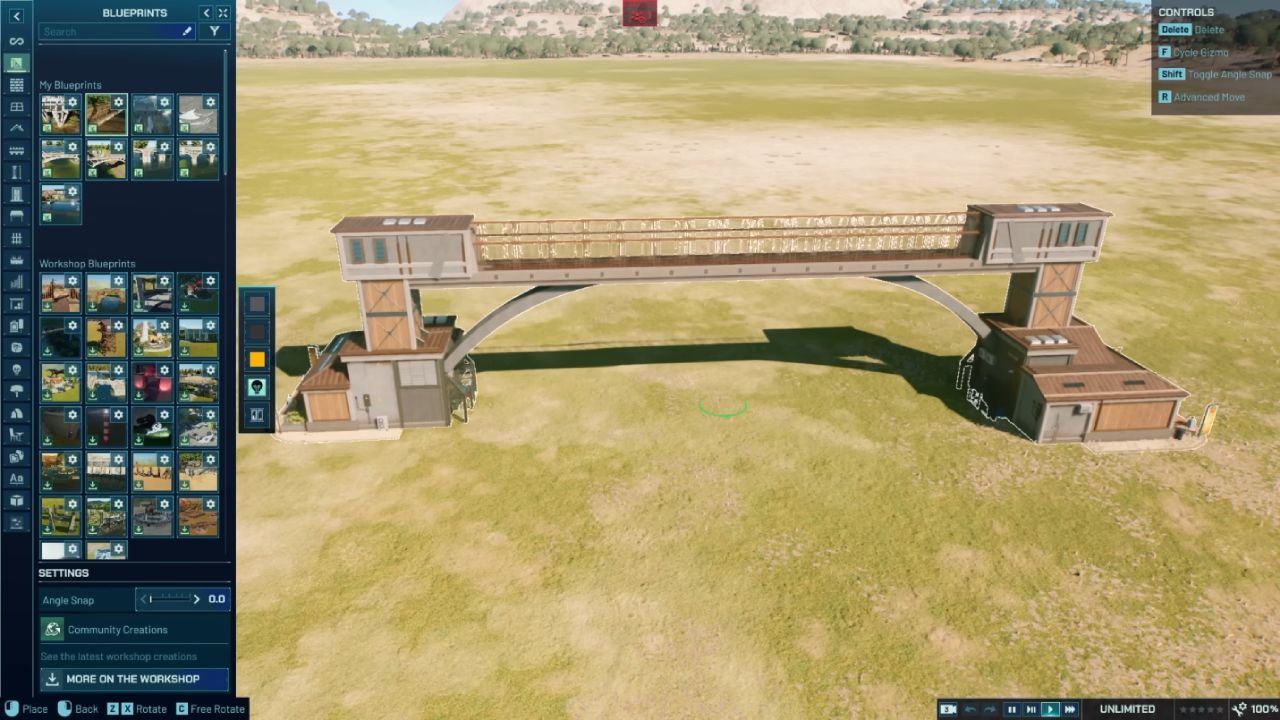
You can also use Tour Gates as your entry points. After placing the Aviary, run a quick tour, then decide where you want the gates to stay. Delete the tour building and the track, and the gates remain. Now, place your walkway built to connect the two gates. If the gates are wider than your walkway, build a small connection section so it fits smoothly. Even if guests cannot use it, you can still use it in first-person mode, and the gates will open for you.
Add Structures Inside The Aviary
Aviaries do not have to be only rocks, trees, and water. You can add structures inside, too, like a lodge-style build tucked into a larger enclosure. A Treetop Lodge-style structure can look great as a centerpiece, even if it is not perfectly accurate. If access looks unclear, you can add a simple elevator shaft lined up near the Viewing Dome or clip a walkway through the dome area to sell the idea.
The main point is to stop thinking of the aviary as only a habitat. Treat it like a themed zone, and your builds will instantly stand out.
Place A Bridge Over The Aviary Dome
A bridge over the dome can become one of the most impressive viewing concepts in your park. If your bridge fits over the top, adjust it slightly to improve the view. Adding Glass Flooring creates that “look down into the aviary” effect. Moving supportive arches outward can also free up the view directly beneath the bridge.
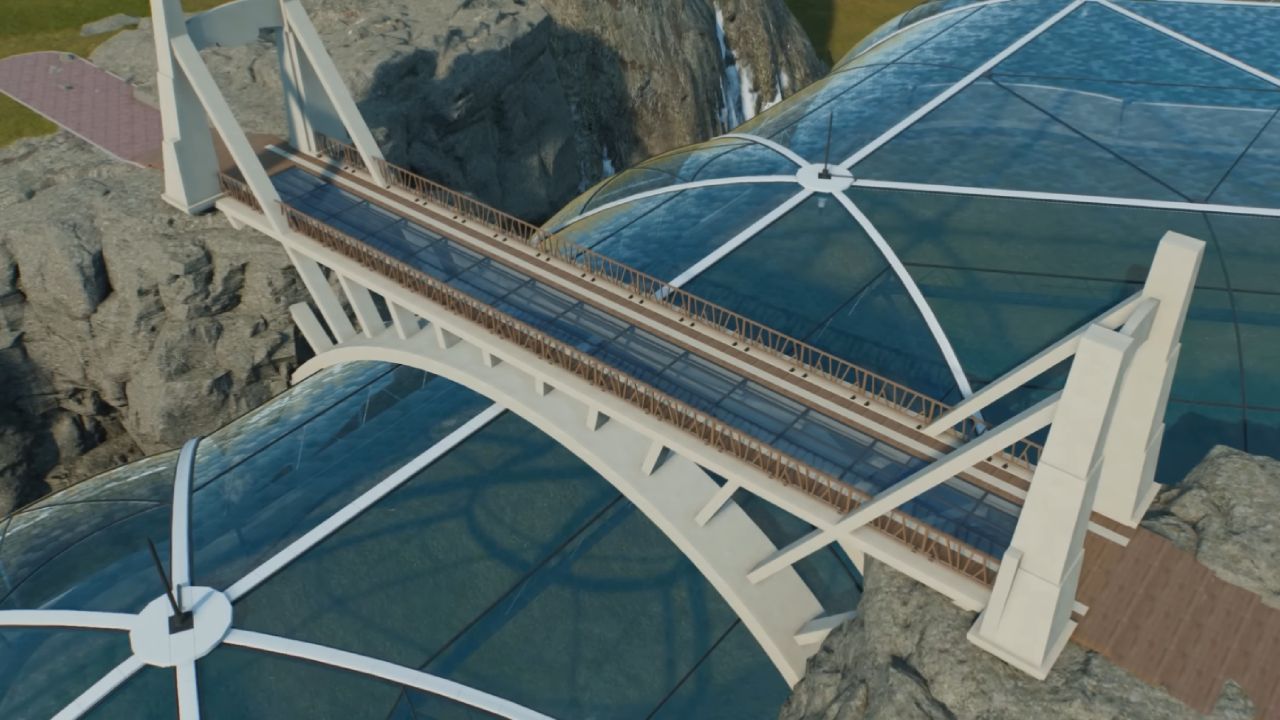
If the bridge does not reach terrain on both sides, you can extend it or hide the problem with rocky outcroppings. Well-placed rocks can make the whole setup feel intentional, as if the bridge were built into the landscape.
Bring Back The Biodome With Biome Contrast
A biodome look works best when you use strong biome contrast. One of the best examples is building on a Desert Map, then making the inside feel alpine or Taiga, or doing the opposite for a dramatic swap.
Start by painting the interior ground with a grassy texture, while keeping the exterior sandy and barren. Add conifer-style trees to set the tone. If you want to sell the illusion fully, add snow using floor pieces. Tarmac or Concrete pieces work well because they have texture. Recolor them white, then cover a large interior area.
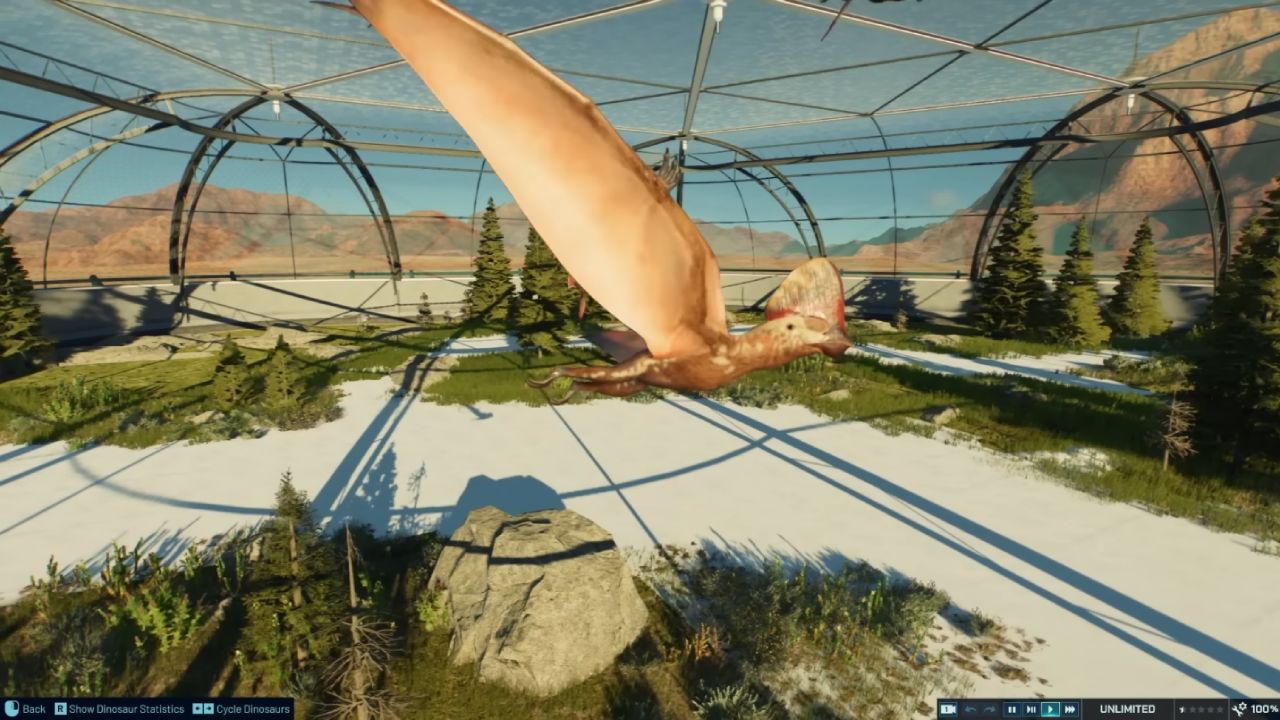
This does not block animals from moving, so you can build freely. After placing the “snow,” raise the terrain slightly and flatten it along the edges to create a natural border. Add shrubs with a foliage brush, then place gray rocks from a temperate-style set to break up the surface. Finish by placing biome-appropriate trees so the interior does not feel like it belongs to the outside map.
Release Pterosaurs Outside The Aviary
When your Pterosaurs are ready in the hatchery, you do not have to release them into the dome. Use the placement option to drop them where you want, including out in the open.
If you want them to nest in the wild, the nest must originally be placed inside an Aviary Dome. Place the dome where you want the nest to end up, place the nest inside, then delete the dome. The nest remains, and your free-flying reptiles can now fit into a Site B-style ecosystem build.
Use Waterfalls As A Backdrop
Waterfalls can instantly add scale and drama to an aviary. Raise terrain directly behind the dome, getting as close as possible. Raise the terrain inside the aviary as high as you can, too. Then use the Water Brush to paint waterfalls, layer by layer, building up to 3 layers. Place a Viewing Gallery across from it, and the waterfall becomes a huge cinematic backdrop.
A smaller waterfall in front can help the scene feel more cohesive. If the water looks like it is passing through solid aviary walls, add simple vent-style structures to suggest openings in the walls. If your aviary sits on a cliff edge, you can also make water pour out of the enclosure. Push the water to the interior edge, then place water below to connect the flow and complete the illusion.
Also, check out our other guides:
- Jurassic World Evolution 3 Guide | How to Use the New Island Generator
- Jurassic World Evolution 3 Guide | How to Adjust Slopes and Create Waterfalls
- Jurassic World Evolution 3 Guide | All Attractions
- Jurassic World Evolution 3 Guide | How to Set Up Attractions on Enclosures
- Jurassic World Evolution 3 Guide | Best Attractions of the Game
- Jurassic World Evolution 3 Guide | How to Build Structures Piece by Piece
- Jurassic World Evolution 3 Guide | How to Build Circles in Jurassic World Evolution 3
- Jurassic World Evolution 3 Guide | How to Set Up Expeditions
Editor, NoobFeed
Latest Articles
No Data.