
Jurassic World Evolution 3 Guide | How To Release Dinosaurs in the Aviary
Build cooler parks fast with three popular creative glitches that still work in Jurassic World Evolution 3.
Game Guide by Jubair Baky on Feb 14, 2026
Jurassic World Evolution 3 has a lot of strong building tools, but a few big ideas still need creative workarounds. These tricks let you release land dinosaurs into an Aviary, lower Monorail tracks to a custom height, and create working Tour bridges. The steps are specific, so doing them in the right order matters.
How To Release Dinosaurs In The Aviary
This Aviary method is great for building high-security enclosures, especially with a glass-style look. It also helps you create a completely different biome feel within a desert park, making the habitat design stand out.
To set this up, you need an Aviary, an Aviary Hatchery, a regular Land Hatchery, and an Entrance Building. Once those pieces are placed, the key is using the land hatchery search to “carry” a dinosaur selection into the aviary hatchery.
Start in the Land Hatchery and choose Synthesize Dinosaur. Pick the dinosaur you want, but do not click it from the list. You need to type the full name into the search bar.
For example, type Acrocanthosaurus. After typing it, make sure the selection screen shows only one dinosaur tile. That part matters because the trick works best when the list is “clean” and focused on a single result.
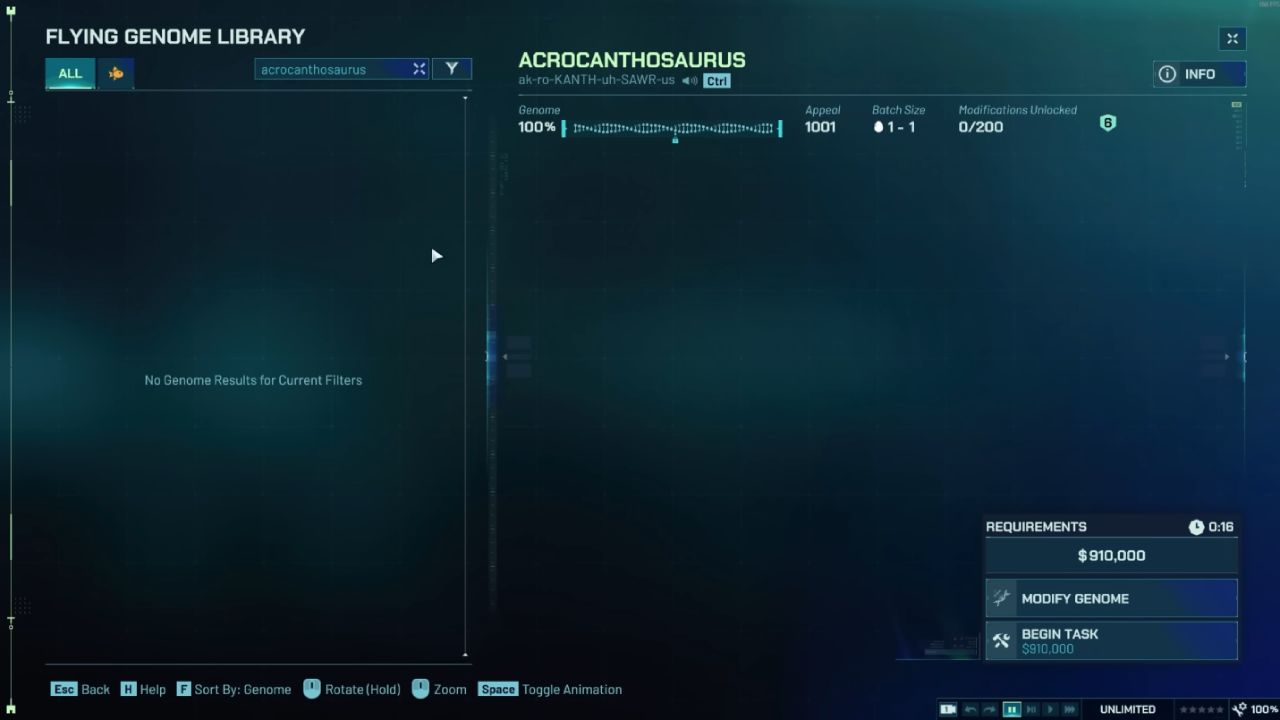
If you want genome changes, do them in the Land Hatchery. Change skins and traits there, then save and exit. Avoid editing inside the Aviary Hatchery, because you can lose skin previews, and the process can break after changes.
Now leave the Land Hatchery and go to the Aviary Hatchery. Open Synthesize Dinosaur. You should notice the search text still shows your typed dinosaur name, and the list looks empty because it is not a flying species. Begin the task anyway. The hatchery will begin synthesizing the land-dwelling dinosaur within the aviary system.
Once synthesis finishes, select the eggs and begin incubation. When incubation completes, prepare the asset for release. The result is a land dinosaur released into the Aviary. It can look a little strange because the enclosure is not designed for it, but the effect is real.
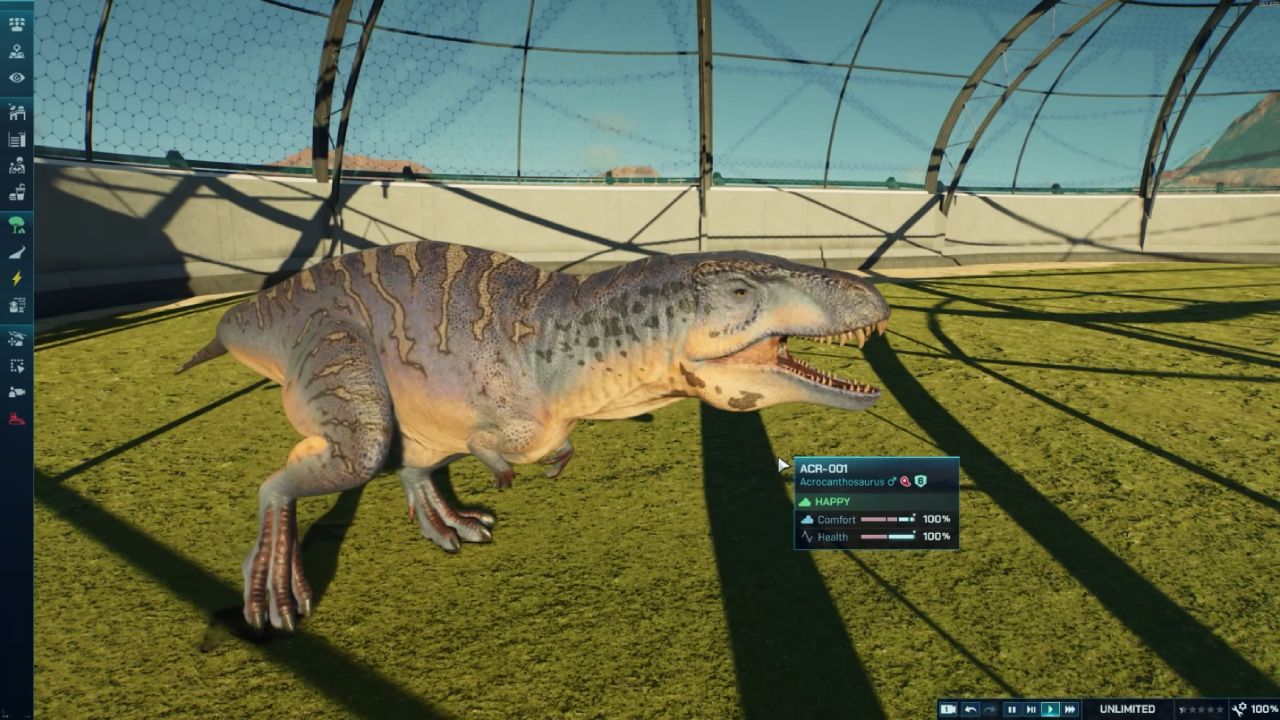
If you want to repeat it with another dinosaur, follow the same rhythm. Go back to the Land Hatchery, type the dinosaur name so only one tile remains, do all genome edits there, exit, then start the synth task from the Aviary Hatchery without changing genomes in that menu. This method also works with big names like Tyrannosaurus Rex when the typing step is done correctly.
How To Change The Height Of The Monorail
The Monorail height trick works best early in a park build. It is much easier to build around it than to force it into a finished park, because the terrain shaping can get steep and awkward.
Begin by digging a trench. The deeper the trench, the lower your Monorail track can sit. After the trench is ready, place your first Monorail Station inside or near that lowered area.
Then attach one length of Monorail Track. Keep it to a single segment at first. After that, attach a second Monorail Station at the end of that one track length.
Next, raise a small bump under the track. This bump is not a decoration. It is feedback. When you move a station along the track, the terrain pressure from that bump helps you notice when the track wants to rise, which is exactly what you want to avoid.
Now add more Monorail Track. Keep it straight or only slightly curved. Avoid a full curve, because the trick becomes unreliable. After placing more tracks, select the station and use the move option in settings. Slide it along the track.
When you feel resistance or see the track reacting to the bump, pull the station back just enough so the track stays straight. Place it there.
This becomes a repeat loop. Move the station forward, watch for the bump feedback, and pull back until the track is straight again, then place. At some point, you may see “obstructed by Monorail Station.” That usually means the previous station is in the way. Pull back until placement is allowed, then continue.
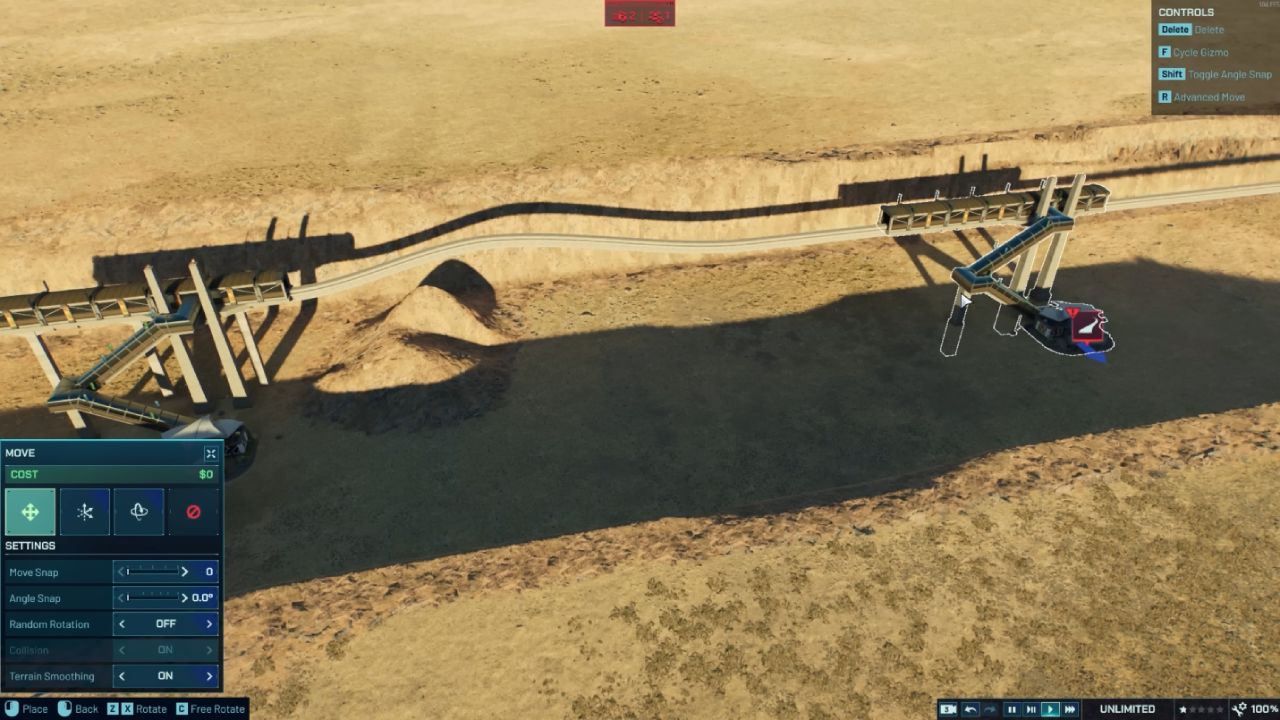
Once you have the lowered track effect across the area you want, use terrain tools to reveal the look. You can keep the track almost flush with the ground for a “real train track” vibe or keep it slightly visible for a more stylish look.
You can also control the final height by adjusting trench depth. A shallow trench creates a higher “low track,” and a deep trench creates a more dramatic ground-level track.
If the terrain around the entry becomes too steep for clean pathing, a workaround is to place a Hyperloop Station near the Monorail connection and build around it. You can surround it with terrain as much as the slope limits allow, then hide rough edges with rocks.
You can also clip a second Hyperloop Station into a custom build to create the illusion of a new station, then connect it and add an Entrance Building as the arrival point.
How To Make Working Tour Bridges
A normal decorative bridge may look good, but it will not work for ride systems by default. This trick creates a functional elevated route for Tour vehicles, similar to what was possible before, but it still needs careful alignment.
Start with the Tour Vehicle and line it up with the Tour Track. The alignment needs to be dead center. Once it is centered, run the tour track along the Monorail path to create the elevated bridge-like route. If the slope is too steep, adjust the terrain and try again until the route places properly.
When the Tour Track is placed, the original pillars can disappear. That is where modular building helps. Use a simple column structure as custom support pillars under the route.
You can color-match it to the Monorail style for a cleaner illusion. Add railings or side pieces if you want it to feel like a real bridge, and expand the structure as needed.
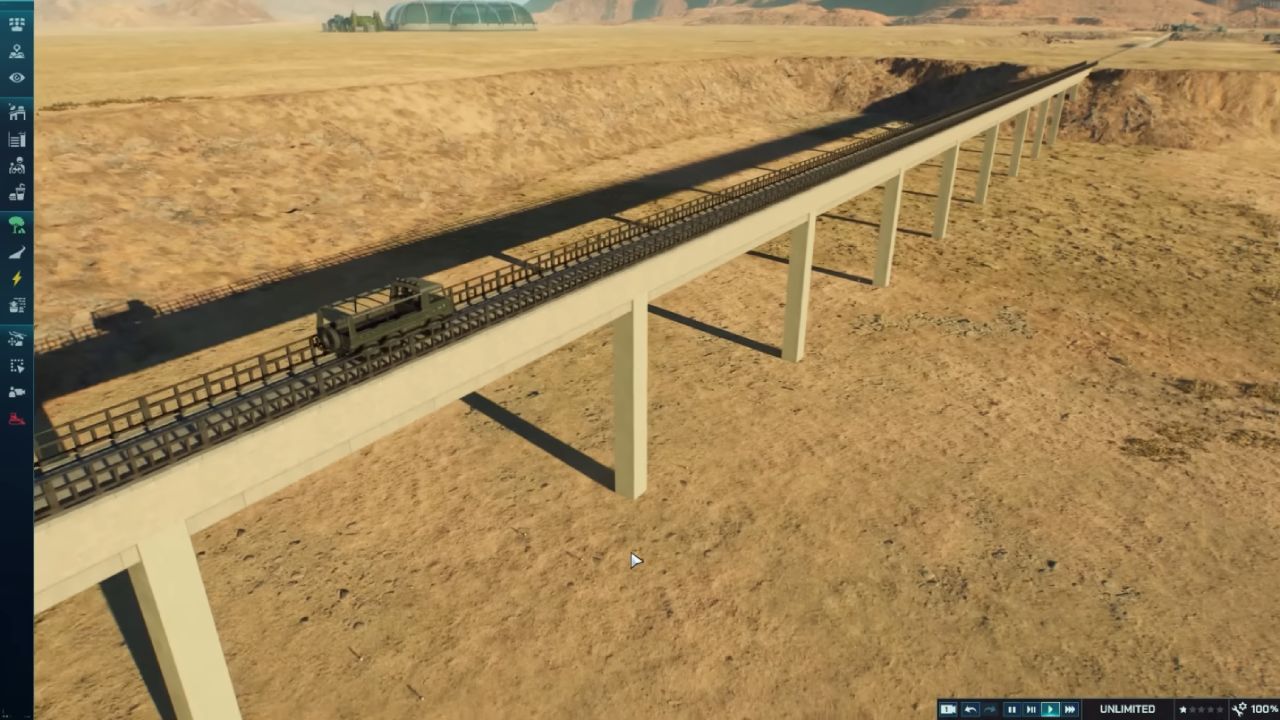
You can also place a decorative bridge blueprint over the track to cover it, then raise the terrain slightly for a smoother look. With proper sizing, the track can sit neatly under the bridge shell while the vehicle continues to run the route.
Also, check out our other guides:
- Jurassic World Evolution 3 Guide | How to Use the New Island Generator
- Jurassic World Evolution 3 Guide | How to Adjust Slopes and Create Waterfalls
- Jurassic World Evolution 3 Guide | All Attractions
- Jurassic World Evolution 3 Guide | How to Set Up Attractions on Enclosures
- Jurassic World Evolution 3 Guide | Best Attractions of the Game
- Jurassic World Evolution 3 Guide | How to Build Structures Piece by Piece
- Jurassic World Evolution 3 Guide | How to Build Circles in Jurassic World Evolution 3
- Jurassic World Evolution 3 Guide | How to Set Up Expeditions
Editor, NoobFeed
Latest Articles
No Data.