

Back 4 Blood Guide | Best Card Deck And Supply Line Tips
Master the card system, decks, and supply lines to make every Back 4 Blood run easier.
Game Guide by Ornstein on Dec 06, 2025
The card system in Back 4 Blood is what makes the game stand out from other zombie shooters. Instead of locking you into fixed classes, the game lets you build custom decks that shape how you play.
With the right cards, you can increase revive speed, boost healing, or even add an area-of-effect heal that triggers for all teammates when you go down. This gives you a lot of control over how each run feels and how your cleaner supports the team.
You can build decks that work well in solo play or decks that shine when you coordinate with friends. Before a session, you and your squad can talk through what each person wants to run so every deck fits a role. The card system is flexible enough to support serious meta builds, fun meme builds, and everything in between.
Picking A Playstyle With Custom Decks

The main question is simple: how do you want to play Back 4 Blood?
If you enjoy helping others, you can lean into a strong utility role. You can stack revive speed, healing bonuses, and team buffs so you become the backbone of every fight.
If you prefer to feel like an unkillable wall, you can set up a slow-moving juggernaut build that focuses on damage resistance and survivability.
You can also lean into pure gunplay. If you like a fast-paced shooter feel similar to classic FPS games, you can build around accuracy, recoil control, ammo, and weak spot damage.
On the other side, you can go for a full meme build: super high movement speed and a melee-focused setup where you sprint around the map smashing everything with a bat.
The card system supports it all. Your deck is where you decide if you want to be a tank, a healer, a damage dealer, or a speed demon, and the game rewards you for committing to that vision.
Corruption Cards, The Director, And Mission Cards
The card system does not belong only to you. The enemies use it too. The infected hordes, known as the Ridden, are directed by an AI system called The Director. This hidden force plays its own deck of Corruption Cards during your run.
These Corruption Cards can add hazards like flocks of birds that trigger massive hordes, tougher Ferocious Ridden variants, or the card The Fog, which covers the map in low visibility. Each Corruption Card changes the conditions of the level, stacking extra dangers on top of the base difficulty.
Not every card the game shows you is negative, though. At the start of each mission, you also see a Mission Card. This mission card gives you a bonus objective in exchange for rewards.
These rewards can be Copper (the in-run currency for buying gear and upgrades in safe rooms) or Supply Points (your long-term unlock currency for meta progression), and sometimes you earn both at once.
Learning to read Corruption Cards and Mission Cards at the start of a level helps you pick the right cards from your deck and adjust your plan before you leave the saferoom.
Supply Lines, Copper, And Supply Points
As you complete missions, finish bonus objectives, and take on higher difficulties, you earn Supply Points. These Supply Points are the core of meta progression in Back 4 Blood. You use them to unlock new cards, cosmetics, and other customization options that slowly expand what your decks can do.
Difficulty affects how many Supply Points you gain. On Recruit you earn fewer points, Veteran gives you a standard amount, and Nightmare awards more Supply Points for the extra challenge. This encourages you to climb up as you become more confident with your decks and team play.
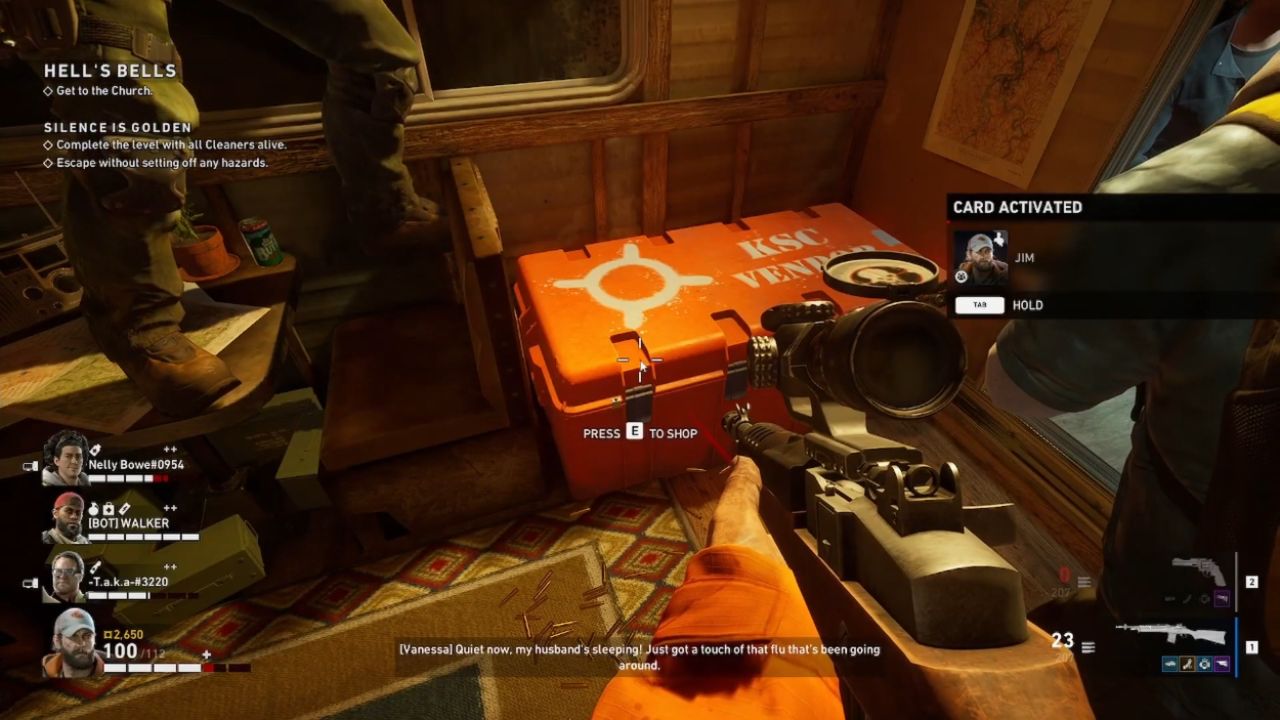
During missions, you also collect Copper, which you spend at the safe room vendors. Copper pays for weapons, attachments, support items, team upgrades, and extra cards offered mid-run.
Copper shapes your short-term strategy inside a campaign, while Supply Points build your long-term progression outside of it.
Unlocking Cards And Cosmetics In Supply Lines
All of your cards, cosmetics, and personalization items come from Supply Lines. You can access Supply Lines from the in-game menu or by walking up to the Supply Line NPC in the hub.
At the start, you only see a single short three-node track. Once you complete that first track, three longer Supply Line tracks appear. Each one leans toward a certain theme or general playstyle. Some lines focus more on support and healing, some on raw damage, and others on utility or economy.
As you move along a track, you unlock new cards to add to your decks. At the end of most tracks, you also unlock banners, character outfit pieces, or weapon skins.
Character cosmetics can be equipped in the Cleaners tab, and weapon cosmetics can be applied in the Armory tab. Over time, this lets you build both powerful decks and a cleaner look that feels like your own.
Deck Types: Solo, Campaign, And Swarm
On the deck screen, you see three main deck types: Solo, Campaign, and Swarm.
The Solo deck is used when you prefer to go it alone with bots. The Swarm deck is used in Swarm, the PvP mode where teams alternate between Cleaners and Ridden.
In both Solo and Swarm, every card is unlocked by default for deck-building. These modes are perfect for testing ideas and experimenting with wild builds, since you do not have to worry about unlock restrictions.
The Campaign deck is where the core experience lives. This is the mode where you play through the story acts, and only the cards you have unlocked through Supply Lines are available.
On the left side of the deck screen, you see your list of created decks. Before starting a run, you choose which Campaign deck you want to bring in.
These decks define your identity in the squad. By choosing a specific deck, you bring something unique to your team, whether that is more damage, more healing, better stamina, or stronger economy.
Building Decks And Example Archetypes
As the game evolves, a meta will always form, but the system is designed to reward your creativity. You are encouraged to experiment with card combinations until you find a deck that feels right.
You might run one tanky deck centered on damage resistance, trauma reduction, and fast revives, with extra team heals to keep everyone standing.
Alongside that, you might keep a second deck that focuses more on constant fire and weak spot damage, aiming for a “bottomless magazine” feel where you spray down priority targets and chew through bosses.

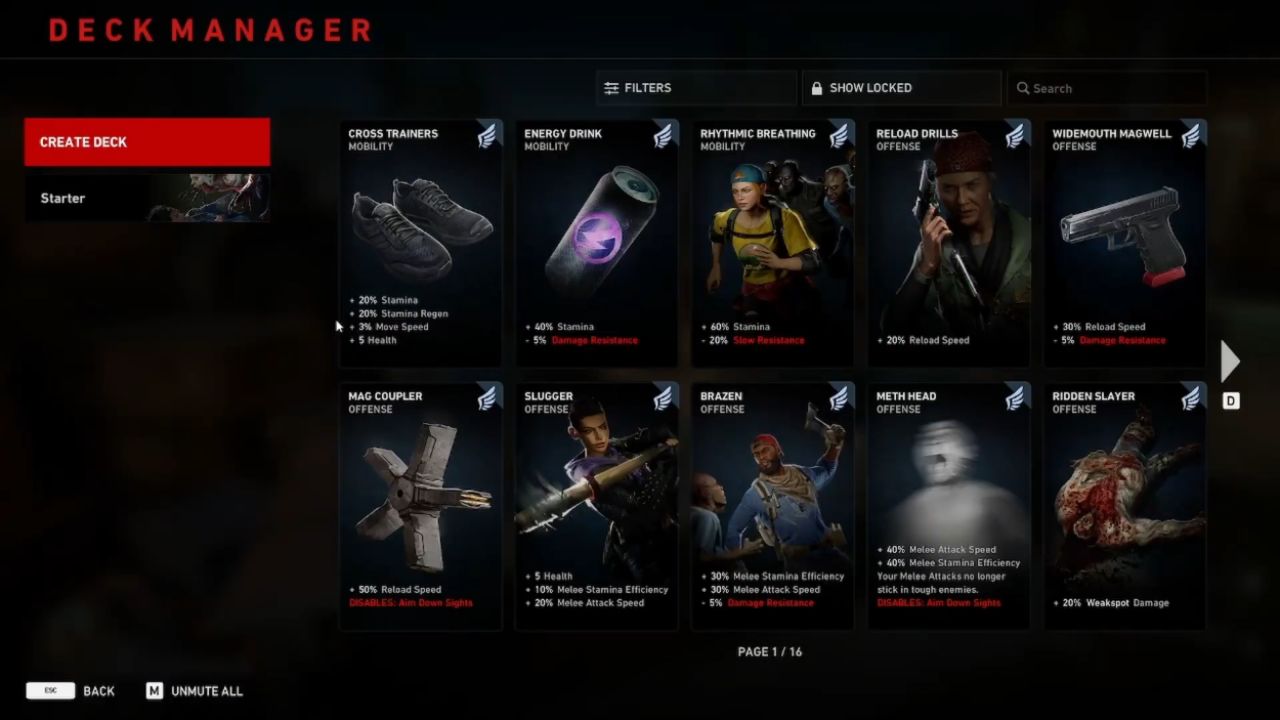
Every Campaign or Swarm deck can contain up to 15 cards. These cards are grouped into four main categories, each with a color and general theme:
You have Reflex (blue), which usually boosts speed, accuracy, and handling.
You have Brawn (green), which focuses on health and toughness.
You have Discipline (red), which emphasizes sustained damage and weapon control.
You have Fortune (yellow), which often ties into economy, item gain, or powerful utility effects.
Each card also belongs to a subtype such as Offense, Defense, Mobility, or Utility, which helps you quickly see what role it fills in your build.
On the deck screen, you can use the search bar and filters to find cards by name, category, or subtype, which makes managing large collections much easier.
Starter Cards, Draw Order, And Planning Ahead
The card at the very top of your deck is your Starter Card. This card is always drawn and played automatically at the start of a Campaign run. Because of that, your starter slot should hold a powerful, general-purpose effect that helps every build, like extra stamina, more health, or better economy.
After that starter, a small set of cards is drawn from your deck at the beginning of each mission. This draw is not random. You always draw cards in the order you placed them in your deck list. This means you can carefully script what kind of power spikes you get on each map.
If you know a certain act is full of tight corridors and dangerous special Ridden, you can put movement and defensive cards earlier, so you have them ready before those missions.
If you know there is a long, ammo-hungry finale, you can place damage and ammo cards in the mid and late positions so they come online when you need them most.
Forward planning is crucial. The more you learn about each act, the better you can tune your deck order around specific threats and objectives.
Joining In-Progress Runs And Extra Cards After Death
If you join a Campaign already in progress, you do not lose out on card power. You can immediately draw and play cards up to the number of missions that have already been completed in that act.
This catch-up system keeps you from being too far behind your teammates when you drop into a lobby mid-run.
If your team fails a mission and chooses to use a continue instead of fully restarting, you get a little compensation. Before trying again, you can add one extra card to your active build from your deck. This makes the next attempt slightly easier and rewards you for smart card choices after a rough run.
Adapting Your Cards To Corruption Cards
When you decide which card to play at the start of a mission, it helps to look closely at which Corruption Cards The Director has already put into play.
If you see Corruption Cards that spawn tougher standard Ridden, it can be worth picking a card that increases weak spot damage. That way, headshots and weak spot hits can still drop enemies in a single bullet even when they are buffed.
If you see cards that focus on special enemies such as Stalkers, it can make sense to pick cards that buff control tools. For example, you may choose a card that increases the number of Stun Guns you can carry so you can free yourself more easily if you get pounced or pinned.
The card system offers a lot of different paths, and each combination shifts how your cleaner feels to play. By reading Corruption Cards, planning your draw order, and tailoring each choice to the current threats, you can turn every mission into a controlled, strategic run instead of a random scramble.
And no matter what build you end up using, one basic rule always holds true in Back 4 Blood: the safest way to stop attackers is still to remove the head or destroy the brain.
Also, check our Back 4 Blood Xbox Series X Review and other guides below:
Contributor, NoobFeed
Latest Articles
No Data.