
Tales of Arise Guide | How to Beat Valclynimus
Here's a guide on how to beat Valcynimus in Tales of Arise.
Game Guide by Mash Rahman on Jun 03, 2026
Your revolutionary quest to liberate Dahna from oppression reaches its harrowing conclusion as your party finally infiltrates the deepest chambers of Rena. You walk through the sterile and mechanical maze of Gegham Helgarahi and are confronted with a deeply disturbing biological experiment. This otherworldly realm houses the boss Valclynimus, a major gatekeeper later in the game.
This huge beast is one of the last big hurdles you have to get through before the final series of battles. The physical design of this boss essentially determines how you need to manage your offensive and defensive positioning in the fight. This giant, however, is not as nimble as the swordsmen or as frantic as the winged beasts, and stays relatively rooted in place for the majority of the battle.
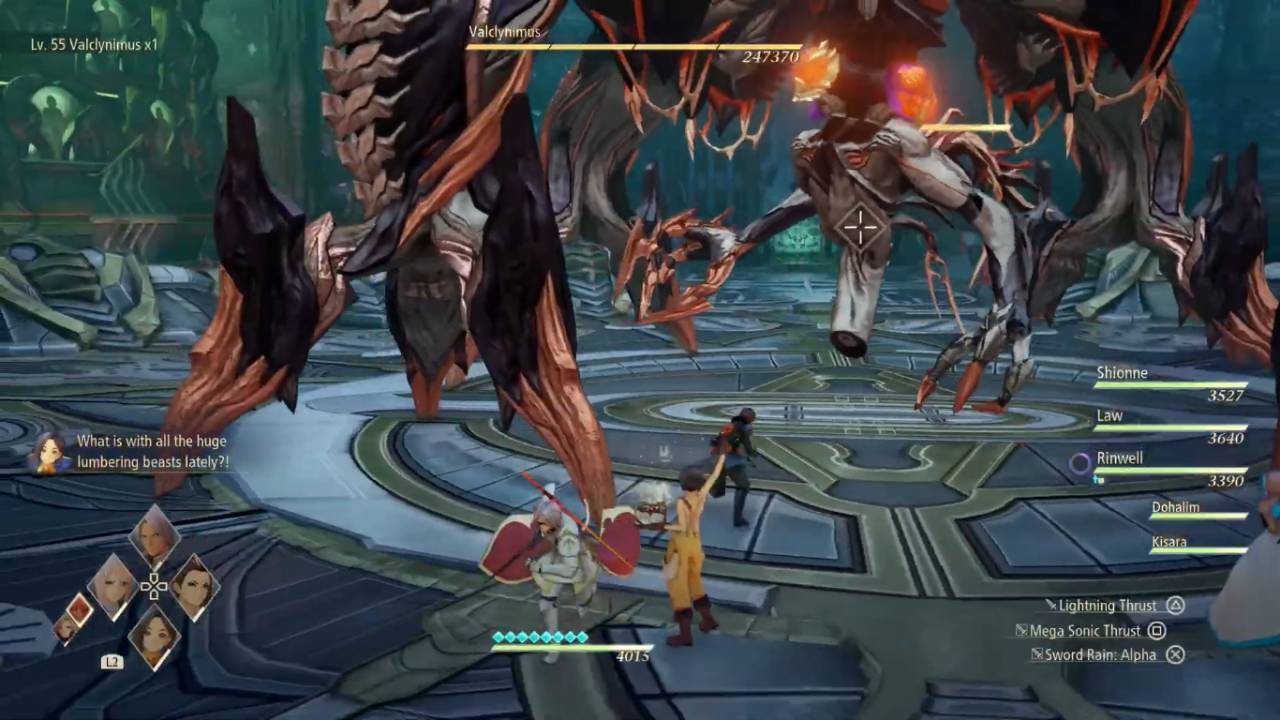
It makes up for its lack of mobility with massive sweeping attacks and an incredibly durable defense mechanism. The bosses in this game have super armor; you can't just juggle or launch Valclynimus in the air with normal combo strings. This guide covers the punishing attacks and massive health pool of the demanding combat disciplines needed to survive it.
Basic Equipment and Necessary Readiness
If you jump into this last arena without a thorough audit of your current inventory and equipment loadouts, you will get a quick defeat. You need to make sure your whole party is equipped with the best armor available from recent dungeon chests. Make sure your front-line fighters have better defensive gear to survive the boss’s sudden heavy physical sweeps.
Also, the choice of your protective accessories is of absolutely critical importance when it comes to reducing the creature’s overpowering offensive output. It is functionally required to have a fifty percent reduction in incoming elemental damage on the higher difficulties and almost all of the bosses in the game have elemental alignments. High-level protective charms will offer your active fighters a huge survival advantage against its dark elemental magic, and are forged and employed as such.
You’ll also need to spend a couple of minutes to re-stock your inventory with critical medical consumables before starting the fight. Keep a maximum allowance of high-quality gels and Life Bottles to reverse any sudden knockouts. You will need to use items to recover your common stock of Cure Points, which are required to use important healing/support artes.
Arranging the Best Party Composition
When you’re fighting a giant boss with obvious elemental weaknesses, picking the right team comp is absolutely crucial. For this specific engagement, the best active lineup is Alphen, Shionne, Rinwell, and Law. This combination allows for a perfect synergy of high-velocity melee pressure, long-range elemental spell casting, and highly robust healing capabilities.
Shionne is still an absolute must-have on your active roster for her unparalleled ability to manage the team’s overall health pool. Her high-level healing artes require Cure Points to use, but she can quickly heal multiple allies at one time from the safety of the arena perimeter. She can also use her long-range rifle attacks to chip away at the boss without being in immediate danger zones.
Alphen is the perfect anchor for your aggressive frontline assault, with Shionne covering the perimeter. His main role is to attract the attention of the giant while unleashing hard-hitting sword techniques to deal massive damage. Using his unique flaming sword abilities, he can inflict phenomenal burst damage at the cost of his own health, which Shionne must then restore.
Exploiting The Core Elemental Weakness
The key tactical route to victory in this harrowing encounter is the relentless exploitation of the creature’s primary elemental weakness. Valclynimus is extremely susceptible to light-based astral energy, making it extremely susceptible to holy spells and radiant strikes. You want to make sure you do opposite-element combos whenever possible to maximize your overall damage output against this massive entity.
Rinwell is your main source of offensive power in this fight, as she is without equal in the advanced astral light magic. This will make her actions as streamlined as possible. Immediately go to the strategy menu and turn off her non - elemental artes ( or any elemental artes that conflict ) . If you make her AI focus solely on throwing high-tier light spells, she will unleash a never-ending torrent of critical damage.
.jpg)
These spells will continuously hit the giant’s enormous hitboxes from afar, allowing her to generate huge combo points from a safe distance. Law provides the necessary high-speed physical aggression to break the enemy's stance, complementing this ranged magical attack. Give Law close-quarters techniques that use the light element, so he can do quick strings of strikes on the boss's base.
The flow of the first phase is mastered
As the battle officially begins, your first goal is to establish a strict offensive rhythm that takes advantage of the boss’s relatively low mobility. The creature rarely reorients itself, so you can even safely string out long, unbroken attacks without missing your targets. Normal attacks cost no resources and can be spammed on the ground or in the air for a basic string.
It’s very important to keep a combo string going since that is the direct way you can speed up the generation of your party’s boost gauges. Use your character-specific boost attacks to keep enemies staggered and in a poise-lost state. The only exception is saving some character assists for when the giant tries to pull off its biggest defensive sweeps.
The boss's sudden physical attacks are stationary, so be very careful. If you see the torso move or a slight glow, be ready to dodge perfectly to the side or behind the creature. Dodging at the right time is very satisfying, and there’s no cap on stamina so you can try and dodge as much as you want.
The Magical Hazards and Phase Two
Once you get that big health pool of the boss below half, the fight takes a much more dangerous turn. Valclynimus will send out a very large shockwave and will be surrounded by a chaotic aura that indicates a very high increase in aggression. In this second phase, the creature's attack patterns are much faster and cover a much larger portion of the arena floor.
It will begin to combine its physical slams with large-scale magical blasts that burst directly from the stone ground. When the boss gets to its big spell, you have to quickly switch all the non-player character strategies to a keep-away setting so they actively dodge the hazard. The key to making it through this chaotic phase of the fight is definitely prioritizing spatial awareness over just reckless damage dealing.
If you are still too greedy with your melee strings during this time frame, your characters will quickly face-plant into the incoming spells. You’ll want to take advantage of Rinwell’s unique magic-stealing boost attack to strategically neutralize these devastating spells before they form. Activating Rinwell’s assist during the boss’ casting window will instantly cancel the incantation and briefly stun the creature, opening up a huge offensive window.
Cure Point Preservation Inventory Management
Your survival in the final dungeon in the long run is determined by your absolute priority of managing the pool of Cure Points that your party has collectively. Phase two attacks from the boss deal a lot of multi-hit damage, so Shionne will have to burn through Cure Points quickly to keep everyone healthy. If this important pool is fully depleted, you have to actively supplement her healing with flat-recovery items from your inventory to prevent this from happening.
.jpg)
You’ll want to stop the action often to use high-quality Life Bottles and recovery gels, keeping your team in peak condition. This manual intervention prevents Shionne from running out of her magical energy, allowing her to complete the grueling battle. This resource does not regenerate like sitting around, so you want to watch that bar closely during the fight.
In the main configuration menu, you can also fine-tune your overall party tactics to further protect your precious resource pool. It's really useful to be able to adjust the combat behavior so your allies only have to concentrate on defense when their health gets below a certain level. Strict defensive discipline saves a huge amount of healing energy that you will desperately need later, and keeps the life of your companions intact.
Performing the Definitive Strike
Once the boss is down to the final fraction of a health bar, your goal should be to hit a final, definitive Boost Strike. The game’s Boost Strike system allows you to link combos of powerful attacks with your party members to completely take down enemies. Keep hammering away at them with light element attacks, and you will fill the blue strike indicator rapidly.
As soon as you see this prompt in bright letters on your screen, press the corresponding directional button to start the cooperative finishing maneuver. “This incredible cinematic assault ignores all remaining health and ensures an instant win without any risk of late-fight casualties.” It’s the ultimate payoff for keeping a perfect offensive multiplier through the entire long, grueling engagement.
If you finish the gorgeous animation, the massive abomination will melt away for good, and the harrowing encounter will be a success. You will have conquered one of the final major guardians protecting the absolute core of Rena by defeating Valclynimus. Ride the momentum you’ve so hard-earned, fully heal back up your party, and boldly strut into the heart of the final planetary battle.
Check out our Tales of ARISE - Beyond the Dawn Edition Review and other guides:
- Tales of Arise Guide | How to Beat Red Woman
- Tales of Arise Guide | How to Beat Tormented Limbs
- Tales of Arise Guide | How to Beat Eljarania
- Tales of Arise Guide | How to Beat Lord Vholran Igniseri
- Tales of Arise Guide | How to Beat Kalmarzel and Kaldinzel
- Tales of Arise Guide | How to Beat Lord Almeidrea and Mesmald
- Tales of Arise Guide | How to Beat Grigere
- Tales of Arise Guide | How to Beat Temararus
- Tales of Arise Guide | How to Beat Lord Balseph
- Tales of Arise Guide | How to Beat the Ice Wolf Leader
- Tales of Arise Guide | How to Beat the Ooze Hive
- Tales of Arise Guide | How to Beat Zacarania
- Tales of Arise Guide | How to Beat Menancia Guard Captain Kisara
- Tales of Arise Guide | How to Beat Lord Dohalim il Qaras
- Tales of Arise Guide | How to Beat Venoflage
- Tales of Arise Guide | How to Beat The Mysterious Swordsman
- Tales of Arise Guide | Unlock the Quaking Continent Trophy
- Tales of Arise Guide | Unlock the Billowing Cyclone Trophy
- Tales of Arise Guide | Basic Combat Mechanics
- Tales of Arise Guide | All Recipe Locations
- Tales of Arise Guide | All Fishing Spots and Fish Locations
- Tales of Arise Guide | All the Locations of the Artifacts
- Tales of Arise Guide | All Astral Flower Locations
- Tales of Arise Guide | Unlock the Big Game Hunter Trophy
- Tales of Arise Guide | Unlock the Wall Smasher Trophy
- Tales of Arise Guide | Unlock the Raging Current Trophy
- Tales of Arise Guide | Unlock the Night Blossom Trophy
- Tales of Arise Guide | Unlock the Veteran Rancher Trophy
- Tales of Arise Guide | Get the Diligent Counterattacker Trophy
- Tales of Arise Guide | Unlock Putting the Past in Its Place Trophy
- Tales of Arise Guide | Conquering the Ultimate Group Training
- Tales of Arise Guide | Ultimate Level 100 XP Farming Strategy
- Tales of Arise Guide | All Dahnan Owl Locations
- Tales of Arise Beginner's Guide | Gameplay Tips & Tricks
Editor, NoobFeed
Latest Articles
No Data.