
Tales of Arise Guide | Conquering the Ultimate Group Training
Here's a guide on training your characters in Tales of Arise
Game Guide by Mash Rahman on May 31, 2026
Throughout your journey across the various realms of Dahna, you will encounter numerous challenges that test your combat prowess, but few are as demanding as the Training Grounds located in the city of Viscint. This gladiatorial arena offers a variety of combat trials for both solo characters and your entire party, restricting your access to consumable items and forcing you to rely entirely on your raw statistics and mechanical skill. The absolute pinnacle of these challenges is the Ultimate level of the group training battles.
Taking on this specific arena fight pits your squad against two massive, incredibly powerful bosses simultaneously. Because the Training Grounds strictly forbid the use of any healing items, including CP-restoring gels and life bottles, you must approach this battle completely differently than a standard overworld boss fight.
Successfully clearing this encounter not only proves your mastery over the game's intricate combat systems but also rewards you with the prestigious Elite Vanguard achievement and a generous stack of Astral Flowers to permanently increase your communal Cure Point gauge.
Preparing Your Party for the Arena
Before you even consider speaking to the Training Grounds attendant to initiate this challenge, you must ensure your party is adequately leveled. The recommended level for the Ultimate group battle is ninety-nine, and attempting this fight any earlier will likely result in a swift and frustrating defeat. You should follow the dedicated experience farming methods involving the post-game Chronos boss fight to push your party all the way to the level one hundred cap, unlocking the Peak Strength trophy in the process.
Once your party has reached the maximum level, you should take a moment to evaluate your game difficulty settings. There is absolutely no shame in dropping the combat difficulty down to the easiest available option for this specific arena challenge. The two bosses boast bloated health pools and devastating attack patterns, and lowering the difficulty will significantly reduce their damage output without penalizing your final rewards or invalidating the achievement unlock.
Assembling the Perfect Combat Team
Because you cannot swap party members in the middle of a Training Grounds bout, selecting the correct active roster is the most important decision you will make. You should leave Law and Kisara in the reserve slots, as their close-range brawling and defensive playstyles are easily overwhelmed by the chaotic area-of-effect attacks utilized by the dual bosses. Instead, your active frontline should consist of Shionne, Dohalim, Rinwell, and Alphen.
Alphen serves as your primary physical damage dealer and is strictly needed for his specific Boost Attack, which can reliably knock the massive bosses to the floor and create vital damage windows. Rinwell is your magical artillery, providing devastating long-range elemental damage while keeping her distance from the center of the arena. More importantly, Rinwell's Boost Attack is essential for instantly interrupting any dangerous magical spells the bosses attempt to cast, completely shutting down their most lethal attacks.
The Necessity of Double Healers
The most critical component of this specific team composition is the inclusion of both Shionne and Dohalim. Because consumable items are completely disabled in the arena, your communal Cure Point gauge is the only thing keeping your party alive. Having two dedicated characters capable of casting restorative magic ensures that if one healer is momentarily stunned or caught in an enemy combo, the other can immediately step in to stabilize the team's health pools.
Dohalim is an excellent secondary healer who can also revive fallen allies, taking immense pressure off your primary support character. You must dive into the tactical strategy menus and configure highly specific commands for your computer-controlled companions before entering the arena. Instruct Dohalim and Rinwell to actively keep their distance from the enemies, and command your healers to prioritize casting First Aid and Healing Circle the moment any party member drops below seventy percent health.
Disabling Dangerous Companion Artes
In addition to tweaking their tactical priorities, you must manually disable any high-risk combat artes in your companions' menus. Alphen is notorious for utilizing his signature Flaming Edge attacks, which consume his own health bar in exchange for massive physical damage. If the artificial intelligence is allowed to use these self-destructive moves in the Training Grounds, Alphen will constantly put himself on the brink of death, forcing Shionne and Dohalim to rapidly drain your precious CP pool to constantly heal him.
You should completely disable all of Alphen's health-draining artes to ensure he relies strictly on his standard, safe combo strings. Similarly, you should toggle off Dohalim's close-range melee strikes, forcing him to rely entirely on his long-range dark magic and healing spells. Keeping your AI companions out of immediate danger is the best way to artificially extend the lifespan of your communal CP gauge.
.jpg)
Optimizing Your Accessory Loadouts
While your weapons and armor should naturally be upgraded to their absolute maximum tiers by this point in the endgame, your accessory choices require specific tailoring for the arena. Because CP management is the single largest hurdle in the Ultimate group battle, you must craft specialized Faerie Rings for both Shionne and Dohalim. A fully upgraded Faerie Ring significantly reduces the CP cost of all magical artes, allowing your healers to cast their restorative spells much more frequently before the communal gauge runs dry.
For Rinwell, equipping a Mystic Crest will drastically reduce her casting times, allowing her to unleash her highest-tier elemental spells at a rapid, uninterrupted pace. Alphen should be equipped with a Warrior Emblem or a similar accessory that massively boosts his raw physical attack power and counterattack damage. By assigning specific roles and crafting the appropriate accessories to enhance those roles, your party will function as a highly efficient, self-sustaining combat unit.
Taking Direct Control of Shionne
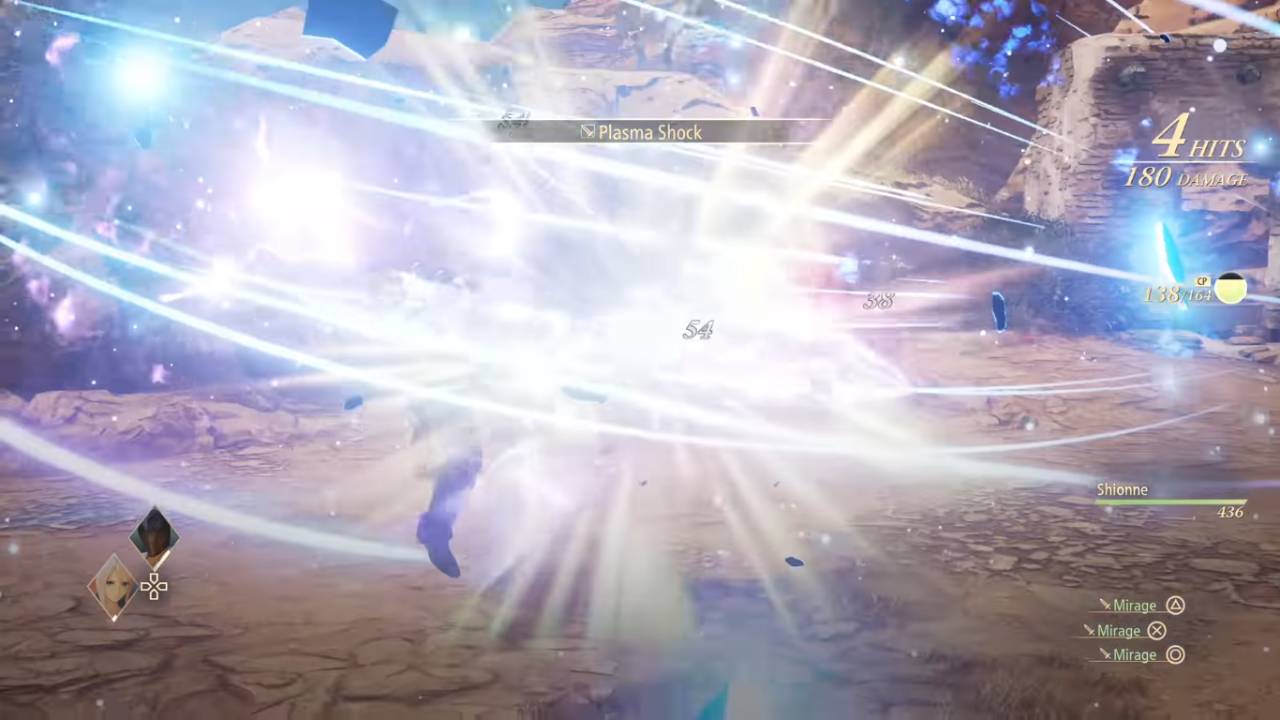
While you might be accustomed to playing as Alphen during the main campaign, the optimal strategy for conquering the Ultimate group battle involves taking direct, manual control of Shionne. Shionne possesses an incredibly safe, long-range playstyle utilizing her rifle, allowing you to deal consistent damage from the absolute furthest edges of the arena. This extreme distance gives you a massive tactical advantage, providing a clear, unobstructed view of the entire battlefield and the bosses' incoming attack animations.
By playing as Shionne, you take the heavy burden of CP management entirely into your own hands. You can manually dictate exactly when to cast Healing Circle or Resurrection, rather than relying on the occasionally spotty artificial intelligence. Whenever the bosses turn their attention toward your AI companions, you can safely rain down astral artes and piercing rifle shots from afar, completely avoiding the chaotic melee clashes occurring in the center of the ring.
Capitalizing on KO Prevention Skills
Even with maximum defensive statistics and an optimal team composition, the two bosses in the Ultimate arena hit incredibly hard and will inevitably overwhelm your AI companions. To prevent your CP gauge from being entirely consumed by expensive Resurrection spells, you must ensure every member of your party has unlocked the KO Prevention passive skills hidden within their Title panels. These specific skills give your characters a high percentage chance to miraculously survive a lethal blow with exactly one hit point remaining.
When an AI companion triggers this survival mechanic, they will momentarily stagger but remain on the battlefield. Because they are still technically alive, you can quickly manually cast a cheap First Aid spell on them rather than a massively expensive revival arte. This simple mechanical interaction will save you hundreds of Cure Points over the course of the lengthy battle, allowing your team to weather the bosses' most devastating area-of-effect barrages without completely draining your resources.
Navigating the Dual Boss Encounter
The moment the arena battle begins, the two massive bosses will immediately attempt to corner your party. Your primary objective is to maintain constant movement, circling the extreme perimeter of the arena while keeping both targets in your line of sight. Never let yourself get backed into a corner, and always be prepared to use Shionne's highly responsive dodge roll the moment a boss suddenly shifts its aggro toward you.
You must actively manage your party's Boost Attacks to control the tempo of the fight. Whenever one of the bosses begins to charge a lethal attack or completely drops its guard, immediately trigger Alphen's Boost Attack to violently knock the creature to the ground. While the boss is temporarily stunned, command Rinwell to unleash her most powerful area-of-effect spells to capitalize on the damage window. Rinse and repeat this cautious, methodical kiting strategy, slowly whittling down the bosses' massive health pools while prioritizing your healers' safety.
Surviving the Inevitable CP Drought
Despite your absolute best efforts and careful accessory planning, the sheer length and intensity of the Ultimate group battle practically guarantee that you will eventually completely run out of Cure Points. When the communal gauge finally hits zero, your AI companions will lose their ability to heal and will quickly fall to the bosses' relentless assaults. You must not panic when this happens; the battle is absolutely not over.
Once your teammates are down, the encounter transforms into a tense, solo kiting exercise. Because you are playing as Shionne, you are perfectly equipped to handle this exact scenario. You must completely abandon any thoughts of reviving your team and focus entirely on your own survival. Maintain maximum distance, constantly dodge backward, and fire quick, safe rifle shots during the brief windows between the bosses' attack animations.
.jpg)
Claiming the Ultimate Victory
Soloing the remainder of the fight requires immense patience and strict mechanical discipline. The bosses are designed to punish aggressive, close-range behavior, but they severely struggle to hit a highly mobile, ranged target that refuses to engage in melee combat. Take your time, continuously circle the arena, and slowly chip away at their remaining health bars using Shionne's safest long-range artes.
With sustained focus and careful evasion, the two towering bosses will eventually collapse under the weight of your relentless ranged assault. Upon completing this grueling challenge, the arena attendant will congratulate you on your incredible display of tactical mastery. You will be handsomely rewarded with the Elite Vanguard achievement, cementing your status as a true master of the game's complex combat systems, and a massive bundle of Astral Flowers to permanently empower your party for any remaining post-game adventures.
Check out our Tales of ARISE - Beyond the Dawn Edition Review and other guides:
- Tales of Arise Guide | Unlock the Billowing Cyclone Trophy
- Tales of Arise Guide | Basic Combat Mechanics
- Tales of Arise Guide | All Recipe Locations
- Tales of Arise Guide | All Fishing Spots and Fish Locations
- Tales of Arise Guide | All the Locations of the Artifacts
- Tales of Arise Guide | All Astral Flower Locations
- Tales of Arise Guide | Unlock the Big Game Hunter Trophy
- Tales of Arise Guide | Unlock the Wall Smasher Trophy
- Tales of Arise Guide | Unlock the Raging Current Trophy
- Tales of Arise Guide | Unlock the Night Blossom Trophy
- Tales of Arise Guide | Unlock the Veteran Rancher Trophy
- Tales of Arise Guide | Get the Diligent Counterattacker Trophy
- Tales of Arise Guide | Unlock Putting the Past in Its Place Trophy
- Tales of Arise Guide | Ultimate Level 100 XP Farming Strategy
- Tales of Arise Guide | All Dahnan Owl Locations
- Tales of Arise Beginner's Guide | Gameplay Tips & Tricks
Editor, NoobFeed
Latest Articles
No Data.