
Diablo IV: Lord of Hatred Guide | How to Beat Tormented Andariel
Here's a guide on how to beat Andariel in Diablo IV Lord of Hatred
Game Guide by Mash Rahman on May 26, 2026
Conquering the Maiden of Anguish in her Tormented Echo form requires a deeply calculated approach to combat execution and positional awareness. The Tormented Andariel encounter sits at the absolute pinnacle of Diablo 4's endgame difficulty, demanding exceptional reflexes and focused single-target damage.
Unlike her standard campaign counterpart, this version of the boss is designed to systematically punish players who rely on blindly absorbing damage.
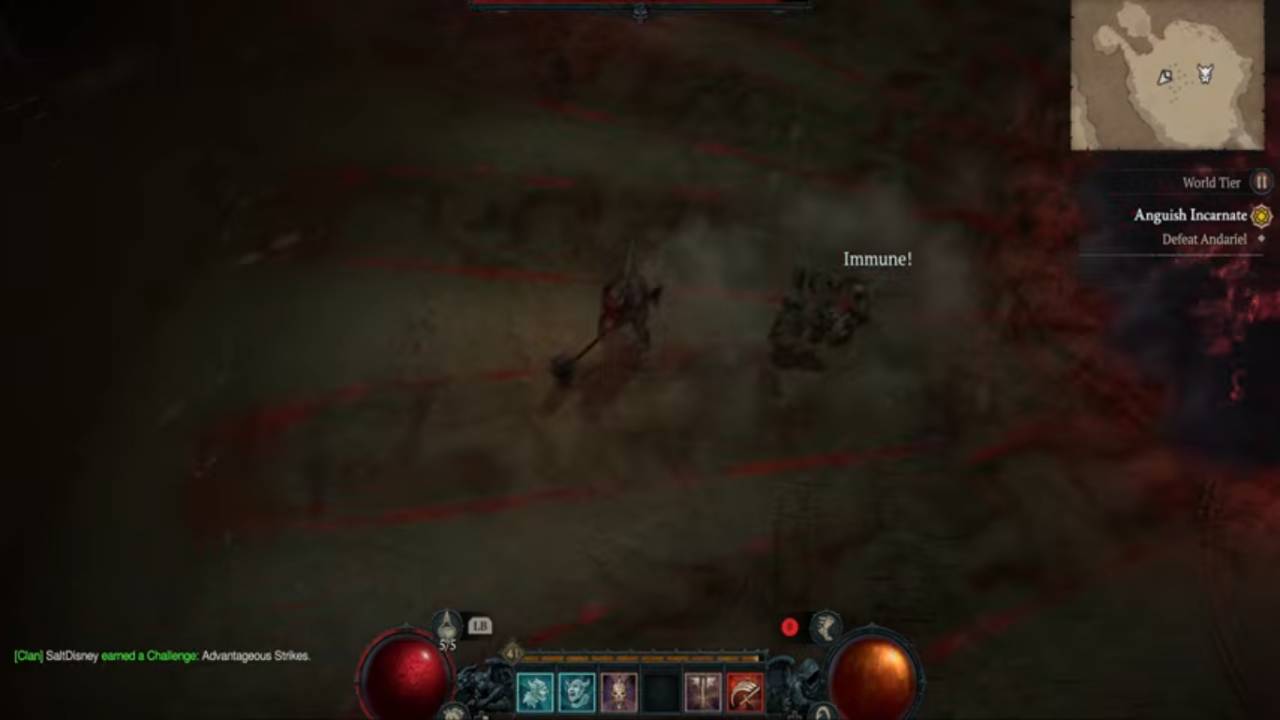
The core mechanic that dictates the entire flow of the Echo of Andariel fight is the Tormented debuff system. Every time you are struck by one of her major elemental attacks, your character receives a stacking vulnerability debuff that drastically increases all incoming damage. This means that even the most incredibly armored characters will eventually succumb to a single blow if they fail to dodge her mechanics correctly.
Therefore, your overarching philosophy for defeating her must revolve around maintaining a highly mobile, strike-and-fade playstyle. You cannot treat this as a stationary tank-and-spank encounter.
Instead, you must generate explosive single-target burst damage during her brief vulnerability windows while maintaining the movement speed necessary to physically outrun her devastating arena-wide area-of-effect spells. It is a terrifying dance of poison, fire, and precision that rewards those willing to master the choreography.
Preparing Your Character and Loadout
Before setting foot into the Hanged Man's Hall to summon her, you must deliberately optimize your character specifically to counter her elemental arsenal. Because her mechanics bypass standard defensive mitigation through her stacking debuffs, sheer armor values will not be enough to keep you alive. You must ensure that all of your elemental resistances, particularly poison and fire, are strictly capped at their maximum values.
Your gear must also heavily prioritize movement speed and mobility enhancements. Your boots and amulet are arguably the most critical defensive tools you possess for this battle, as both must carry the highest possible movement speed affixes.
Without a resting movement speed high enough to comfortably strafe her rotating beams, surviving the later intermission phases becomes virtually impossible. Utilizing elixirs that boost your maximum health or elemental resistances can also provide a vital buffer against accidental missteps.
Furthermore, your build must be retooled to focus entirely on concentrated single-target damage rather than area-of-effect clearing capabilities. Skills that allow you to rapidly close the gap, dump your primary resource for massive burst damage, and then immediately reposition are incredibly valuable. Every tempering roll, masterwork upgrade, and Paragon board selection should serve the singular purpose of making you hit harder and move faster.
Navigating Poison Novas and Ground Runes
The initial phase of the Tormented Andariel encounter acts as a brutal test of your situational awareness and reaction time. As the fight begins, Andariel will frequently unleash her signature Poison Nova, a devastating move where she scatters blobs of poison in a massive semicircle. To survive this, you must recognize her wind-up animation and back away, as standing in the gaps between the spread-out projectiles is far easier than trying to dodge them at point-blank range where the spread is incredibly tight.
Simultaneously, you must carefully manage the ground underneath your feet. Andariel will consistently conjure large, expanding runic circles that explode after a short delay, dealing heavy damage and knocking you back. These circles immediately spawn secondary rings that detonate outward in a chain reaction. Standing just outside the initial circle's range is the safest way to avoid the entire sequence.
You must never let the knockback from a spell push you into another hazard. Combos are what make her truly lethal. A single misstep on a ground rune can easily knock you directly into a slow-moving red lightning ball, immediately applying multiple stacks of her fatal debuff. Maintaining a cool head and prioritizing safe positioning over an extra hit of damage is the only way to successfully push her into the next phase.
.jpg)
Managing the Effigies of Anguish
Once you deplete her health pool to specific percentage thresholds, Andariel will disappear entirely from the arena and initiate her dreaded intermission phases. During these forced transitions, she summons three Effigies of Anguish that must be destroyed to force her back into the fight. However, these statues are protected by invulnerability shields, meaning you must physically stand inside their small protective bubbles to deal damage to them.
While you are scrambling to move between these statues and destroy them, the arena becomes a chaotic nightmare of environmental hazards. A massive, rotating blood beam will sweep across the center of the room, forcing you to move counter-clockwise to stay ahead of it. Simultaneously, a dust storm will enclose the outer edges of the arena, heavily restricting your playable space and punishing you for moving too far away from the center.
Your priority during these intermissions is absolute efficiency. You must utilize your mobility skills to instantly snap into a statue's bubble, unleash your heaviest burst damage to shatter it, and immediately move to the next before the rotating blood beam catches up to you. Lingering too long on a single statue or mistiming your rotation will result in catastrophic damage and likely end the encounter.
Surviving the Final Phase Flame Skulls
When Andariel is pushed below 40% health, the fight becomes an ultimate test of endurance and spatial awareness. The mechanics from the previous phases persist, but she introduces a terrifying new element: two floating fire skulls situated at opposite edges of the room. These skulls cast a highly lethal, rotating flame beam across the entire platform, serving as a constant, sweeping hazard.
This final phase demands absolute mechanical perfection. You must continuously output damage to Andariel while simultaneously tracking the position of the rotating fire beam, dodging the lingering red lightning sparks, and avoiding her direct poison attacks. The safe zones in the arena become incredibly tight, requiring you to make micro-adjustments to your positioning rather than large, sweeping movements.
Green phantoms will periodically spawn to run rampage towards your character, exploding in melee range and dealing massive knockback to add to the chaos. Spatial awareness is extremely important; you require enough space to try and lure them to blow up away from the main dangers.
The idea is to get very relaxed, but focus on rotating around the fire beam while draining the last of her health bar during her slight recovery animation.
The final push to secure the spoils and execute.
There's a great deal of patience, mechanical skill, and repetition required to defeat the Tormented Echo of Andariel. It's an encounter that punishes greed and rigorously rewards disciplined execution, if you'll pardon the expression.
You will then enter his domain, apply your defensive buffs, and quickly start the rhythmic dance of striking and fading, carefully navigating the poison projectiles and ground runes.
.jpg)
As it continues and shifts through her multiple intermission phases, your mindset needs to be 100% survival & calculated movement. You will perform flawless counter-clockwise rolls just in front of the blood beams to obliterate the Effigies of Anguish, and with your blinding speed of movement, you will kite the explosive phantoms.
When her final strand of health is used, the army of mechanics will stop attacking her once and for all. Mastering this kill is a real test of one of Sanctuary's toughest challenges. You will be rewarded with a tremendous payout for your outstanding work and access to sought-after Resplendent Sparks, as well as the ability to unlock the most powerful Mythic Unique items in the game.
Also, check out our Diablo IV Review, Diablo 4: Vessel of Hatred DLC Review, and other guides below:
- Diablo IV: Lord of Hatred Guide | How to Beat Tormented Duriel
- Diablo IV: Lord of Hatred Guide | How to Beat Tormented Beast in the Ice
- Diablo IV: Lord of Hatred Guide | How to Beat Tormented Lord Zir
- Diablo IV: Lord of Hatred Guide | How to Beat Tormented Grigoire
- Diablo IV: Lord of Hatred Guide | How to Beat Tormented Varshan
- Diablo IV: Lord of Hatred Guide | Forging an Unstoppable Champion
- Diablo IV: Lord of Hatred Guide | Paladin Build: Mastering the Zealous Shredder
- Diablo IV: Lord of Hatred Guide | Paladin Build Mastering the Falling Star Arbiter
- Diablo IV: Lord of Hatred Guide | Paladin Build: Mastering the Holy Purifier
- Diablo IV: Lord of Hatred Guide | Warlock Build Mastering the Umbral Chains Weaver
- Diablo IV: Lord of Hatred Guide | The Ultimate Endgame Build
- Diablo IV: Lord of Hatred Guide | Essential Tips and Tricks for Traversing Sanctuary
- Diablo 4 Guide | Warlock Build Mastering the Blood Pact Invoker
- Diablo 4 Guide | Mastering the Pinnacle Challenges of Sanctuary
- Diablo IV: Lord of Hatred Warlock Build Guide | Mastering the Shadow Summoner
- Diablo IV: Lord of Hatred Guide | How to Choose Your Ideal Class
- Diablo IV: Lord of Hatred Guide | Warlock Build Mastering the Brimstone Apocalypse
- Diablo IV: Lord of Hatred Guide | Mastering the Frost Juggernaut
Contributor, NoobFeed
Latest Articles
No Data.