
Diablo IV: Lord of Hatred Guide | How to Beat Tormented Varshan
Here's a guide on how to beat Tormented Varshan in Diablo IV: Lord of Hatred
Game Guide by Mash Rahman on May 26, 2026
Being able to defeat the Echo of Varshan in their ultimate Tormented form demands both a sharp sense of momentum and a high level of mechanical control. Out of the many endgame boss encounters offered throughout Sanctuary, Varshan is the trickiest.
On the surface, his arena setup and animation suggest a very predictable, straightforward duel.
The Reality of the Echo of Varshan
.jpg)
On a heavily geared character, the battle can certainly be a game of chasing and dodging little targets and waiting for the floor indicator to come slowly, before resuming your normal push-pull routine against the bigger, faster enemies. Yet this may seem simple, but it is actually a deliberate ploy to catch players who are unready or in an over-ambitious mood, completely unaware.
The real challenge of the Tormented Varshan fight is that it is an extremely violent punishment for not being single-target efficient in battle. As with all pinnacle bosses, he also uses the Tormented debuff system, in which players are permanently weakened by getting hit by his main telegraphed attacks.
But Varshan adds an oppressively new twist that can make a fight go completely out of hand. A single mechanical cycle away from the required amount of damage and there's an exponential failure loop.
As soon as you are outpaced by his intake of outside power, his defenses increase significantly, his main resources are depleted, and your windows of opportunity to safely perform your skills are gone. You must keep him under mechanical control at all times, or he will trigger this chain of events.
Creating Your Character and Loadout
Before getting to the Malignant Burrow right next to the Tree of Whispers, you need to optimize your gear and some of your defensive values. Due to the unique mechanics of Varshan, the high health pool will allow him to easily defeat enemies by applying Vulnerability debuffs to them multiple times, resulting in their total defeat.
The first thing you should consider when looking at your defensive sheet is limiting your shadow resistance. Varshan's projectiles, ground waves, and environmental bursts inflict significant corruptive shadow damage. If you are going to endure the ambient damage in the arena, having a capped shadow resistance of exactly seventy percent is a must.
The power of a shadow-resistant elixir can offer a much-needed level of protection, and you can absorb a few accidental hits and not have to reset the shot. Besides strengthening your elemental defenses, your build configuration will need to strike a good balance between burst damage in a single target and AoE damage output.
Active skills or passive triggers are required to obtain the Unstoppable status effect. If you're hit by crowd control in this fight, you will perish, as you won't be able to reposition yourself during his area-wide explosions.
Your gear affixes should focus on increasing the speed of your boots and amulet, so you can easily outrun his tracking attacks. The goal of setting up your Paragon board and legendary aspects is to get the most raw damage against crowd-controlled or weak targets with the bare power you have.
Putrid Tendrils and Frontal Cleaves are difficult to navigate.
Your 1st moments of the fight will put your patience and positioning skills to the test. As Varshan emerges from the corrupted altar, he will strive to quickly establish true melee dominance, punching outwards with his enormous tentacles, which are actually intestines.
His base attack is a sequence of wide, sweeping slashes that overcome the floor to disburse an arc of foul "shadow projectiles". A well-equipped character can take the first shot from these projectiles, but the danger comes from the debuff that lets his second shot through.
The only way to completely counter this frontal attack is to train yourself to rotate in a tight circle around his character model laterally and use your evade to move directly to his flank/back when he is setting up a punch. If you try to put the distance between you and the boss, Varshan will immediately counter and fire a tracking tentacle at you at high speeds.
He will utilize this appendage to violently yank his whole body to his own position, slamming into you and devastatingly swiping you with his physical appendage on arrival. You need to have a disciplined mid- or close-range positioning strategy to stay out of the hands of this aggressive gap-closer.
Keeping it pretty close to his character model, you don't get him to do the erratic teleports that throw him off, and his movement is still predictable and allows you to have the most damage-dealing abilities active for as long as possible without losing any of his movement cooldowns to erratic, disorientating moves.
.jpg)
Surviving the Putrid Dance Floor Patterns
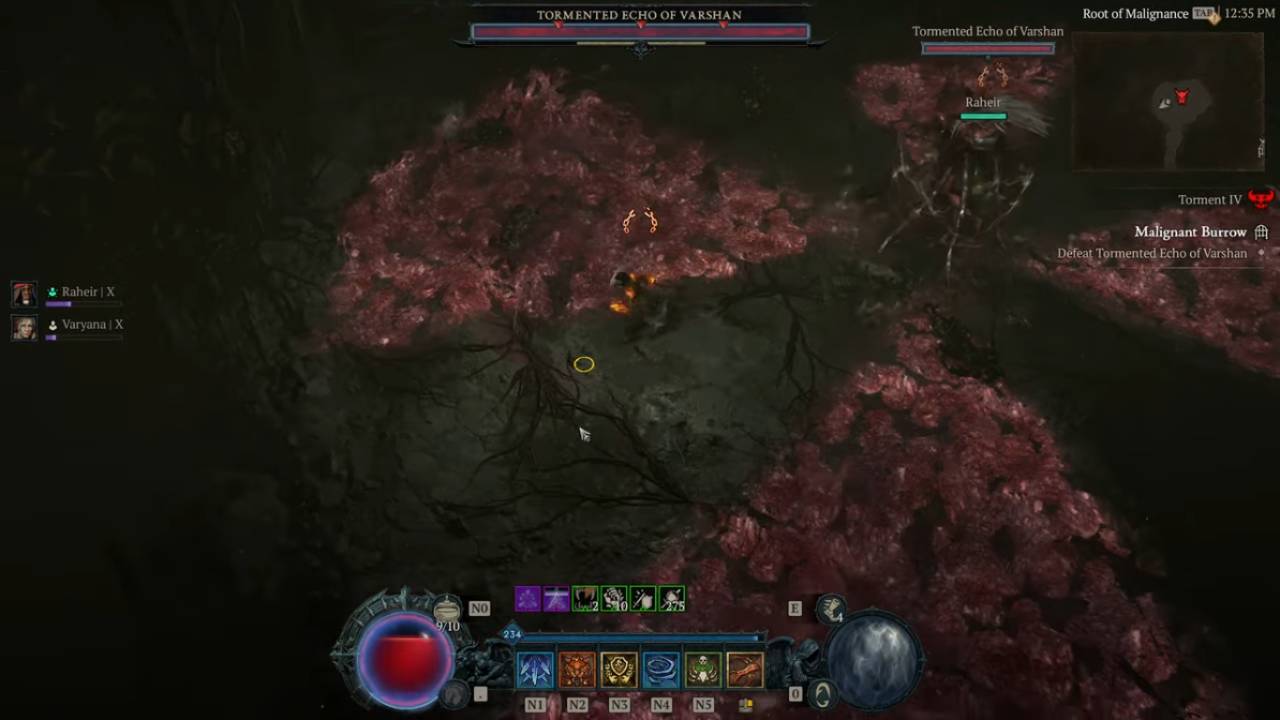
After the opening arm-wrestling match, the bout will get more of the Putrid Dance, a nickname for the more visually garbled mechanic that Varshan will switch to frequently. The boss will temporarily fix himself in the middle of the room and pour out all corruption straight to the ground, thus setting fire to vast areas of the arena floor with a peculiar, unhealthy pink-red hue.
These "marked" grids represent a highly dynamic warning system that shows where on the grid violent shadow explosions will detonate after a short 2-second delay. The boss uses a number of different setups for this attack, sometimes rotating a pinwheel, sometimes a series of alternating concentric circles, or spreading the room into huge triangles.
Surviving this brutal match-up depends on your ability to remain calm and not dash around the arena in panic mode. The safe zone limits are very close together, and the evade charge will be burned if you aren't careful, which is likely to get you smacked right into the next detonation's safe zone.
Instead, one has to closely watch the pattern of illumination across the floor's quadrants and make very small, micro-adjustments to step onto the lit step. When you feel like you are about to be hit on a tile and can't get away, that's when you use your Unstoppable defensive cooldowns to absorb the mechanical error without incurring a big knockback and launching yourself into the next explosion.
Confronting Malignant Minions and the Failure Loop
The key stage of the Tormented Varshan fight is when the boss is momentarily invulnerable and spawns three wicked, powerful minions at the corners of the room. As soon as these appear, Varshan will enter them through separate channels of light and absorb their individual elemental energy.
It's at this moment that experienced gamers will see the moment where either the fight will be done right or it will become an unwinnable cycle. When you don't have enough single-target damage, or when you aren't sure of what minion he's draining first, you'll face the consequences right away, and they will be catastrophic.
If Varshan successfully completes a channel, he will receive permanent, devastating empowerments until the end of the encounter. When he takes out resources from a Wrathful minion, his normal projectile attacks will deal an extreme Daze effect, which will prevent you from using any skills or even doing basic attacks.
When a Devious minion is drained, his attacks will immediately deplete your main resource bar, so you can no longer retaliate. In addition, each victory of his siphon gives him a huge new secondary health barrier that blocks all damage.
This leaves you with a highly dangerous situation where you are unable to break his shield, so you can't replenish your health potions, and he keeps conjuring up more minion waves that he can use to make himself stronger. However, in order to avoid this failure mode, one must immediately turn their focus towards the active channels and use their maximum burst cooldowns to destroy the minion that is being targeted before the siphon bar is full.
The final execution and the securing of the spoils.
The final stretch of Varshan's health bar is a real test of endurance and execution. As he gets closer to the end of his life, he will start to summon his minions and create his floor explosions at ever greater frequency, with almost no room left in the arena.
You have to be able to run his stagger bar efficiently for the end of this mad dash to be a success. Repeatedly dealing damage and applying crowd control will keep the boss staggered for extended periods.
This blue-bar stun will completely interrupt the current channeling spells he has, destroy any shield that may be in place that is draining resources, and give you a massive window to be safe and unleash your ultimate without having to worry about retaliation. When the final blow is struck, the Malignant Burrow will crumble, and the oppressive shadow energy will be eradicated from the burrow.
The Tormented Echo of Varshan is a huge challenge, and will give you tons of endgame loot such as Legendary gear up to level 95, as well as special crafting materials. Most importantly, if you beat him, you'll get Mucus-Slick Eggs, which are necessary to summon the Echo of Duriel and potentially earn the rarest items in the game.
Respect his mechanics, neutralize his minion siphons to great lengths, and maintain flawless positioning, and you'll always convert what could've been a failure loop into a clean, decisive win.
Also, check out our Diablo IV Review, Diablo 4: Vessel of Hatred DLC Review, and other guides below:
- Diablo IV: Lord of Hatred Guide | Forging an Unstoppable Champion
- Diablo IV: Lord of Hatred Guide | Paladin Build: Mastering the Zealous Shredder
- Diablo IV: Lord of Hatred Guide | Paladin Build Mastering the Falling Star Arbiter
- Diablo IV: Lord of Hatred Guide | Paladin Build: Mastering the Holy Purifier
- Diablo IV: Lord of Hatred Guide | Warlock Build Mastering the Umbral Chains Weaver
- Diablo IV: Lord of Hatred Guide | The Ultimate Endgame Build
- Diablo IV: Lord of Hatred Guide | Essential Tips and Tricks for Traversing Sanctuary
- Diablo 4 Guide | Warlock Build Mastering the Blood Pact Invoker
- Diablo 4 Guide | Mastering the Pinnacle Challenges of Sanctuary
- Diablo IV: Lord of Hatred Warlock Build Guide | Mastering the Shadow Summoner
- Diablo IV: Lord of Hatred Guide | How to Choose Your Ideal Class
- Diablo IV: Lord of Hatred Guide | Warlock Build Mastering the Brimstone Apocalypse
- Diablo IV: Lord of Hatred Guide | Mastering the Frost Juggernaut
Contributor, NoobFeed
Latest Articles
No Data.