
Final Fantasy Resonance Guide | Best Early Build to Make Expert Easier
Here’s a guide on how to create the best early party build for Expert difficulty in Final Fantasy Resonance.
Game Guide by Jubair Baky on Nov 13, 2026
The best early build for Expert difficulty in Final Fantasy Resonance does not require six fully mastered Visions on every character. By Chapter 3, Rain can protect the party, Lasswell can deal physical damage, Nichol can provide formations, and Fina can heal or pass extra actions.
Understand Mastery Rank, Awakening, and AP
Character levels unlock native commands. Mastery Rank (MR) tracks skills learned from a Vision by each hero. Awakening Stars use Magicite separately, so MR9 does not unlock every awakening skill.
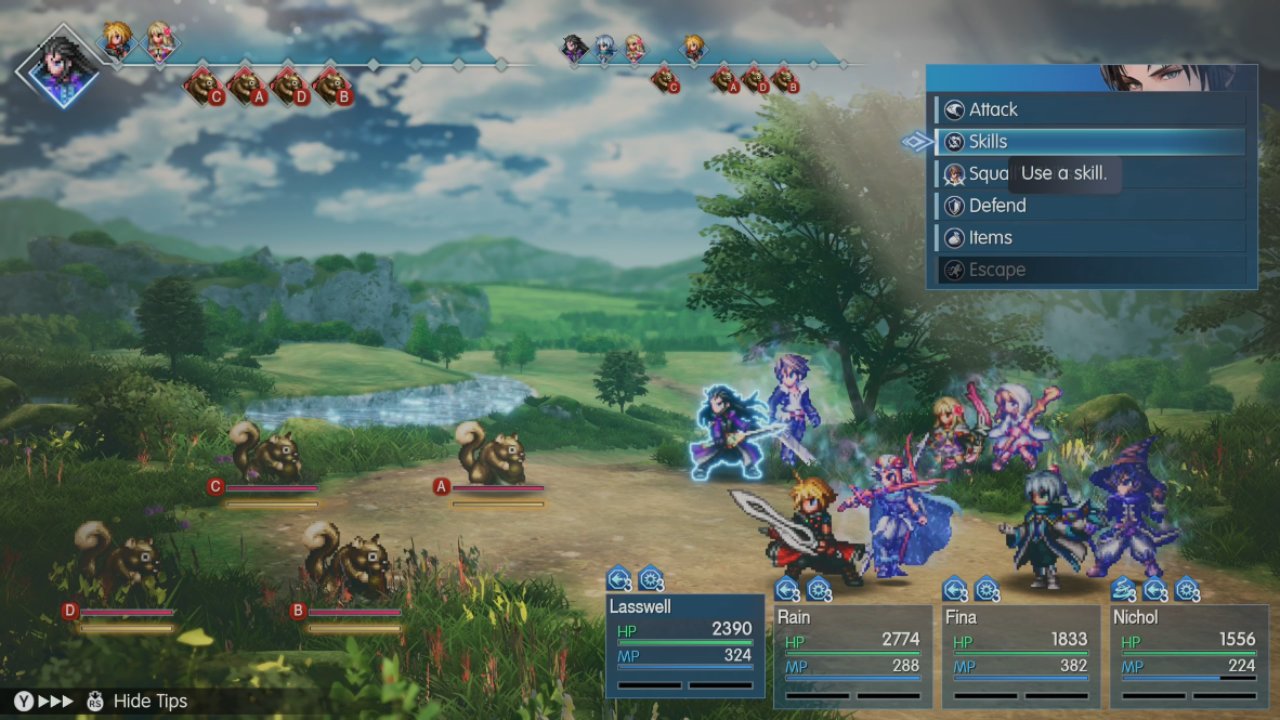
When a Vision is equipped, its learned Mastery Rank abilities are available without occupying borrowed ability AP. To use those skills with another Vision equipped, the individual character must first master them and then pay the listed AP cost. Learning Arms Akimbo on Rain does not give it to Lasswell, Nichol, or Fina. Check the character's own rank in Equipment & Abilities.
Start with Firion on Rain, Squall on Lasswell, Tidus on Nichol, and Leah on Fina. This keeps the starting AP budget affordable and leaves room for defense.
Equip Rain for Protection and Stagger
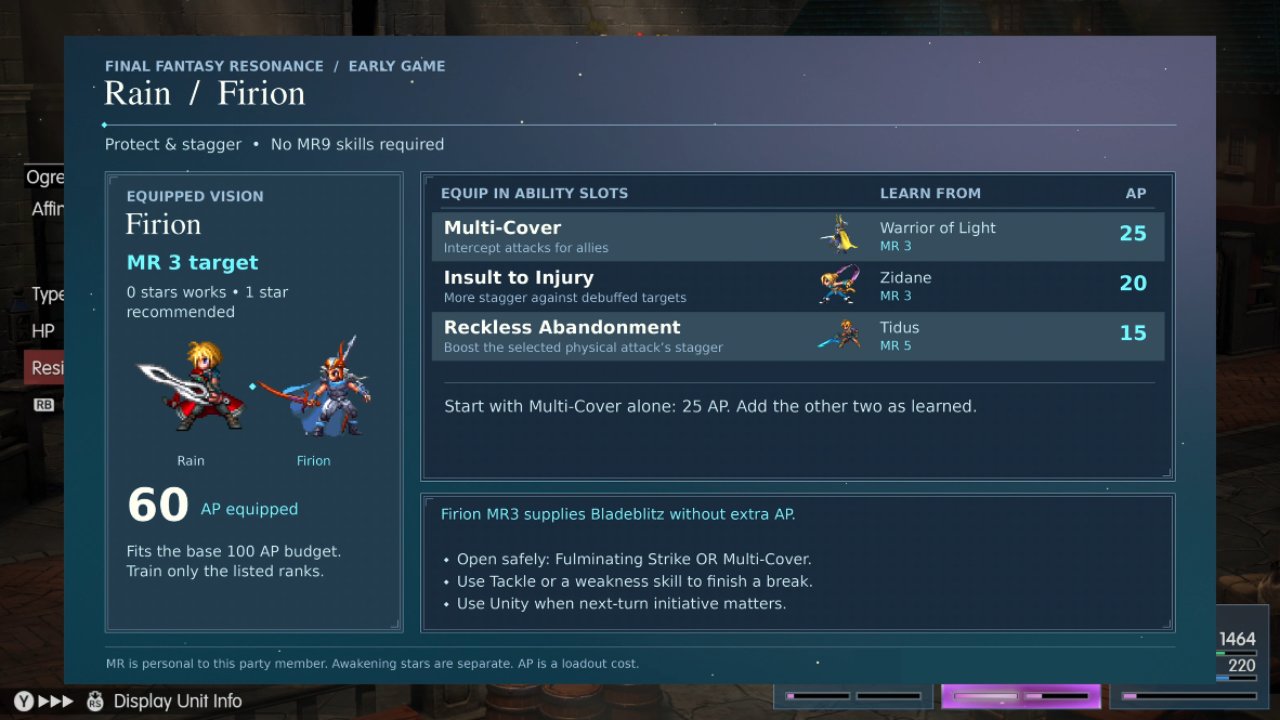
Give Rain Firion and take it to MR3 for Bladeblitz. Borrow Multi-Cover from Warrior of Light at MR3 for 25 AP. Later, add Insult to Injury from Zidane MR3 and Reckless Abandonment from Tidus MR5. Together, those three borrowed abilities cost 60 AP. Rain protects allies and helps finish stagger gauges.
Firion's Fulminating Strike raises Rain's stagger power for the following attacks. Follow with Tackle, Bladeblitz, or an elemental attack that exploits the target's weakness. Reckless Abandonment doubles stagger power, not HP damage. Insult to Injury needs an enemy debuff or ailment.
Multi-Cover is not an automatic choice. It makes Rain absorb attacks meant for allies, which can knock him out if he is low on HP. Use defensive support and healing before asking him to cover. Early on, Rain must choose between protecting and attacking.
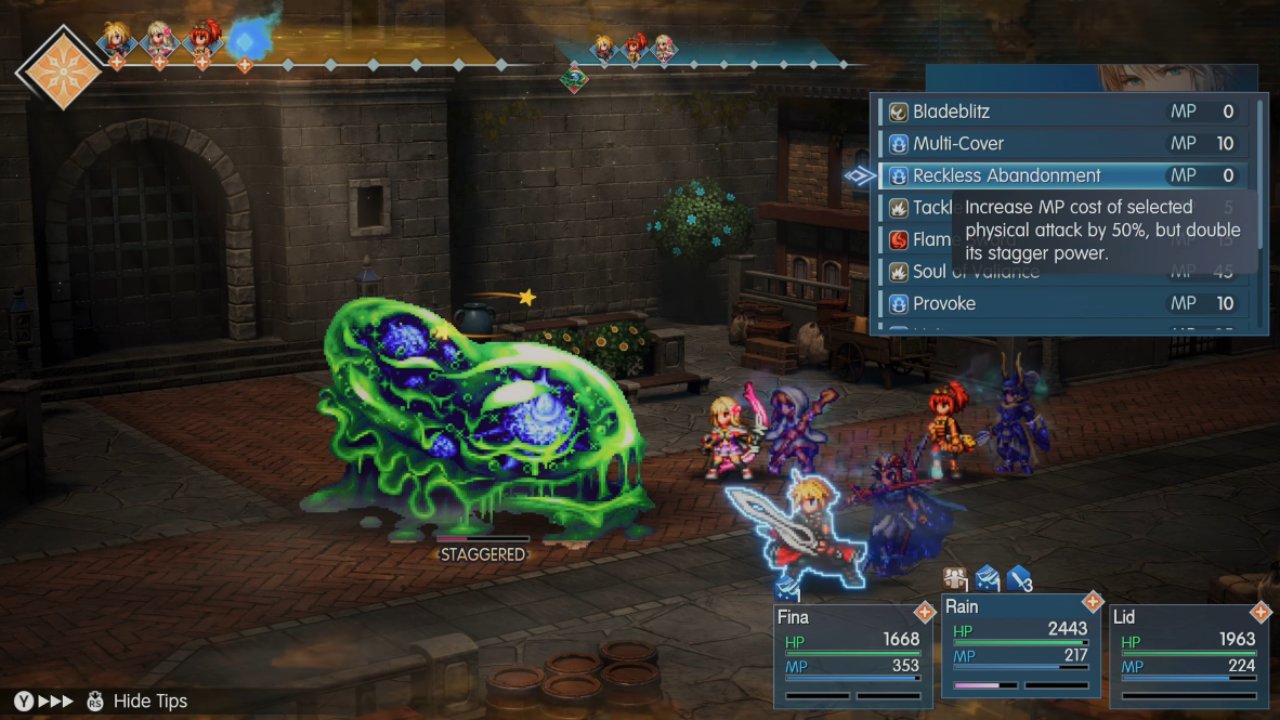
Set Up Lasswell for Affordable Attacks
Keep Squall on Lasswell. Improvement arrives at MR1, while Trigger at MR5 strengthens the standard attacks and battle skills used in this setup. Bring over Bladeblitz from Firion MR3 for 25 AP. This gives Lasswell an all-enemy battle skill with no MP cost. Mug from Zidane MR5 is a similarly economical single-target option, costing 20 AP to equip but no MP to use.
Once learned, add Reckless Abandonment for 15 AP and Insult to Injury for 20 AP. The complete early borrowed loadout totals 80 AP, but Bladeblitz by itself makes the idea useful. Mug remains useful when MP runs low.
One Awakening Star on Squall unlocks Deprotect. Apply it against a stronger enemy to lower physical defense and provide a debuff for Insult to Injury. Do not keep wasting actions if the target resists it. When the stagger preview shows that Mug will not finish the break, try Tranquility or an appropriate elemental attack instead. Choose the move that finishes the break.
Give Nichol Early-Turn Support
Equip Tidus on Nichol and reach MR3 for First Strike. This lets him act at the opening of battle, not automatically before everyone every round. Two Awakening Stars add Haste Opener later. You can also borrow Observe and Recover HP from Onion Knight MR5 and Reflex from Noctis MR3 for a combined 40 AP, although neither passive is required to start supporting the team.
Use Formation: Assault to increase party stagger power, Formation: Bulwark to help the group survive, and Stratagem to target an enemy with a difficult stagger gauge. Dispel removes troublesome enemy buffs. At Nichol's character level 19, Tactic: Fluid Warfare becomes available. Activate it on a safe turn, then use a formation on a later action to gain one follow-up action. It triggers once per turn.
Keep Fina Ready to Heal or Pass Her Action
Equip Leah on Fina and aim for MR5 to learn Pass the Torch. One Awakening Star unlocks Cura, Esuna, and Shellga; two stars later provide Curaga and Raise. Observe and Recover HP plus Reflex are optional early passives and cost 40 AP together. Prioritize healing, especially when Rain is covering.
When everyone is healthy, Pass the Torch gives another character an action to finish a stagger or make another attack. It consumes MP. Regular Fina also has Light Veil to protect against one incoming debuff or status ailment. Leah's Healing Wind Resonance heals above maximum HP and adds Regen.
Follow the Early Expert Battle Rotation
Begin a difficult fight with Nichol using Formation: Assail for stagger or Formation: Bulwark for defense. Rain decides whether to use Fulminating Strike or Multi-Cover. Lasswell attacks or applies Deprotect if the fight is likely to last. Fina handles healing, Light Veil, or a useful support action. Skip setup against weak enemies.
Next, check the stagger previews. Nichol can apply Stratagem, Rain can follow with Tackle or an enemy weakness, and Lasswell can use Bladeblitz or Mug. If Fina doesn't need to heal, Pass the Torch can help another character empty the final part of a gauge. Against several enemies, try to stagger all of them in one turn. A Sweeping Stagger provides bonus actions and a chance to use a Resonance.
After staggering, prioritize damage or recovery. Check elements, too. Firion's Light attacks can affect Rain's non-elemental physical attacks, so avoid a Light imbue against enemies that absorb Light. Expert reduces your damage and strengthens enemies. For Chapter 3, roughly levels 20–23 at the start and 25–28 near later bosses are useful targets rather than strict requirements.
Upgrade Each Character Without Grinding Everything
The next big breakthrough is extra actions. Firion MR9 teaches Arms Akimbo, which lets a character act twice in one turn. It costs 60 AP when borrowed, but Rain pays no borrowed AP for it while using Firion. Take Warrior of Light to MR9 for Grit, and Tronn to MR9 for Half MP Cost when MP becomes an issue. Rain's later core uses Multi-Cover, Grit, Half MP Cost, Reckless Abandonment, and Insult to Injury for 150 AP.
For Lasswell, first reach Squall MR9 to unlock Double Action while Squall is equipped. After that, work toward Noctis MR9 for Barrage, Firion MR9 for Arms Akimbo, and Tronn MR9 for Half MP Cost. The main borrowed setup costs 165 AP for Arms Akimbo, Half MP Cost, Barrage, Reckless Abandonment, and Insult to Injury. Squall supplies Double Action and Trigger without additional borrowed AP while equipped.
Nichol can eventually use Arms Akimbo, Half MP Cost, and Grit for 150 AP while keeping Tidus equipped. Fina can use those three plus Observe and Recover HP for 170 AP while keeping Leah. In Final Fantasy Resonance, Visions grant eight AP at MR4 and MR9. Upgrade one useful mastery at a time.
Use Gut Rip and Barrage for the Advanced Damage Rotation
Once Lasswell has all the needed skills, the strongest single-target follow-up uses Gut Rip with Barrage. Gut Rip makes his attacks either miss or critically hit for five turns, but Barrage has a guaranteed hit. That is why the two work together. The guarantee does not automatically extend to other attacks.
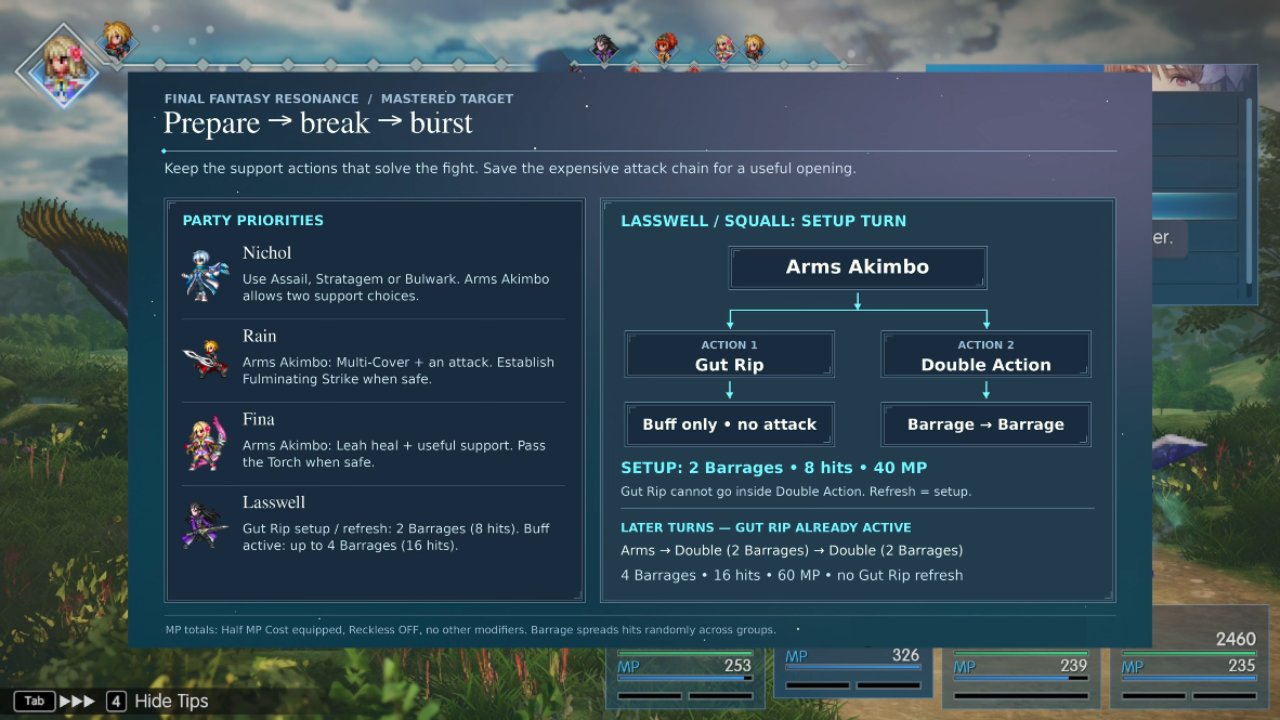
On the opening turn, select Arms Akimbo. Use Gut Rip as the first action, then Double Action as the second, and choose Barrage twice. That gives eight separate hits rather than sixteen, because Gut Rip cannot be selected inside Double Action. With Half MP Cost and without Reckless Abandonment, the setup costs approximately 40 MP.
On later turns while Gut Rip remains active, use Arms Akimbo and select Double Action twice, with two Barrages in each. Four Barrages produce sixteen hits for about 60 MP at reduced cost. Against a lone boss, all hits focus on the same target; against groups, Barrage chooses targets randomly. Refresh Gut Rip when it expires.
You can use Double Action with two Barrages by itself when a smaller burst is enough. Stop using Reckless Abandonment once the enemy is staggered, because its main benefit is stagger rather than HP damage. Equip Lasswell for physical attack, Rain for defense, and your supports for MP and survival.
The best early Expert build uses Rain, Lasswell, Nichol, and Fina to protect the party, coordinate Sweeping Staggers, and gradually upgrade into Arms Akimbo and Barrage combinations.
FAQ
Q. Do you need Mastery Rank 9 to start this Expert build?
A. No. The first setup relies on lower-rank skills such as Multi-Cover, Bladeblitz, First Strike, and Pass the Torch. MR9 upgrades are for later.
Q. Does Reckless Abandonment double attack damage?
A. No. It doubles the chosen physical attack's stagger power at an increased MP cost. Use it before the enemy breaks, not after.
Q. How do you unlock Arms Akimbo for the whole team?
A. Each character must personally reach Firion MR9 and equip Arms Akimbo when borrowing it. One character mastering Firion does not unlock the skill for the others.
Q. Why does Lasswell use Barrage with Gut Rip?
A. Gut Rip normally risks missed attacks, but Barrage's guaranteed hit rate allows its strikes to benefit from the critical-hit effect without that risk.
Editor, NoobFeed
Latest Articles
No Data.