
Tales of Arise Guide | How to Beat Kalmarzel and Kaldinzel
Here's a guide on how to beat Kalmarzel and Kaldinzel in Tales of Arise.
Game Guide by Mash Rahman on Jun 03, 2026
Your party’s epic quest to overthrow the tyrannical Renan regime takes you deep into the heart of Pelegion, where they will at last penetrate the sprawling Del Fharis Castle. Your harrowing climb through the heavily guarded towers and icy corridors inevitably leads you to the beautifully haunting Hanging Garden.
Here your rebellion is abruptly interrupted by a terrifying boss encounter that will test your ability to handle multiple massive threats at once. You’re not fighting one giant behemoth but forced into a brutal tag-team deathmatch against two legendary zeugles.
Kalmarzel and Kaldinzel are the last gatekeepers to Lord Vholran and are a pair of very aggressive beasts that use opposing elemental affinities to completely overwhelm your party. This guide will equip you with the specific preparations, tactical setups, and rigorous combat disciplines necessary to survive their relentless assault and shatter their elemental synergy.
Necessary Preparations and Equipment Optimization.
If you go into the Hanging Garden without thinking about your character loadouts, you'll wipe out your party quickly and frustratingly. Before you enter the immediate trigger zone for this confrontation, make it a top priority to have maximized your team's equipment tier to the full extent. It is essential that Alphen has his absolute highest available forged blade, so that he can cut through the beasts' heavy physical defenses and do competitive burst damage.
This fight has two separate bosses, and both use deadly elemental magic, so you’ll definitely want to make sure your defensive accessories are in order if you want to live. Shock Charms are an extremely valuable asset for your frontline fighters, as Kalmarzel uses devastating Lightning attacks that can cause paralysis so easily. On the other hand, Kaldinzel uses a lot of Ice elemental strikes, so you should keep some Freeze Charms in your bag to swap out if the freezing effects get too much.
You also have to pause and manually set your party’s active artes list before engaging in combat. The bosses have strong resistances against Light and Water-based artes, so it is strongly recommended to turn them off completely in your menus. Also, keep your medical stock stocked with a small number of Apple Gels, Orange Gels, and Life Bottles to maintain perfect stability in your shared Cure Points pool.
Setting the Party AI to Defensive Balance
The sheer physical size of these twin zeugles, in combination with their constant elemental casting, makes proper companion configuration absolutely critical to maintaining battlefield control. Your active 4-person team for this brutal endurance battle: Alphen, Shionne, Rinwell, Dohalim. Now that Shionne is back in your party, you want to turn off Dohalim's healing artes so she can be your dedicated, highly efficient primary lifesaver.
When fighting this boss, you will want to keep Alphen under direct control, actively engaging the beasts’ immediate attention with Alphen’s heavy close-range sword strikes. Open up your Strategy menu, and adjust Shionne's behavioral parameters to strictly prioritize recovery and status preservation over outright magical damage. Set her to auto-cast high-level healing spells the moment any character’s health drops below a safe-and-comfortable level.
Rinwell has to be told to keep as far from the outer perimeter of the arena as possible, or she’ll be trampled by the giant beasts. She'll want to focus on her long-range elemental spells to exploit her opponent's weaknesses, while always keeping her support actions on hand in case of emergencies. Keep your backline nicely spread out so the bosses’ wide physical attacks don’t hit multiple party members at once.
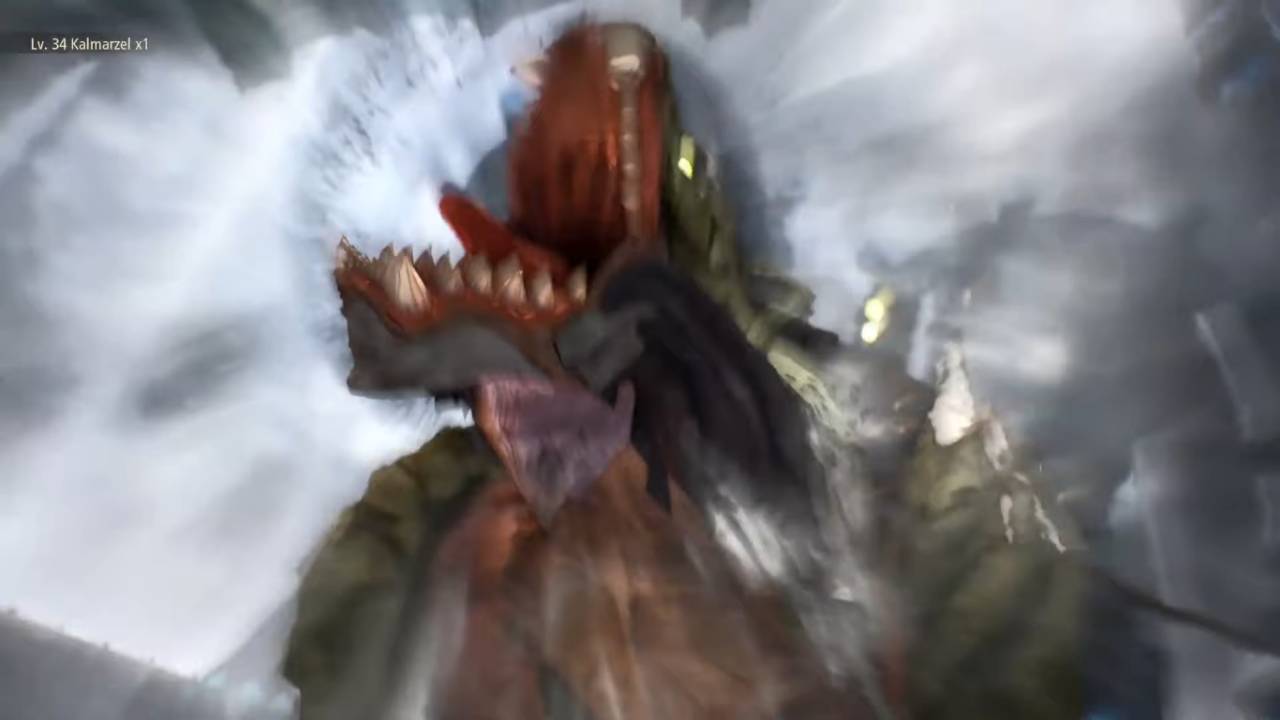
Stage One Against Kalmarzel
Once the battle officially starts, the game seems to try to trick you into thinking this will be a normal single target fight. The fight will start with you fighting only Kalmarzel, a vicious zeugle who uses the Lightning element to shock the arena. Its primary physical attacks are three quick bites in a row, sweeping claw slashes, and a devastating roar that stuns attackers nearby while doing chip damage.
To build offensive momentum safely, you must absolutely avoid the temptation to just mash your standard attack buttons against its armored face. Or, wait and be defensive, putting all your offensive pressure on its glowing weak point. This vital weak point is on its right foreleg, so you’ll have to position Alphen precisely while dodging its sweeping attacks.
If Kalmarzel lowers its stance or pulls its head back, time your dodge roll just right to do a Perfect Evade. This will slow down the action around you briefly, and allows you to immediately perform a Counter Edge strike right into the glowing leg node. These grounded counter-attacks are much safer than trying to get an extended combo, which leaves Alphen totally open to a surprise electric discharge.
Earth Weaknesses and Interruptions Used
You should use Kalmarzel’s elemental weaknesses to your advantage to speed up the fight when it comes to the physical threats of Kalmarzel. This lightning-charged beast is also very weak to Earth elemental attacks, which makes Dohalim an extremely valuable asset for dealing consistent posture damage. As soon as the boss is briefly stunned by your physical attack, have your party unleash their most powerful localized Earth artes.
You must also watch the creature with a hyper-vigilant eye as it retreats to cast its devastating electrical magic. It often calls down lightning that strikes the ground in broad radial patterns around its body, making huge hazards for your front line fighters. Once you see a purple casting circle start to appear beneath its paws, use Rinwell's Boost Attack to forcibly suck up the active incantation.
Stealing this magical energy successfully will completely negate the incoming lightning hazard and enter a Core Break state immediately. This causes the huge zeugle to lose balance and crash helplessly into the dirt. And it stays completely paralyzed for a generous window. While the beast is down, have Alphen pour some of his health pool into his most powerful Flaming Edge techniques to quickly melt its health bar.
The Tag Team Transition Survival
You fall into a comfortable groove and manage to strip Kalmarzel's health pool down to the fifty percent mark when the battle's structural dynamics change dramatically. Kaldinzel (a second identical zeugle) will drop into the arena without warning, forcing you to deal with both massive threats at once. The sudden escalation turns the encounter into a frantic struggle for survival, the screen filled with contradictory elemental threats.
The one golden rule for surviving this dual-threat phase is to ignore Kaldinzel until the original boss is completely defeated. Splitting your party’s damage between two big targets just prolongs the phase where you’re taking double the incoming damage. Now, focus all your offensive firepower, as well as your companions' assists, on finishing off Kalmarzel. His health bar should be pretty low by now.
.jpg)
This chaotic overlap requires you to rely on your well-timed dodge rolls and spatial awareness to not be sandwiched between the beasts. Run in wide circles around the outer edges of the arena and let Shionne handle the huge healing load. Wait for Kalmarzel to open up in clear, isolated spaces and hit his weak point without letting Kaldinzel's incoming projectile attacks hit you.
Working with Kaldinzel's Ice Mechanics
Once Kalmarzel is defeated and its remains dissipate, you can focus all your energy on breaking down the frosty interloper. Kaldinzel has an almost identical physical moveset to its twin, but completely changes its elemental affinity to devastating Ice magic. It will frequently unleash huge ice shards from the ground in straight lines, erect massive freezing columns around itself, and charge wildly across the arena.
To get through this creature's defenses you must concentrate again all your power on hitting its specific glowing weak spot. Kaldinzel’s critical weakness is on its left foreleg, unlike the first boss, so you’ll have to adjust your physical attack angles a bit. On top of that, this icy beast is *very* weak to Dark elemental magic, so Dohalim can continue to heavily exploit the boss's natural resistances.
Artes that utilize fire are also especially effective against this frosty opponent, so Alphen’s Blazing Sword artes are your best bet to deal burst damage. Wait for Kaldinzel to complete a heavy charging animation or a long casting sequence, then close the distance with a quick lunging strike. Land a couple of quick sword strikes on the weak spot, and then back away immediately to avoid its freezing counter roar.
Fury Weathered Above the Limit
As you continue to exchange blows and whittle down Kaldinzel's health pool, the beast will eventually become enraged and wrap itself in a blazing blue aura. That particular glow means that it has officially entered the Over Limit state and fully brought out all of its physical and magical potential. In this chaotic phase, its movement speed is greatly increased, and its natural hyper armor is completely unbreakable by normal means.
In this glowing state, the beast can’t be staggered or interrupted, and Rinwell’s magic-stealing Boost Attack is entirely useless as a defensive tool. As soon as this hyper phase begins, you need to forget all offensive thoughts and switch to an all-out defensive style of play. Just focus on running around the arena in big, sweeping circles to avoid its homing elemental orbs and rapid-fire ice spikes.
Trying to trade hits with the beast, or trying to force an offensive push in this state, is a very dangerous gamble that will easily result in a sudden party wipe. Keep a close eye on your shared Cure Points meter, and don’t hesitate to hit pause and use items from your inventory if Shionne is lagging behind on healing. Just focus on plain survival, and patiently wait until the Over Limit aura naturally dissipates from the creature’s body.
The Desperate Fusion Phase
Depending on your total damage output and the speed of combat, you may trigger a final, desperate twist to this already grueling encounter. Shortly after you defeat the original boss, the game will sometimes make the two monsters violently fuse together into one, terrifying entity. This new fused fusion abomination immediately restores a lot of health and has a deadly combination of electric and ice moves.
If you are faced with this fused variant, you must immediately grasp the extreme increase of environmental hazards all over the battlefield. The fusion will be running around the arena aggressively, as well as casting localized lightning strikes and summoning giant ice pillars. You need to use Kisara's Boost Attack to stop its physical charge attacks for good, but still need to rely on Rinwell to forcibly interrupt its dual-elemental casting.
.jpg)
This large chimera has retained the icy traits of Kaldinzel, and is still ridiculously susceptible to heavy Fire elemental damage. If you have enough health to sacrifice, Alphen's Boost Attacks and his subsequent Blazing Sword techniques are absolutely perfect here defensively and offensively. If you can regenerate their companion assist gauges quickly enough, you can essentially lock this fused zeugle into a stagger loop until its health is depleted, with the right party.
The Last Strike
Once the boss gets through the long elemental onslaught and gets a chance to recover their physical stamina, they will be very tired. This is your last chance to take advantage of its exhaustion and to win a hard-fought victory against the twin terrors. Synchronize Alphen's fiery sword strikes with any remaining companion Boost Gauges to completely overwhelm its remaining structural defenses.
Your entire working party puts all its strongest physical and magical resources into its vulnerable frame, and the beast's posture will break entirely. In this last uninterrupted barrage, the blue crosshair diamond directly above the boss will fill to max very fast. When the Strike prompt shines brightly on your screen, press the corresponding directional pad prompt for your cinematic team-up finisher.
This spectacular final blow will forever damage the physical structure of the beast, and will officially end the dangerous hunt in the Hanging Garden. Beating Kalmarzel and Kaldinzel is a major feat that proves you have mastered target priority, elemental exploitation, and resource management in the most dire straits. With these legendary zeugles now defeated, the path ahead into the deepest chambers of Del Fharis Castle is completely clear.
Check out our Tales of ARISE - Beyond the Dawn Edition Review and other guides:
- Tales of Arise Guide | How to Beat Lord Almeidrea and Mesmald
- Tales of Arise Guide | How to Beat Grigere
- Tales of Arise Guide | How to Beat Temararus
- Tales of Arise Guide | How to Beat Lord Balseph
- Tales of Arise Guide | How to Beat the Ice Wolf Leader
- Tales of Arise Guide | How to Beat the Ooze Hive
- Tales of Arise Guide | How to Beat Zacarania
- Tales of Arise Guide | How to Beat Menancia Guard Captain Kisara
- Tales of Arise Guide | How to Beat Lord Dohalim il Qaras
- Tales of Arise Guide | How to Beat Venoflage
- Tales of Arise Guide | How to Beat The Mysterious Swordsman
- Tales of Arise Guide | Unlock the Quaking Continent Trophy
- Tales of Arise Guide | Unlock the Billowing Cyclone Trophy
- Tales of Arise Guide | Basic Combat Mechanics
- Tales of Arise Guide | All Recipe Locations
- Tales of Arise Guide | All Fishing Spots and Fish Locations
- Tales of Arise Guide | All the Locations of the Artifacts
- Tales of Arise Guide | All Astral Flower Locations
- Tales of Arise Guide | Unlock the Big Game Hunter Trophy
- Tales of Arise Guide | Unlock the Wall Smasher Trophy
- Tales of Arise Guide | Unlock the Raging Current Trophy
- Tales of Arise Guide | Unlock the Night Blossom Trophy
- Tales of Arise Guide | Unlock the Veteran Rancher Trophy
- Tales of Arise Guide | Get the Diligent Counterattacker Trophy
- Tales of Arise Guide | Unlock Putting the Past in Its Place Trophy
- Tales of Arise Guide | Conquering the Ultimate Group Training
- Tales of Arise Guide | Ultimate Level 100 XP Farming Strategy
- Tales of Arise Guide | All Dahnan Owl Locations
- Tales of Arise Beginner's Guide | Gameplay Tips & Tricks
Editor, NoobFeed
Latest Articles
No Data.