
Tales of Arise Guide | How to Beat Meria Phein
Here's a guide on how to beat Meria Phein in Tales of Arise.
Game Guide by Mash Rahman on Jun 03, 2026
As your grand quest to bring down the oppressive Renan regime continues, your party is taken through stormy seas and into the swampy, water-logged realm of Ganath Haros. Very soon, you will be confronted with a variety of highly territorial predators that have adapted to the harsh, wet environment. As you walk along the misty, thick trails of the Tuah Coast and the nearby wilderness, you are stopped dead in your tracks by a giant, beautiful bird zeugle.
Meria Phein is a towering, legendary bird boss and a literal gatekeeper to the region's deeper secrets. This massive creature completely shreds through your frontline defenses with blistering wind astral energy, aerial superiority, and blinding high-speed dives. Standard ground tactics will quickly leave you open to its strikes, forcing you to completely rethink your approach to combat.
This boss fight in particular is a monumental test of your party’s anti-air capabilities and spatial awareness. Meria Phein is a break from the heavily armored, slow-moving land beasts or defensive humanoid commanders you’ve faced in previous chapters. This creature spends the vast majority of the confrontation just out of reach of standard ground combos.
It does not fight up close but rains constant wind currents and strikes from above with absolute animalistic ferocity. You must know exactly how to ground an agile flying target while dealing with rapid elemental transitions to survive this encounter. This guide will show you the precise preparations and tactical execution required to clip the wings of this feathered terror.
Essential Prep Work & Gear Optimization
The surest way to a quick and frustrating defeat is to charge blindly at Meria Phein’s coastal nesting grounds without upgrading your equipment tier. Make sure you stop by the closest merchant hub or campfire blacksmith before you enter the immediate trigger zone for this hunt. Upgrade your active party’s loadout, and you’ll get the defensive stats you need to weather the storm ahead.
For this specific fight, it’s important that Alphen is using his best forged sword available. When the avian beast is successfully brought down to earth, you will have to dish out some incredibly high physical burst damage. A weaker weapon will not exploit the short stagger windows, and the fight will drag on until you run out of resources.
Meria Phein is very sensitive to wind astral energy and regularly fills the whole arena with cutting gale hazards. Therefore, installing your defensive accessories is crucial to your survival and the party's overall stability. It is highly recommended to make and equip Opal accessories on as many active party members as possible prior to the fight.
This particular accessory halves any incoming wind or earth damage, effectively negating the most dangerous elemental attacks of the creature. Without these elemental resistances, the boss’ fast hurricane waves will quickly chip away at your health pools before you can even get an offensive rhythm going. You also need to stock up your inventory with the necessary medical supplies before the battle sequence starts.
Spend your hard-earned currency on a healthy, maximum supply of Apple Gels and Treat Gels for flat health-point recovery. You'll need tons of Orange Gels to keep refilling your shared Cure Points pool as the fight goes on. Always keep a full supply of Life Bottles on hand to instantly counter any sudden knockouts from the boss’s high-velocity aerial dives.
Setting up Party AI for Defensive Anti-Air Support
The hyper-aggressive nature of Meria Phein and its continued aerial maneuvering make proper AI companion configuration absolutely critical for maintaining control. Your best active four-person party for this engagement is Alphen, Shionne, Rinwell, and Dohalim. Ground-locked physical fighters may have a hard time maintaining consistent value if the boss spends a lot of time hovering high above the floor.
If melee fighters chase the bird pointlessly around the arena, they risk leaving themselves open to huge counter-attacks. When the beast lands, you will have direct control of Alphen to lead the close-quarters combat. This allows your ranged backline to operate safely at range without being in the direct line of fire.
Before the battle starts, you’ll want to open up your Strategy menu and set up both Shionne and Dohalim as a specialized double-healing support unit. Set their behavior parameters to prioritize healing and status preservation over direct magical damage. Make sure they are automatically casting high-level healing spells the millisecond any character's health drops below a safe threshold.
Rinwell should be told to stay as far away as possible, around the outer edge of the battle area. She will want to use her long-range elemental spells to exploit weaknesses, but keep her supportive actions for emergencies. Keeping your backline safely spread out wide means the boss's massive sweeping wing attacks won't hit multiple party members at once.
Phase One and Implementation of Aerial Movement Mechanics
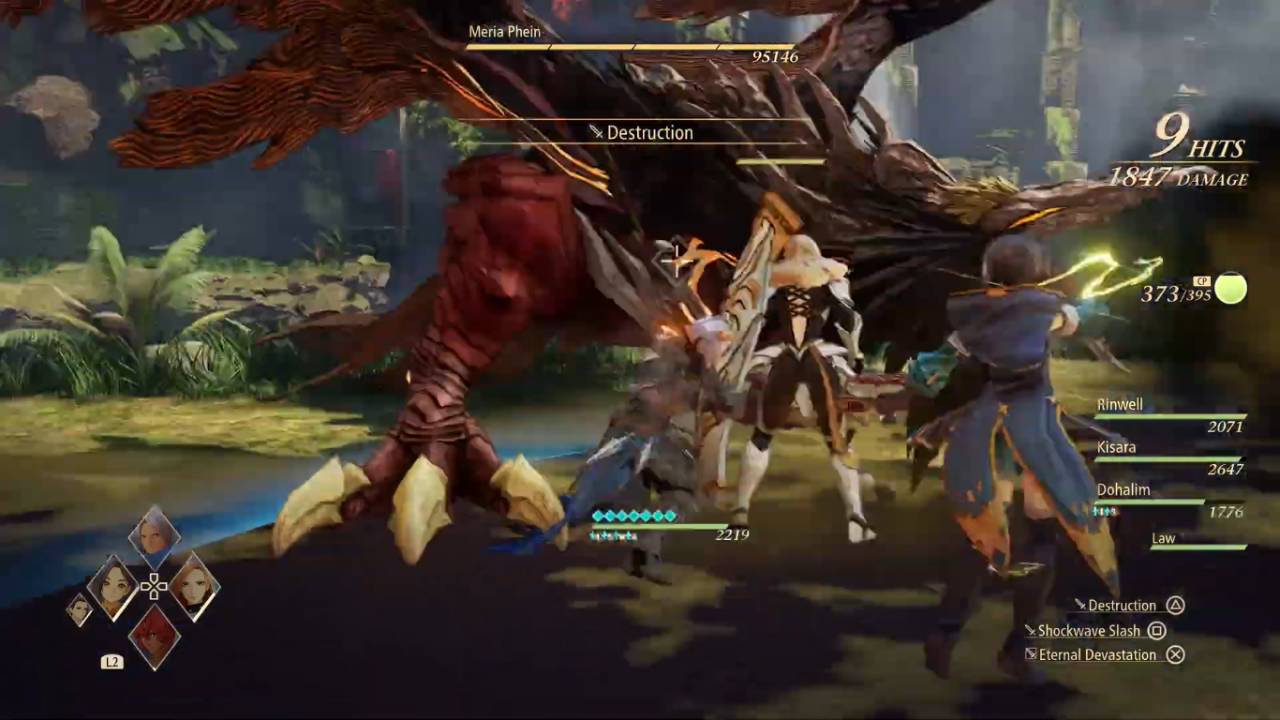
When the battle officially begins, Meria Phein will take to the skies, soaring above the arena floor with majestic aggression. Its primary personal weaponry consists of lightning-quick forward thrusts of the beak, wide sweeping slashes of the wings, and a sudden diving slam from overhead. These physical hits can flatten an unprepared character in an instant, and spatial awareness is your absolute top priority.
It also likes to create localized wind currents that blast outwards from its body towards your active party members. These currents produce tracking tornadoes that actively zone your characters out of the center of the field, pushing you to the edges. To safely generate offensive momentum, do not give in to the temptation to blindly chase the bird into the air with frantic jump attacks.
Instead, assume a very patient defensive stance on the ground and study its physical telegraphs with total concentration. Meria Phein will pull its head back, or angle its wings sharply downward, when it is actively preparing to strike. This animation shows it about to start a high-speed diving lunge across the dirt towards your controlled character.
.jpg)
A Perfect Evade is when you time your dodge roll just right, briefly slowing the action around you. Do this immediately followed by a Counter Edge strike to ensure that critical damage right into its low-hanging talons. These grounded counterattacks are much safer than attempting an aerial combo, which leaves Alphen completely defenseless when she lands.
How to Maximize Shionne's Anti-Air Boost Attack
During the first half of the fight, Shionne’s Boost Gauge will fill up steadily until it is a bright blue glow. The absolute mathematical key to completely shutting down Meria Phein’s high-flying playstyle is managing her specialized companion assist properly. Shionne’s rifle fire is designed to puncture, down, and knock out air targets.
This special utility makes her your only and most expensive asset for this entire face. Watch closely, as whenever the huge bird pulls back to a height, readying itself for a violent aerial dive. When it begins to hover constantly just out of reach of Alphen’s normal sword artes, immediately trigger Shionne's Boost Attack.
The high-velocity sniper round she fires will pierce right through the beast’s wings, effectively negating its current offensive momentum. This precise shot connects with the bird, triggering an immediate Core Break state and sending the enormous avian terror crashing to the stone floor ineffectually. It will be absolutely immobilized on the ground for a very generous window of time.
Tell Alphen to get in close and unleash his most devastating combos while the creature is down. You should drain a part of his health pool on his strongest Flaming Edge techniques, in order to quickly melt the health bar of the boss. These grounded windows are the only way you can comfortably pace the fight and conserve your healing items.
Breaking Magical Casts & Using Rinwell’s Assist
Meria Phein is not just physically agile, but a highly skilled user of wind astral energy. During the skirmish, the beast will periodically retreat to a safe distance and start charging up high-tier elemental spells in a very aggressive fashion. This dangerous behavior can be easily identified by watching the air around the creature.
It will gather large quantities of atmospheric energy, with glowing purple casting circles appearing directly beneath its hovering talons. The boss will summon a localized storm that deals constant heavy damage over an extremely large radius if not stopped. If your backline casters happen to be in the blast radius, this magical bombardment can easily take them out.
This is where Rinwell’s Boost Attack comes in handy and can be a vital defensive move for your team. The moment the purple casting circle appears around the boss, jump in immediately with Rinwell’s boost assist. And before the hurricane hazard can even become a hurricane hazard, her magic will absorb the collected energy and negate it altogether.
If you can interrupt its chant, it will also cause another severe Core Break state, causing the giant bird to crash back down to the dirt. Using Shionne’s anti-air and Rinwell’s magic steal in an alternating fashion will keep the boss grounded and off-balance at all times. If you can keep this pace, you completely eliminate the two biggest offensive advantages of the beast.
Suffered the Phase Two Over Limit Storm
As soon as you have drained the central health pool of Meria Phein past the halfway point, the ferocity of the fight will reach its absolute peak. And the bird will shriek wildly and wrap itself in a permanent, flaming blue aura. This special glow means that it has now entered its Over Limit state and is showing its full potential.
During this chaotic second half of the fight, its movement speed is doubled entirely, making it incredibly hard to track. This makes its natural hyper-armor completely unbreakable, so your normal attacks will no longer make it flinch or stagger. It also loses all of its magical casting times, so it can summon wind hazards instantly.
.jpg)
It will begin to zip and dart desperately through the air, sending quick blasts of wind from surprising directions. It will also perform back-to-back aerial dives without warning, leaving you very little time to react. Trying to trade hits with the beast or interrupt its animations while it’s in this state is a very risky gamble.
Pushing an offensive in this phase is easily going to result in a sudden and devastating party wipe. When the blue aura comes, you have to immediately forget about attacking and go into a purely defensive style of play. Run only in wide, unbroken circles around the outer edge of the arena.
Avoid the lingering tornadoes on the field and do well-timed dodge rolls to break free from their tracking paths. Let your backline focus on keeping everyone topped off safely while you wait for the aggressive push. Surviving this onslaught takes a lot of patience until the beast runs out of Over Limit energy.
The Final Strike is executed
The boss will spend some time recovering its physical stamina after the grueling Over Limit barrage is finally over. This is when it will be very tired and very vulnerable to your last, powerful attack. This is your final chance to take advantage of his weariness and steal a deserved win.
Use Alphen's flaming sword slashes and any remaining companion Boost Gauges to break down its defenses. You have to trap the weakened bird in a never-ending, unbreakable stagger loop so it cannot take flight again. Victory will draw near as your entire active party continuously pours their strongest physical and magical resources into its vulnerable frame.
That last barrage will fill the blue crosshair diamond floating directly over the boss to max capacity in no time. The moment the Strike prompt flashes brightly on your screen, press the corresponding directional pad prompt. This input will execute the cinematic team-up finishing move, ending the brutal battle.
The spectacular final blow will permanently destroy the beast's structure, ending the dangerous hunt. To defeat Meria Phein is quite the accomplishment. It shows you’re a total pro at timing anti-air, managing elements, and coordinating with your companions under extreme pressure. The way into the dark heart of Ganath Haros is now completely clear; the majestic terror is finally defeated.
Check out our Tales of ARISE - Beyond the Dawn Edition Review and other guides:
- Tales of Arise Guide | How to Beat Lord Almeidrea and Mesmald
- Tales of Arise Guide | How to Beat Grigere
- Tales of Arise Guide | How to Beat Temararus
- Tales of Arise Guide | How to Beat Lord Balseph
- Tales of Arise Guide | How to Beat the Ice Wolf Leader
- Tales of Arise Guide | How to Beat the Ooze Hive
- Tales of Arise Guide | How to Beat Zacarania
- Tales of Arise Guide | How to Beat Menancia Guard Captain Kisara
- Tales of Arise Guide | How to Beat Lord Dohalim il Qaras
- Tales of Arise Guide | How to Beat Venoflage
- Tales of Arise Guide | How to Beat The Mysterious Swordsman
- Tales of Arise Guide | Unlock the Quaking Continent Trophy
- Tales of Arise Guide | Unlock the Billowing Cyclone Trophy
- Tales of Arise Guide | Basic Combat Mechanics
- Tales of Arise Guide | All Recipe Locations
- Tales of Arise Guide | All Fishing Spots and Fish Locations
- Tales of Arise Guide | All the Locations of the Artifacts
- Tales of Arise Guide | All Astral Flower Locations
- Tales of Arise Guide | Unlock the Big Game Hunter Trophy
- Tales of Arise Guide | Unlock the Wall Smasher Trophy
- Tales of Arise Guide | Unlock the Raging Current Trophy
- Tales of Arise Guide | Unlock the Night Blossom Trophy
- Tales of Arise Guide | Unlock the Veteran Rancher Trophy
- Tales of Arise Guide | Get the Diligent Counterattacker Trophy
- Tales of Arise Guide | Unlock Putting the Past in Its Place Trophy
- Tales of Arise Guide | Conquering the Ultimate Group Training
- Tales of Arise Guide | Ultimate Level 100 XP Farming Strategy
- Tales of Arise Guide | All Dahnan Owl Locations
- Tales of Arise Beginner's Guide | Gameplay Tips & Tricks
Editor, NoobFeed
Latest Articles
No Data.