
Tales of Arise Guide | How to Beat Temararus
Here's a guide on how to beat Temararus in Tales of Arise.
Game Guide by Mash Rahman on Jun 03, 2026
Your rebellion crosses the great borders of Elde Menancia and into the storm-ravaged, wind-blown lands of Mahag Saar, where the environmental and biological dangers shift dramatically. Suddenly, deep within the hidden, ruinous passages of the Hidden Wharf and the coastlands around it, your party is ambushed by the grotesque, hulking zeugle Temararus.
This creature is a huge step up in raw physical bullying and structural disruption from the mechanical fights of previous realms. Temararus is a huge quadruped resembling a heavily armored, mutated dog fused with toxic organic substances.
It will not allow you to establish a comfortable defensive baseline; instead, it relies on sweeping tail strikes, high-impact body slams, and highly concentrated toxic poison sprays to systematically disrupt your party’s positioning. It creates a dangerous zone in the immediate fighting area, and you have to think twice about where you step as you constantly change your offensive angles.
This guide will break down the exact strategies, gear loadouts, and companion rotations needed to safely bring down this toxic threat.
Essential Preparations and Gear Optimization
Charging blindly into Temararus’s misty hunting grounds without properly auditing your character loadouts is a surefire way to a quick, frustrating party wipe. Prior to entering the immediate trigger zone for this confrontation, be sure to visit the local merchant or a nearby campfire to get the most out of your team's equipment tier.
You want Alphen to have the highest available forged blade to punch through the rubbery armored skin of the beast and provide a competitive burst of damage in stagger windows.
For this grueling endurance match, your active four-person fighting roster should be Alphen, Shionne, Rinwell and Dohalim. Temararus loves to do fast, multiple-hit physical charges, and he also tends to inflict the severely debilitating status debuff, Poison, quite often.
Your choice of defensive accessories is vital for survival. If you craft and equip Poison-resistance accessories or generic physical defense rings on your front-line melee fighters, you'll save your party a lot of grief by greatly softening the blow of his deadly claw slashes.
You also need to stock your medical inventory heavily with consumables you will need in the fight sequence. Spend your hard-earned Gald on a full stock of Antidotes to immediately negate any poison that slips through your defenses, and pack plenty of Apple Gels and Orange Gels to keep your health and shared Cure Points pool topped off during the extended skirmish.
It's also a completely mandatory insurance policy to have a healthy stock of Life Bottles, as the boss's heavy-impact slams can easily defeat a character in one unchecked combo.
Setting Up the Party AI for Defensive Balance
Temararus moves surprisingly quickly for its massive size and can change targets without a hitch while in the middle of a charge animation. Because of this, setting your AI companions’ behavior is important to keeping a stable battlefield. For this boss fight, you should take direct control of Alphen, and use his heavy close-range sword strikes to actively draw and keep the boss's immediate attention. If you want to change your team’s tactical logic, pause the game before engaging the encounter and bring up the Strategy menu.
Shionne should be 100% ordered to be your dedicated, primary lifesaver, focusing on keeping the party healthy. Set her parameters to 100% heal and status recovery priority, and she'll automatically use First Aid or rely on your Antidote supply the very millisecond any character is poisoned or falls below a safe health threshold. Rinwell should be told to stay well back on the outer perimeter, constantly chanting her long-range elemental spells to provide safe, steady chip damage from afar.
Dohalim should be used as an agile secondary physical attacker and backup healer, helping you apply pressure to the boss at close range while casting extra recovery spells when things get too hectic. If you keep your supporting line of defense at a safe distance, you reduce the chances of the whole party being caught in one big toxic blast, and your ranged characters can cast without any restriction.
.jpg)
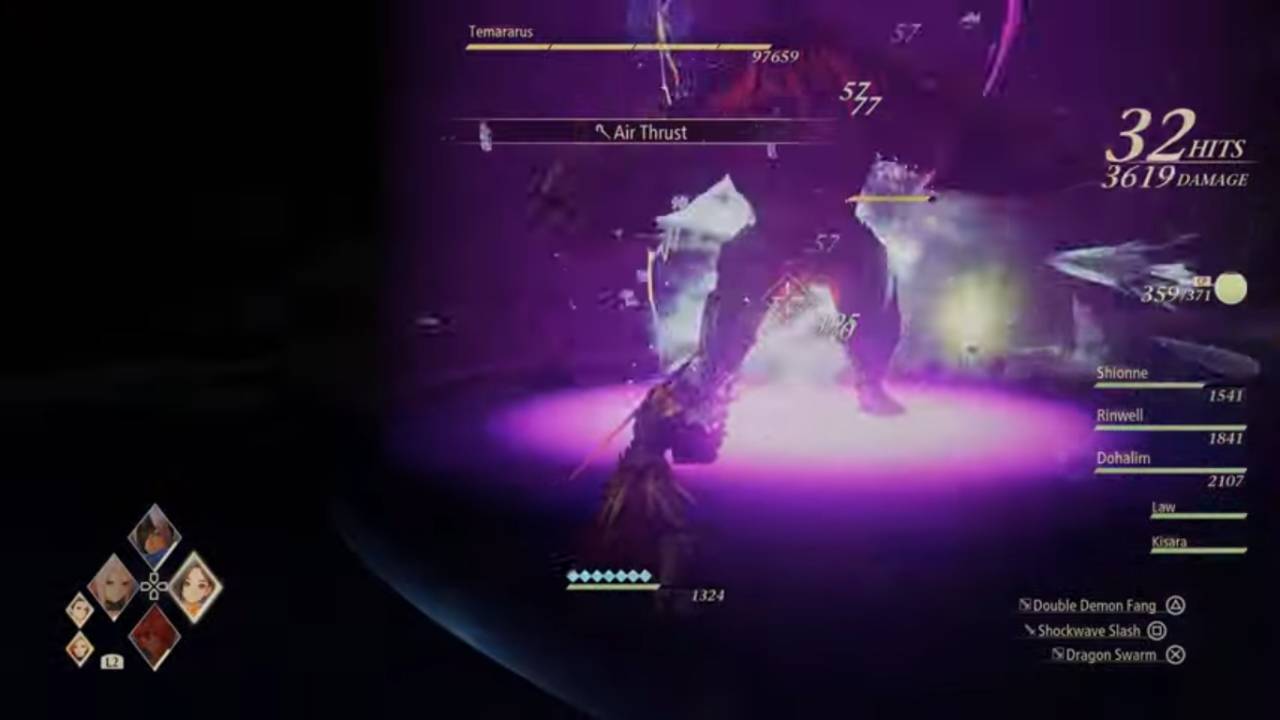
Phase One and the Mechanics of Weak Points
As soon as the battle starts, the Temararus will immediately display its frightening offensive pressure by rapidly sprinting across the arena towards your location. Its primary individual arsenal consists of lightning-fast forward bites, multi-hit sweeping tail slashes, and sudden aerial drops that can track your movement over a large radius.
If you want to survive this fight, you'll need to completely resist the urge to run up to its front paws and mash your standard attack buttons for the first few minutes.
The boss has a lot of natural hyper-armor on its head and front torso during its standard combat animations, so your basic sword strikes won't stagger it while it's actively performing a technique. Instead, you have to keep your eyes fixed on the glowing elemental weak point on the back leg assembly. And it is this one glowing node that is the absolute key to breaking its stance and compromising its balance. Be very patient in your defense and pay close attention to its physical movements.
When Temararus drops its head or backs up slightly, it is preparing to go for a high-speed forward lunge or a spinning tail swipe. You have to time your dodge roll perfectly in order to trigger a Perfect Evade, which slows down the action around you for a moment and gives Alphen a brief window of total invincibility. Immediately afterward, follow up with a Counter Edge strike directly to the glowing weak spot on its rear leg, for certain critical damage.
Using Dohalim’s Vine Bind Boost Attack
You'll constantly dodge the forward charges and trade blows with the enormous beast, and your party members' Boost Gauges will fill up to a bright blue glow along the bottom corner of your interface. Proper management of these companion assists is the key to fully neutralizing Temararus’ high mobility and opening up generous damage windows. Dohalim’s special Boost Attack is your best of the best weapon in this particular battle.
His astral rod strikes can call forth thick, thorny vines from the ground, specifically designed to snare, trip, and ground very agile, fast-moving quadruped targets. When you see Temararus change its center of gravity and get ready to make a frantic run across the arena, trigger Dohalim’s Boost Attack. The resultant vine eruption will automatically track the charging beast, violently wrapping around its legs and slamming it forcefully into the dirt.
Successfully landing this boost assist will totally crush its offensive momentum and instantly trigger a Core Break state. This leaves the giant abomination completely paralyzed on the ground for a long window of time. It's totally helpless. Tell Alphen to close in and use his strongest Flaming Edge techniques to burn through its health pool completely without a fight.
Poison Clouds and Field Hazard Management
Once you’ve chipped away a significant portion of Temararus’ central health bar, it will abandon its direct physical charging tactics for a time and instead fill the arena with biochemical hazards. The beast will be on its hind legs and will violently shake its mutated torso, spewing huge torrents of purple toxic fluid all over the stone floor. These streams of fluid quickly coalesce into large, persistent clouds of toxicity, causing ongoing damage and instantly poisoning anyone who walks through them.
During this perilous stage, you will need to really vary your spacing and resist the temptation to stay glued to the boss’s side. Lead Alphen around the edges of the toxic puddles. Make the beast come to you instead of fighting the beast in the middle of the venom. Temararus will also sometimes use its heavy tail to bombard enemies from afar, dropping dangerous debris that can stagger your spellcasters.
If the field is full of these toxic hazards, rely on your ranged team members to keep the pressure on. Move Alphen in wide circles around the area to draw any targeted spitting attacks away from Rinwell, allowing her to safely complete her high-tier spells. If any companion happens to walk into a toxic cloud, go to your item menu manually and clear the status effect before their health pool gets into the danger zone.
Over Limit Wrath: Surviving Phase Two
Once you get Temararus’s main health pool down past the halfway point, the encounter will ramp up in intensity to an absolute peak. The beast will roar ferociously, then surround itself with a permanent, glowing blue aura, signifying that it has officially entered its Over Limit state. This chaotic second half of the fight completely doubles its movement speed, makes its natural hyper-armor completely unbreakable, and gives its physical strikes absurd tracking.
.jpg)
It will then start to jump around the arena like it is possessed, taking quick phantom lunges and leaving a cloud of toxic gas behind with every physical move. When you start to notice this hyper-active state coming on, you need to immediately drop all offensive thoughts and go to a completely defensive playstyle. Do not try to swing your sword or activate normal artes while it is glowing; it will easily shrug off the damage and knock Alphen out in one hit.
Concentrate on sprinting in wide, sweeping circles around the edges of the arena, spamming well-timed dodge rolls to avoid its tracking paths. Watch your shared Cure Points gauge, and if Shionne needs some immediate help to keep the party alive until her Over Limit aura naturally dissipates, manually pause the game and use some items from your inventory.
Carrying Out the Final Strike
When the long Over Limit attack finally ends, and the boss takes a breather to regain its physical stamina, it'll be exhausted and very vulnerable to your last attack. This is your last chance to take advantage of the fact that it is tired and get a hard-fought win. Coordinate Alphen’s flaming Flaming Edge attacks with any remaining companion Boost Gauges to place the weakened abomination into a perpetual, unbreakable stagger loop.
The blue crosshair diamond hovering directly above its body will quickly fill to maximum as your entire party pours their most potent physical and magical resources into its vulnerable frame. When the Strike indicator flashes wildly across your screen, hit the appropriate directional pad prompt to pull off a cinematic team-up finishing move. This spectacular final blow will destroy its structure forever, bringing the final explosion and the brutal encounter to an end.
Defeating Temararus is a huge accomplishment that shows you’ve completely mastered targeting weak points, controlling field hazards, and coordinating with companions under extreme duress. With this grim shadow successfully repulsed, your combat-hardened party will gain valuable experience and clear the way immediately ahead through Mahag Saar.
Collect your fallen rewards, rest your weary companions by the nearest campfire and prepare your minds for the even greater challenges that await your rebellion in the deeper regions of the world.
Check out our Tales of ARISE - Beyond the Dawn Edition Review and other guides:
- Tales of Arise Guide | How to Beat Lord Balseph
- Tales of Arise Guide | How to Beat the Ice Wolf Leader
- Tales of Arise Guide | How to Beat the Ooze Hive
- Tales of Arise Guide | How to Beat Zacarania
- Tales of Arise Guide | How to Beat Menancia Guard Captain Kisara
- Tales of Arise Guide | How to Beat Lord Dohalim il Qaras
- Tales of Arise Guide | How to Beat Venoflage
- Tales of Arise Guide | How to Beat The Mysterious Swordsman
- Tales of Arise Guide | Unlock the Quaking Continent Trophy
- Tales of Arise Guide | Unlock the Billowing Cyclone Trophy
- Tales of Arise Guide | Basic Combat Mechanics
- Tales of Arise Guide | All Recipe Locations
- Tales of Arise Guide | All Fishing Spots and Fish Locations
- Tales of Arise Guide | All the Locations of the Artifacts
- Tales of Arise Guide | All Astral Flower Locations
- Tales of Arise Guide | Unlock the Big Game Hunter Trophy
- Tales of Arise Guide | Unlock the Wall Smasher Trophy
- Tales of Arise Guide | Unlock the Raging Current Trophy
- Tales of Arise Guide | Unlock the Night Blossom Trophy
- Tales of Arise Guide | Unlock the Veteran Rancher Trophy
- Tales of Arise Guide | Get the Diligent Counterattacker Trophy
- Tales of Arise Guide | Unlock Putting the Past in Its Place Trophy
- Tales of Arise Guide | Conquering the Ultimate Group Training
- Tales of Arise Guide | Ultimate Level 100 XP Farming Strategy
- Tales of Arise Guide | All Dahnan Owl Locations
- Tales of Arise Beginner's Guide | Gameplay Tips & Tricks
Editor, NoobFeed
Latest Articles
No Data.