
The Crimson Hunt Guide | All Puzzle Solutions
This guide The Crimson Hunt Guide covers the main puzzles.
Game Guide by Amaya on Oct 15, 2026
The Crimson Hunt features a series of puzzles that require you to decipher clues, arrange paintings, align mechanical rings, and redirect laser beams. As you progress through the Victorian mansion and into the catacombs, you will also encounter mechanisms that require Victoria and Eleanor to cooperate.
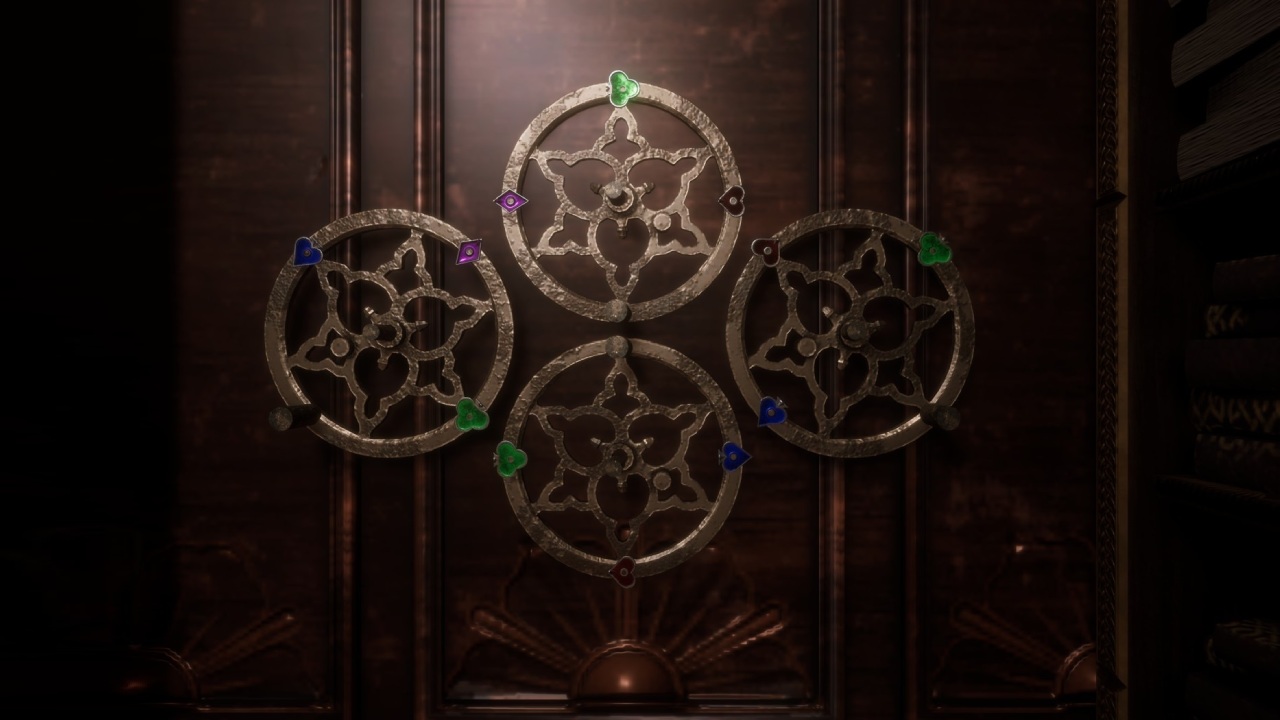
The Gear Puzzle
Location: Mansion, near the Library wing
The Gear Puzzle is one of the first major puzzles in The Crimson Hunt. It features rotating gears marked with playing card suits, and your objective is to connect the symbols into a continuous loop.
Solution: Connect the card suits into a continuous loop in the correct direction.
- Progress through the mansion until you obtain the Gear Mechanism from the Studio.
- Return to the gear console near the Library wing and insert the mechanism.
- Examine the card suits and the connecting paths on the circular gears.
- Rotate the gears until the paths create one continuous loop between the connector points.
- Make sure the loop follows the correct direction. The puzzle only accepts the correct orientation.
The puzzle completes automatically when the gears are aligned correctly, revealing a hidden item behind you. Check the area immediately after solving it.
The Office Safe
Location: Early mansion section
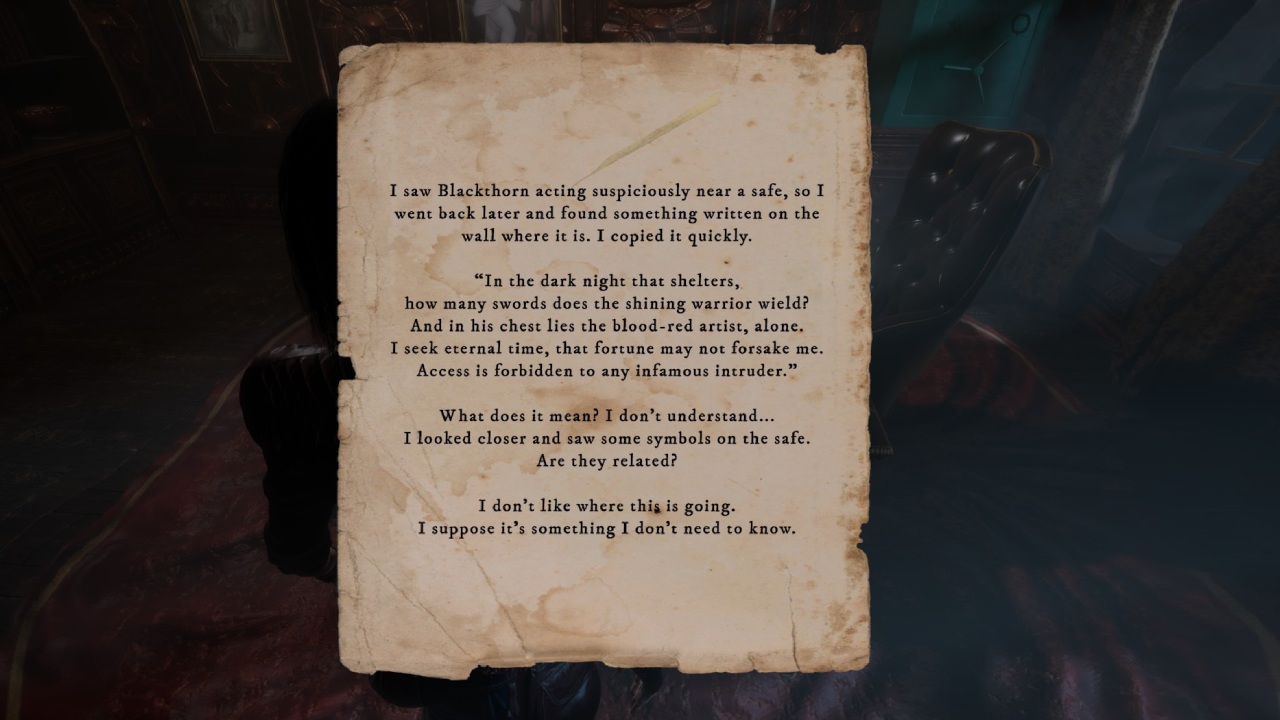
The Office Safe uses a short riddle to reveal a three-digit combination. Read the note on the table before interacting with the safe, then interpret the three clues.
First digit: 5
The shining warrior represents the five-pointed star.
Second digit: 1
The blood-red artist represents the heart, whose clue has one dot.
Third digit: 7
The clock points to seven o'clock.
The Four Paintings Puzzle
Location: Mansion
The Four Paintings Puzzle requires you to rearrange four paintings in the order of chess pieces hinted at by a nearby table.
Correct order: Pawn → Knight → Queen → King.
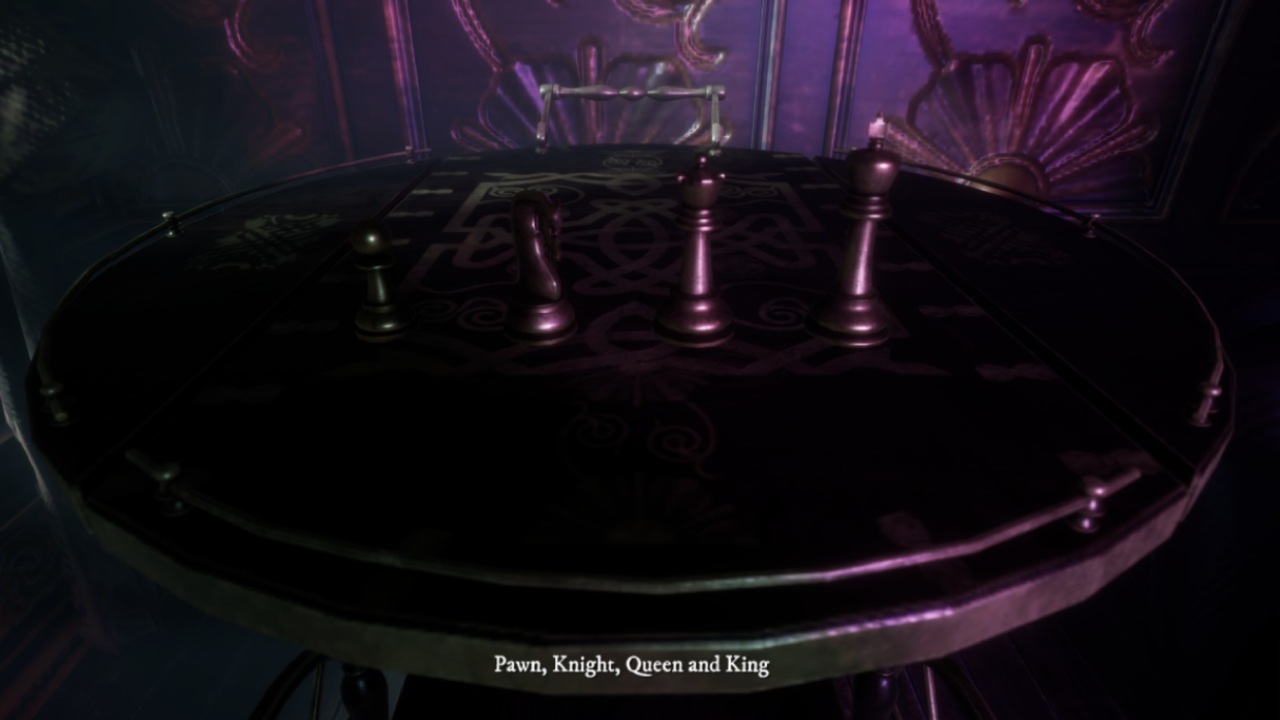
1. Examine the table to find the order hint.
2. Locate the empty painting rack, which is used to rearrange the paintings.
3. Identify the paintings representing the four chess pieces.
4. Move them into the following sequence:
- Pawn
- Knight
- Queen
- King
5. Check that the paintings follow the exact order shown by the clue.
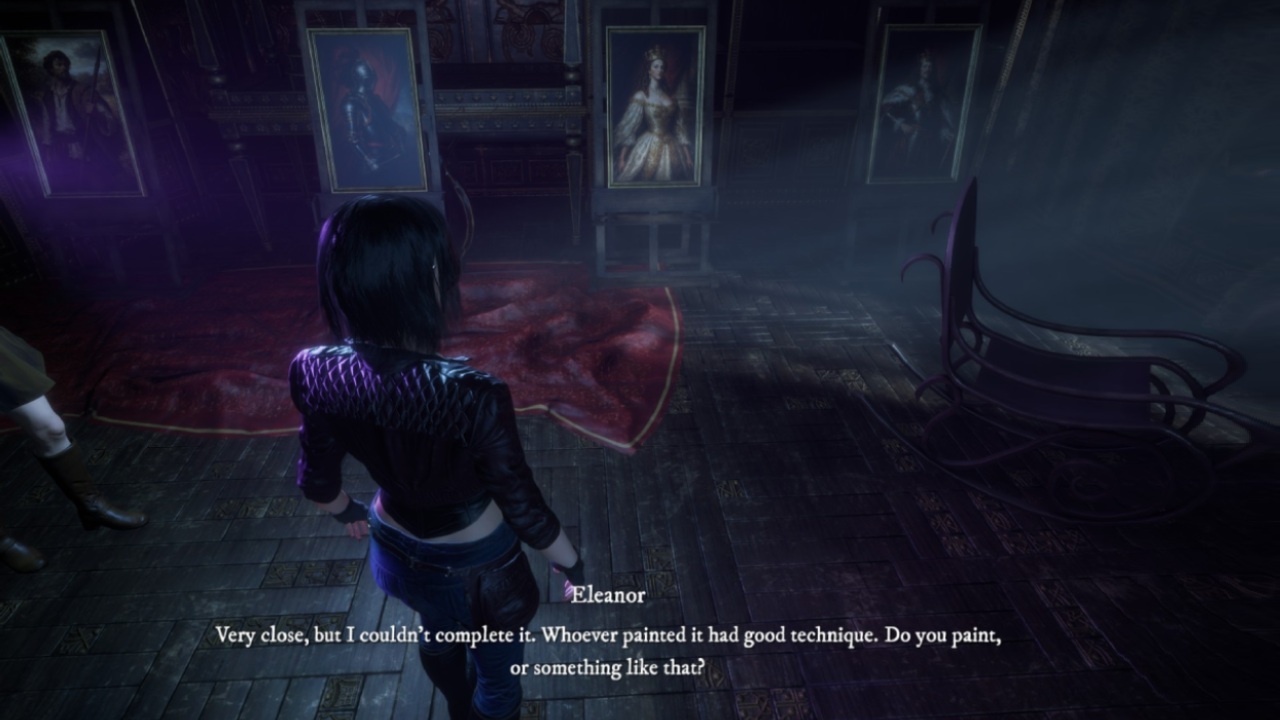
Once you arrange the paintings correctly, the puzzle should complete and let you continue.
First Rotating Rings Puzzle
Location: Catacombs
The first Rotating Rings Puzzle introduces a mechanism controlled by three levers. You will see a logo directly ahead of you, which indicates the alignment you need to achieve.
Solution: Align all three rotating rings to match the central logo.
1. Approach the mechanism and examine the logo ahead of the rings.
2. Locate the three levers that control the rotating sections.
3. Pull the levers to change the rings' positions.
4. Continue adjusting them until all three rings align in front of you.
5. Check the completed arrangement against the logo.
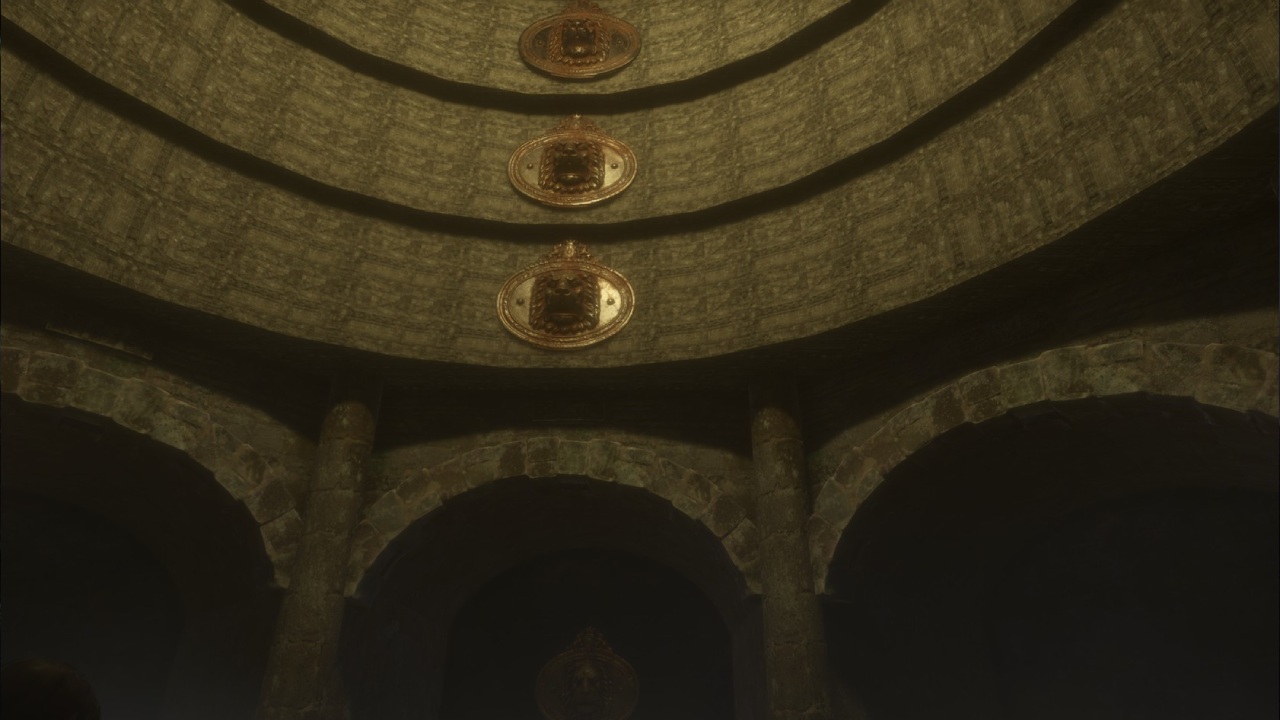
The key is to align all three rings. This differs from the next rotating rings puzzle, which uses separate wall symbols as alignment clues.
Second Rotating Rings Puzzle
The second Rotating Rings Puzzle uses a similar three-lever mechanism, but you must match each ring to a specific wall logo instead of aligning every ring in the center.
Solution: Match each rotating ring to its corresponding wall logo.
1. Examine the logos displayed on the wall.
2. Identify the ring associated with each logo.
3. Use the levers to rotate the corresponding rings.
4. Adjust each ring until its symbol matches the designated wall logo.
5. Check all three alignments before leaving the mechanism.
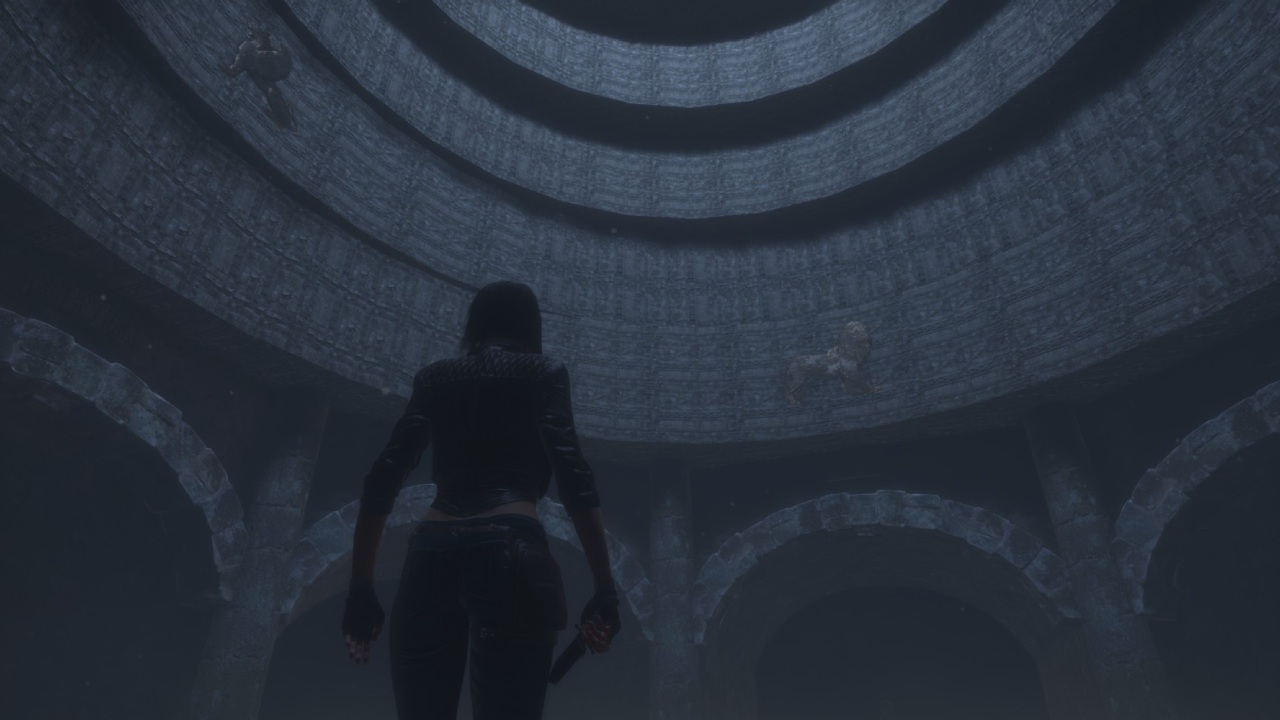
Tip: Use the wall logos as your reference rather than trying to recreate the arrangement from the first puzzle.
Laser Crystal Puzzle
Location: Catacombs
The Laser Crystal Puzzle requires you to restore a missing crystal and direct three other crystals toward the receiving points on the wall. You must complete the light paths before Eleanor can activate the mechanism.
Solution: Replace the central crystal, align all three crystals, and have Eleanor pull the wall lever.
1. Enter the room and search for the missing central crystal.
2. Pick up the crystal and place it back into the central mechanism.
3. Rotate the three crystals to redirect their laser beams.
4. Align the crystals so that every receiving point on the wall is illuminated.
5. Check the beams to make sure none of the receiving points are left unlit.
6. Send Eleanor to the lever on the wall.
7. Eleanor will pull the lever and open the door.
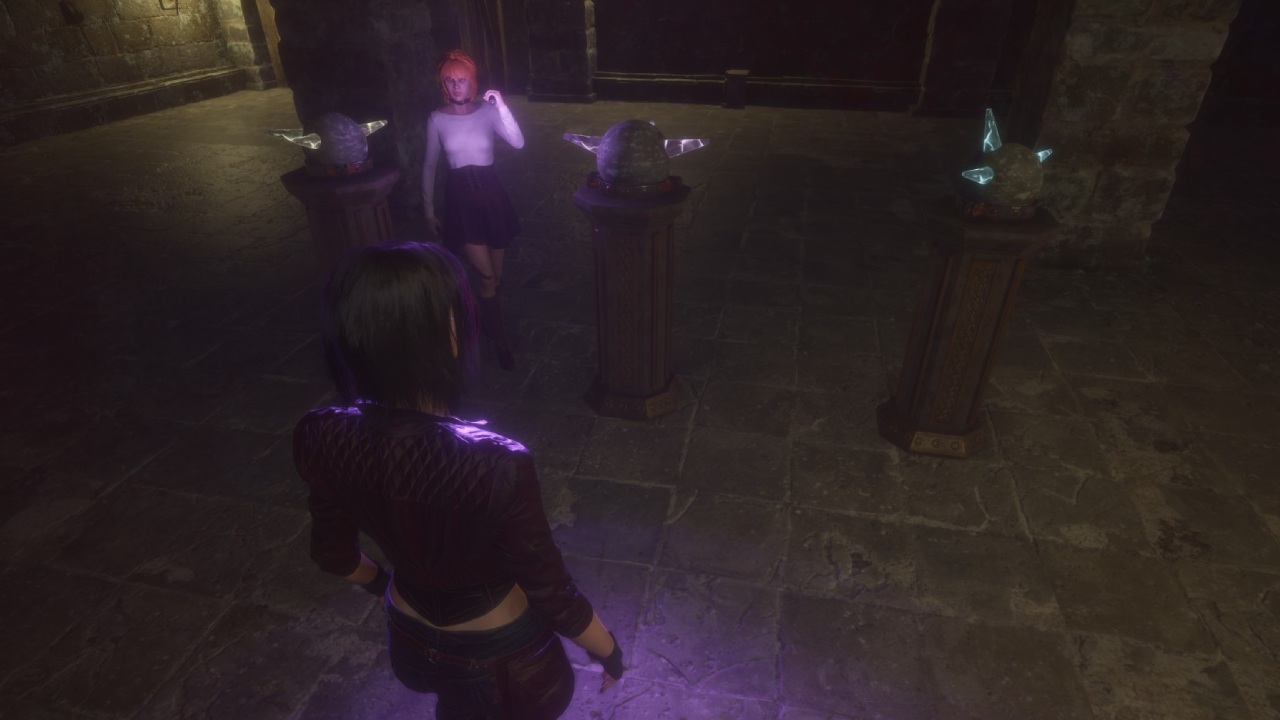
If the door remains locked, recheck each beam's direction. The puzzle requires you to reach all receiving points before you can proceed.
Colored Bells Puzzle
Location: Room with the staircase
The Colored Bells Puzzle requires you to ring three bells in the correct sequence. The clue is found above the staircase, where you can see colored gems on the far wall.
Correct bell order: Red → Green → Yellow.
1. Enter the room and locate the three colored bells.
2. Look up the staircase toward the gems on the far wall.
3. Examine the colors to identify the sequence.
4. Ring the red bell first.
5. Ring the green bell second.
6. Ring the yellow bell last.
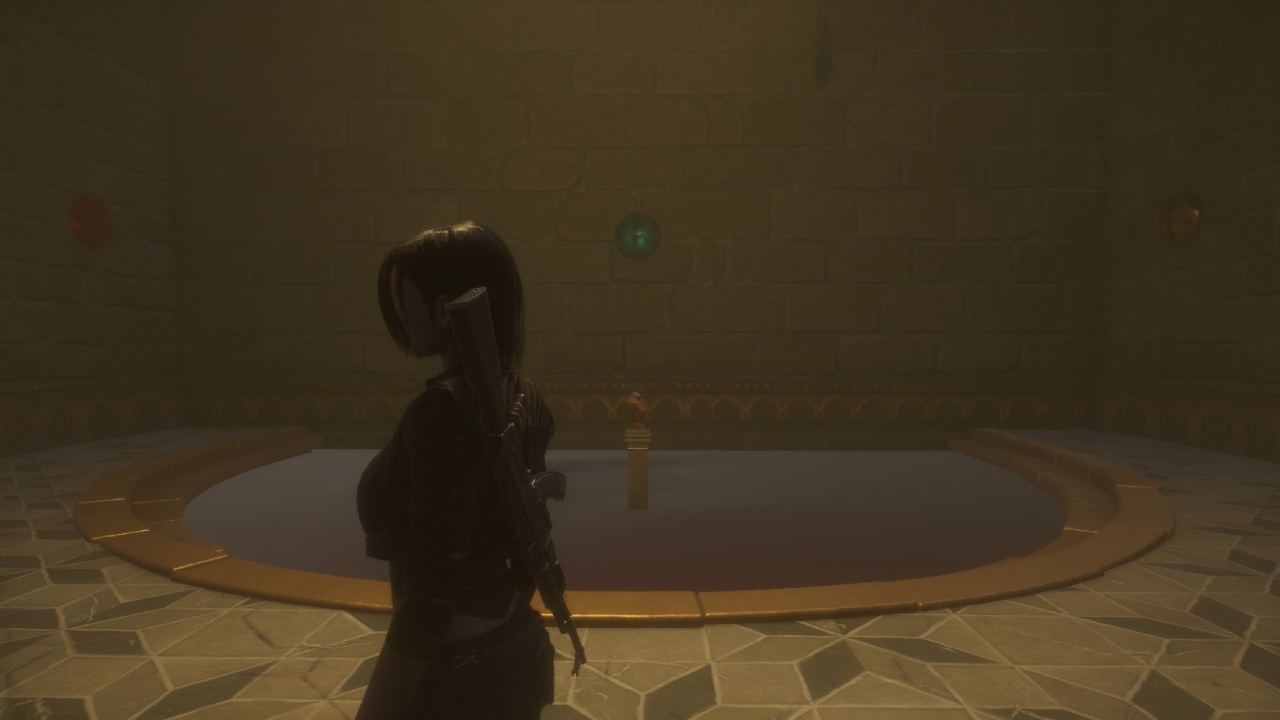
Once you enter the sequence correctly, the mechanism should activate. If it doesn't, check that you rang the bells in the correct order.
West Wing Fireplace Puzzle
Location: Central parlor
After opening the West Wing, you will find a fireplace blocking a hidden crawlspace. To extinguish the flames and reveal the passage, find the missing statue piece.
Solution: Place the Statue Head into the empty socket on the fireplace mantelpiece.
1. Explore the West Wing and locate the armory.
2. Search the adjacent wardrobe to find the Statue Head.
3. Return to the central parlor.
4. Examine the fireplace and locate the empty socket on the mantelpiece.
5. Place the Statue Head into the socket.
6. Once the flames go out, enter the newly revealed crawlspace.
7. Follow the chimney passage with Eleanor to reach the subterranean church.
Be prepared to encounter enemies and traps as you explore the West Wing.
Catacombs Three-Lever Alignment Puzzle
Location: Drainage basin in the catacombs
This puzzle uses three stone levers to rotate a mechanism decorated with animal symbols. The markings on the floor beneath the central mechanism determine the correct arrangement.
Solution: Match the animal symbols on the rotating mechanism to the corresponding floor markings.
1. Progress through the underground church until you reach the drainage basin.
2. Examine the three stone lever pillars.
3. Look for the animal carvings representing the lion, cherub, and griffin.
4. Inspect the markings on the floor beneath the rotating mechanism.
5. Pull the three levers to adjust the central column.
6. Align the animal symbols with their corresponding floor markings.
7. Once the symbols are correctly positioned, the mechanism activates and opens the route into the flooded catacombs.
Do not confuse this puzzle with the earlier Rotating Rings Puzzles. Here, the key clues are the animal carvings and floor markings, not a central logo or wall-mounted symbols.
Knight Guardian Tomb Puzzle
Location: Flooded catacombs
After swimming through the flooded passage, you will reach a tomb chamber containing stone knight statues. To exit, match three animal-themed tablets to their corresponding pedestals.
Solution: Match the Griffin, Lion, and Cherub tablets to their corresponding pedestals.
1. Swim through the flooded passage and reach the tomb chamber.
2. Examine the wall glyphs and the available stone tablets.
3. Identify the Griffin, Lion, and Cherub symbols.
4. Place each tablet on the pedestal bearing its matching symbol.
5. Check that all three tablets are positioned correctly.
6. Activate the mechanism to open the exit.
Be ready for combat after solving the puzzle. Three Knight Guardians animate when the exit opens, so conserve ammunition and healing items before activating the mechanism.
Paired Lever Mechanisms
Location: Underground church and river sections
Several progression obstacles in The Crimson Hunt require Victoria and Eleanor to operate mechanisms together. These aren't conventional symbol puzzles, but they can block your route if you overlook your companion's role. The walkthrough documents paired switches in the dungeon and tandem wall levers near the underground river.
Solution: Position both characters at the required switches and activate the levers together.
1. Examine the blocked doorway or gate to locate the available switches.
2. Identify the lever or switch that Victoria can operate.
3. Position Eleanor at the corresponding mechanism when prompted.
4. Activate the mechanisms together to raise the iron portcullises or lower the river dam gates.
5. Proceed through the newly opened route.
In single-player mode, the AI companion controls Eleanor. Follow the interaction prompts and make sure she reaches the correct position before trying to activate a paired mechanism.
Final Thoughts
The easiest way to solve The Crimson Hunt's puzzles is to examine every nearby clue before interacting with the mechanism. Remember the Office Safe combination (517), the Four Paintings order (Pawn, Knight, Queen, King), and the Colored Bells sequence (Red, Green, Yellow).
The remaining puzzles focus on connecting card suits, matching symbols, redirecting lasers, and coordinating with Eleanor. If a mechanism doesn't activate, recheck the alignment and make sure every required switch, receiver, or pedestal is used correctly.
FAQ
Q. What is the Office Safe code in The Crimson Hunt?
A. The combination is 517. The star represents 5, the heart represents 1, and the clock clue represents 7.
Q. What is the correct order for the Four Paintings Puzzle?
A. Arrange the paintings in this order: Pawn → Knight → Queen → King.
Q. What is the Colored Bells Puzzle solution?
A. Ring the bells in the following order: Red → Green → Yellow.
Q. How do you solve the Gear Puzzle?
A. Insert the Gear Mechanism into the console and rotate the gears until the card suits form a continuous loop in the correct direction.
Q. How do you solve the Laser Crystal Puzzle?
A. Replace the central crystal, align the three crystals so their beams reach every receiving point on the wall, and send Eleanor to pull the lever.
Q. How do you enter the underground church?
A. Find the Statue Head in the West Wing wardrobe and place it in the empty socket on the central parlor fireplace to extinguish the flames and reveal the crawlspace.
Q. How do you solve the Knight Guardian Tomb Puzzle?
A. Place the Griffin, Lion, and Cherub tablets on their matching pedestals. Opening the exit triggers a fight against three Knight Guardians.
Editor, NoobFeed
Latest Articles
No Data.