
John Carpenter’s Toxic Commando Guide | Best Medic Build
The most effective Medic setup for keeping the team alive without turning the class into dead weight.
Game Guide by Jubair Baky on Mar 25, 2026
Medic is strongest when it does more than just patch mistakes. A good build should keep your team stable, save fights that are about to collapse, and still give you enough presence to matter during heavy pressure. The best Medic build does exactly that.
The Best Medic Build
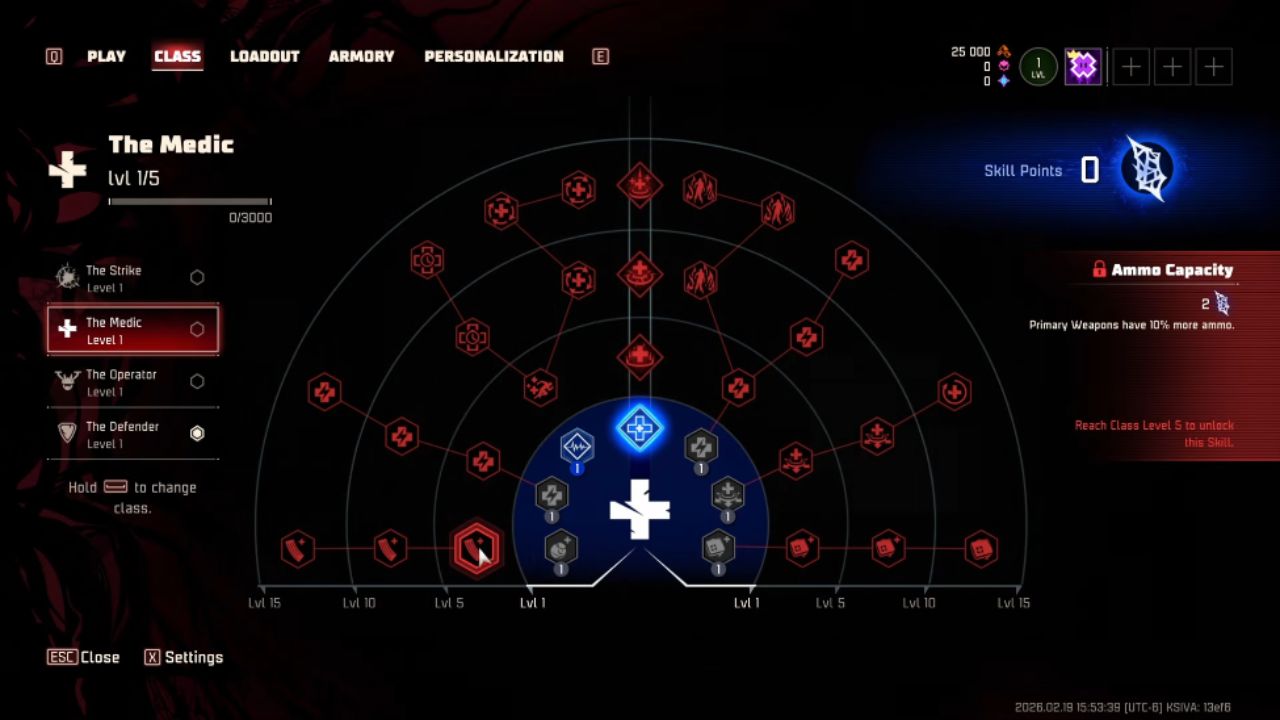
The best Medic build focuses on healing more effectively at first, then improving it to make it a safer team-saving tool. You want healing rate, radius, and length early on because they make the class feel useful right away. When the game gets harder, small healing zones or slow return are rarely enough.
Getting to Emergency Aid is the best way to improve your core. That improvement is very powerful because it turns your healing tool from a slow sustain into an instant shield for your team. During wild fights, being able to heal right away is often more valuable than healing slowly over time.
Best Perks and Skill Priorities
Your first passive priority should be stronger healing efficiency. After that, survivability perks such as a self-save or self-revive effect become much more valuable, especially in harder co-op runs. A downed Medic wastes the team’s best recovery tool, so staying upright matters almost as much as healing well.
Extra healing reach and better sustain also make your class much easier to use in moving fights. If your team is aggressive, bigger and stronger healing zones let you support them without forcing everyone into perfect positioning.

Best Use Case for This Build
This is the best Medic build for teams that want to stay safe without slowing down. The Trauma Center can still help with more static goals, and Remote Treatment can be useful when teammates are spread out, but the best general setup is still the one that is based on Emergency Aid and raw healing power.

If you want Medic to feel powerful instead of passive, build for healing efficiency first and fight-saving recovery second.
Also, check our John Carpenter’s Toxic Commando Review and other guides below:
- John Carpenter’s Toxic Commando Guide | How AI Teammates Work
- John Carpenter’s Toxic Commando Guide | Best Defender Build
- John Carpenter’s Toxic Commando Guide | Best Operator Build
- John Carpenter’s Toxic Commando Guide | Best Strike Build
- John Carpenter’s Toxic Commando Guide | How to Get the Ammo Saver Trophy
- John Carpenter’s Toxic Commando Guide | How to Get Bloodhound Trophy
- John Carpenter’s Toxic Commando Guide | How to Get Gold Digger Trophy
- John Carpenter’s Toxic Commando Guide | How to Get Hold the Door Trophy
- John Carpenter’s Toxic Commando Guide | How to Get the That’s a Good Deal! Trophy
- John Carpenter’s Toxic Commando Guide | How to Get Topped Off Trophy
- John Carpenter’s Toxic Commando Guide | How to Get Weapon Connoisseur Trophy
- John Carpenter’s Toxic Commando Guide | How to Get We’re All Friends Here Trophy
- John Carpenter’s Toxic Commando Guide | Best Solo Class
- John Carpenter’s Toxic Commando Guide | Best Skills to Unlock First
- John Carpenter’s Toxic Commando Guide | Best Starting Class
- John Carpenter’s Toxic Commando Guide | Beginner Tips and Tricks
Editor, NoobFeed
Latest Articles
No Data.