
Tales of Arise Guide | Unlock the Big Game Hunter Trophy
Here's a guide on how to unlock the big game hunter trophy in Tales of Arise
Game Guide by Mash Rahman on May 31, 2026
Dahna’s vast, diverse landscapes teem with aggressive wildlife and militarized monsters known as zeugles. Most of these guys are just standard cannon fodder to help you build your combat skills and gather basic crafting materials, but there is an elite tier of monsters that totally defies standard combat logic.
They are gigantic and hyper-aggressive, known as Gigant Zeugles, the absolute top predators of their environments. It’s not only a test of your party’s endurance, but also the strict requirement for unlocking the highly coveted Big Game Hunter trophy: hunting down and killing all twenty of these legendary beasts.
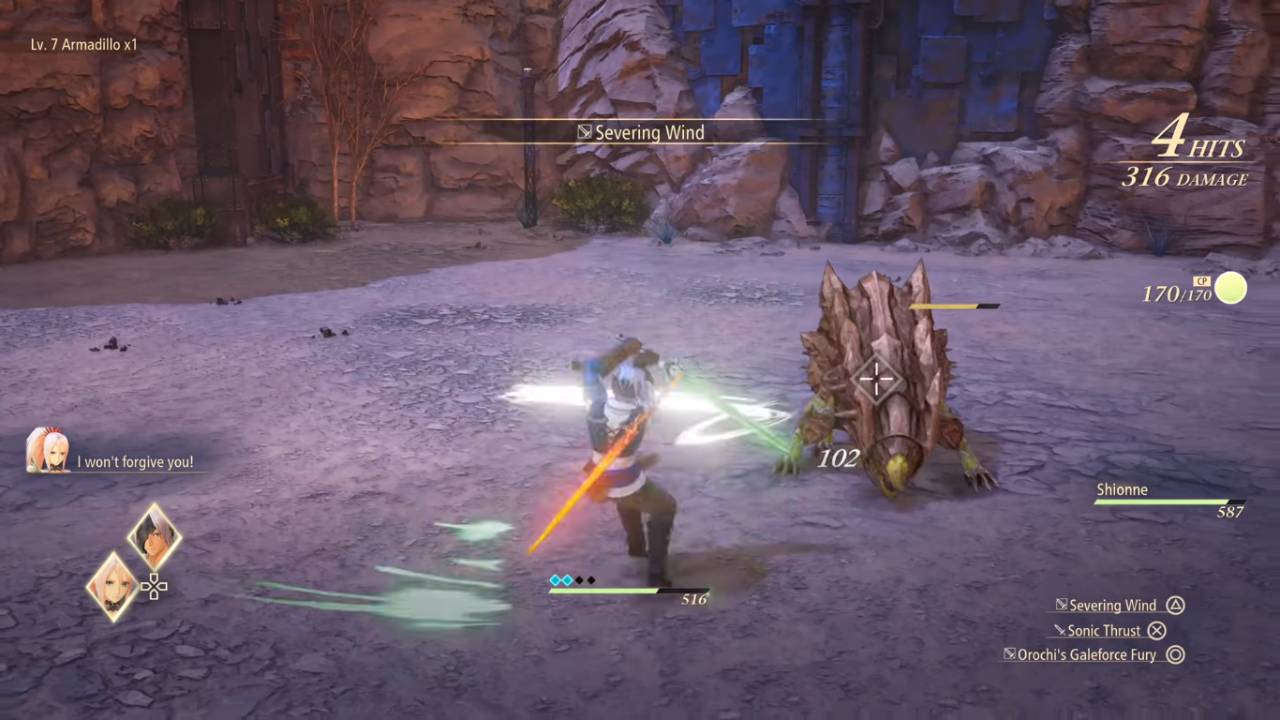
Beating these is a testament to your total mastery of the game’s combat mechanics, as these titans take a lot more than just button-mashing to bring down. Gigants have massive health pools, devastating area-of-effect attacks, and the ability to instantly wipe out unprepared parties.
Besides the pure prestige of getting the silver award for your collection, hunting these twenty creatures provides the most important permanent account upgrades in the whole game. If you’re a player wanting to take on the hardest post-game challenges, you can’t help but find every single one of these elite monsters – it’s an inevitable and important milestone.
Tracking the Giants with Sub-Quests
One of the most important things to understand when you embark on your quest for the Big Game Hunter trophy is that you won’t just find all twenty of these beasts while casually exploring the open world. There are a few Gigants that are roaming free in certain zones from the very start of the game, but most are so heavily gated behind the game's massive sub-quest system. You will need to actively engage with the distressed residents of Dahna, wisely accepting their bounties and investigation requests to force these giant creatures to spawn into the world.
The game was designed by the developers with zero missable content, so you won’t have to worry about missing out on any of these encounters. If you make it to the last dungeon and find that you still need a few Gigants, you can always go back to towns you've already liberated and look for NPCs with envelope icons above their heads. Many of these specific hunting quests, such as those targeting the strongest elemental monsters, will only appear in the final chapters of the story or after the main campaign has been completed in full.
Scaling the Power
The first trap new players fall into when they see Gigant Zeugles is thinking that the monster's level matches the zone's level. You see, developers love to place incredibly high-level Gigants in early-game areas to teach players the valuable lesson of running away.
The most infamous is the Mantis, a terrifying level forty-three insectoid beast, quietly resting in the Sandinus Ravine, which is literally the very first open world area you explore in Calaglia. Good luck trying to fight the Mantis when your whole party is level ten. That'll be a death sentence that'll end your journey before it even starts.
When you discover a new Gigant roaming the world map, always be sure to observe the level indicator above its head before initiating battle. If the beast is more than five levels higher than your active party at the time, it is highly recommended to just run past it and come back much later in the game.
Once you have better armor, stronger weapons, and unlocked the advanced title nodes, you can always fast travel back to the specific zone. Consider these encounters as long-term goals, not instant roadblocks, and your progression will be smooth and frustration-free.
The Calaglian and Cyslodian Bounties
The twenty apex predators you want to kill begin in the sweltering deserts and hellish fortresses of Calaglia. After the terrifyingly over-leveled Mantis in the Sandinus Ravine, the Toxidillo is waiting for you on the fourth floor of Glanymede Castle. The boisterous Roper can be found in the Ulvhan Grotto, waiting to ambush unsuspecting travelers, while the heavily armored Thunderite can be found in the Iglia Wastes after agreeing to a certain sub-quest later in the game. These early encounters are a rude awakening to the sheer physical damage these elite monsters can inflict.
.jpg)
Cyslodia is a frozen world, covered in snow and battered by terrible blizzards, and home to two of the toughest Gigants, made to survive even the fiercest of storms. The Polycephus is a disturbing two-headed dog kept deep inside the Underground Prison of the Riville Prison Tower, accessible only after completing the Survey Says sub-quest.
At some point, you will have to face the Agony Keeper in the wide open area of the Nevira Snowplains. This giant beast uses the slippery ice and freezing temperatures to its advantage, forcing your party to focus heavily on evasion and warmth-inducing culinary buffs before starting the fight.
The Menancian Game
Elde Menancia's green, green pastures and rocky quarries hold the densest concentration of Gigant Zeugles in the entire game, making it a true safari for the seasoned hunter. As you traverse the vast Traslida Highway, you'll inevitably trigger a number of unique hunting quests that spawn powerful titans. The Alpha Reaper, the Great Dragon, and the Relentless Charger all have this huge grassy plain. Each of these beasts demands a completely different tactic, forcing you to rotate your active party members constantly and rearrange your elemental accessories to survive their unique attacks.
Deep inside Razum Quarry, far off the highway, hides the explosive Flamewrecker, a beast that controls the battlefield through intense heat and volcanic eruptions. But the real terror of the Menancia region lies near the Mountain Base of Mount Dhiara.
The Ezamamuk is a level fifty-nine monstrosity and one of the absolute hardest fights for the trophy. Trying to fight this monster before fully exploring the final dungeon and reaching the game’s level cap is asking for trouble, as its base physical stats can one-shot even the most heavily-armored party members.
Expeditions of Mahag Saar and Ganath Haros
The war-torn valleys of Mahag Saar bring their own special hunting challenges, mostly in the form of multi-Gigant encounters. Chasing the Ruthless through the Este Luvah Forest and swatting the Mother Boomy out of the skies over the Aqfotle Hills are no-brainers, but the Adan Lake sub-quest is a big stumbling block.
You will have to fight the Masher Bull and the Masher Mare at the same time. Handling two massive high-level Gigants in the same arena calls for perfect awareness of your surroundings, so you need to use Dohalim's dark magic to crowd-control one beast while Alphen aggressively burns down the other.
A trio of deadly elemental manifestations completes the overworld hunts in the thick, muggy swamps of Ganath Haros. The Stormbringer will bring death to the Tuah Seashore, unleashing huge cyclones to toss your party members helplessly into the air. You have to face the Elemental, deep in the Lavtu Marshlands, an annoying creature that can quickly change its elemental affinities.
Finally, the Regent Bee rules over the Shinefall Woods, and you'll need to constantly employ Shionne's anti-air boost strikes to take down the massive insect before it can unleash its paralyzing stingers on your healers.
Post-Game Nightmares and the Renan
The last two Gigant Zeugles you need to fill out your hunting log are tucked away in the eerie high-tech confines of Rena itself. The winding corridors of Gegham Helgarahi will lead you to the Calamity Arms, a nightmare of heavy mechanization which strikes at the speed of a speeding locomotive.
The Sword Dancer is your final goal, a multi-armed, terrifying executioner lurking in the depths of the Water Astral Energy Separator of Tarfhal Helgarahi. These end-game monsters are meant to test the absolute limits of your fully built characters and accessory optimization.
These last Renan creatures are not vulnerable to any elements you can exploit, so you will have to survive through brute force and perfect defense alone. Make sure your healers are equipped with accessories that shorten their magical casting times, so they can quickly fire off Resurrection spells when the Sword Dancer inevitably breaks through your defensive line.
Make sure you have the absolute maximum supply of Pineapple Gels and Life Bottles on hand for these closing encounters because your communal magical pool will be stretched to the absolute limit of exhaustion before the beasts finally drop.
.jpg)
Weak Points and Break States Exploitation
No matter which specific Gigant you’re currently hunting, the basic approach to getting past their inflated health pools is still largely the same. Most of the giant beasts in the game have some glowing orange crystal structure on their body somewhere. The key to victory lies in this localized weak point. You will have to manually target this glowing appendage and make sure that your entire party keeps up the offensive pressure on it. If enough damage is done to this node, it will eventually cause a Core Break, an internal systemic failure that shatters the beast’s hyper-armor.
When a Gigant suffers a Core Break, it will drop helplessly to the ground for a long time, giving your party the opportunity to safely unleash their most devastating, high-cost astral artes without fear of retaliation. To get the most out of these precious damage windows, you’ll want to properly manage your companion’s boost gauges.
Use Rinwell to negate any large magical spells the giant tries to cast on the fly, and make heavy use of Kisara’s unyielding tower shield to fully absorb and nullify their high-speed forward-charging attacks. Using these specialized counters properly will keep the beast always off-balance and locked into a defensive posture.
Grasping the Ultimate Prize: Going systematically through the realms, checking off names on your hunting ledger, you will come to appreciate the true value of these encounters. Each time a Gigant Zeugle is killed, it drops an Astral Flower, which is a highly sought-after key item. Collecting a flower permanently increases the maximum Cure Point capacity of your party by 10 points. Once you get around to hunting down all twenty beasts, your shared healing pool will be considerably larger, allowing your party to comfortably endure the punishing boss runs in the ultimate post-game dungeons.
As soon as the last beast is officially put to sleep, be it the terrifying Sword Dancer on Rena or the lingering Mantis back in the desert, the game will instantly acknowledge your amazing dedication to combat. And the coveted Big Game Hunter trophy will proudly pop up in the corner of your screen, cementing your status as the single most lethal force on the planet.
Now that all twenty giants have been permanently ejected from the ecosystem, and your Cure Point pool has been significantly bolstered by the flowers they dropped, your party is finally ready to confront the remaining interdimensional rifts and usher in genuine peace for the twin worlds.
Check out our Tales of ARISE - Beyond the Dawn Edition Review and other guides:
- Tales of Arise Guide | Unlock the Wall Smasher Trophy
- Tales of Arise Guide | Unlock the Raging Current Trophy
- Tales of Arise Guide | Unlock the Night Blossom Trophy
- Tales of Arise Guide | Unlock the Veteran Rancher Trophy
- Tales of Arise Guide | Get the Diligent Counterattacker Trophy
- Tales of Arise Guide | Unlock Putting the Past in Its Place Trophy
- Tales of Arise Guide | Conquering the Ultimate Group Training
- Tales of Arise Guide | Ultimate Level 100 XP Farming Strategy
- Tales of Arise Guide | All Dahnan Owl Locations
- Tales of Arise Beginner's Guide | Gameplay Tips & Tricks
Contributor, NoobFeed
Latest Articles
No Data.