
Tales of Arise Guide | Unlock Putting the Past in Its Place Trophy
Here's a guide on how to get the Putting the Past in Its Place Trophy in Tales of Arise.
Game Guide by Mash Rahman on May 31, 2026
When you finally complete the sprawling main narrative of Tales of Arise and watch the credits roll, your journey across Dahna and Rena is far from over. The post-game content offers some of the most grueling and mechanically demanding challenges the developers have crafted. One of the absolute most difficult trials awaiting you is a specific sub-quest known as The Reminiscence Device.
This quest serves as the final gateway to unlocking the prestigious Putting the Past in Its Place trophy. To access this daunting boss gauntlet, you must load up your cleared save data, which is conveniently indicated by a small star icon on the load screen. Once you are back in control of Alphen, fast-travel directly to the space station known as Daeq Faezol.
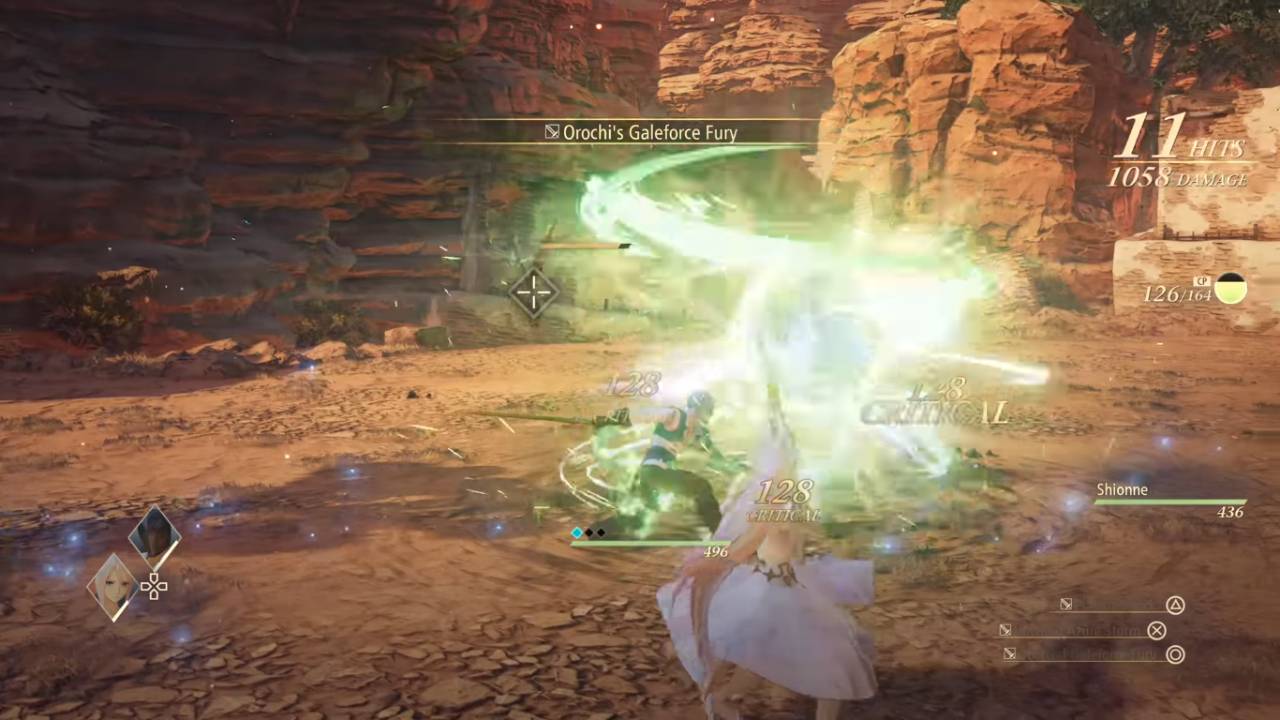
Navigate your way down to the Lower Level of the station and look for a mysterious researcher dressed entirely in black clothing. This specific non-playable character has constructed a virtual simulation machine capable of perfectly replicating human memories. He will eagerly ask your battle-hardened party to test his new invention, thrusting you into a continuous, unrelenting gauntlet of seven distinct boss fights without any breaks in between.
Grinding to the Maximum Level
Because the Reminiscence Device is designed to be the ultimate test of your party's combat prowess, the enemies within the simulation are scaled to an incredibly high degree. The bosses you will face range in level from ninety-five all the way up to the maximum cap of one hundred. Attempting to start this sub-quest immediately after finishing the main story at level sixty or seventy is essentially a guaranteed death sentence.
Before you even consider speaking to the researcher, you must dedicate time to heavily level up your active roster. The most efficient way to prepare for this trophy is to completely ignore Daeq Faezol for the time being and focus your attention on the Otherworldly Visitors questline found in the Earth Spirit Temple. Pushing through those dimensional rifts and repeatedly farming the Chronos boss fight at the end of the Vesper Rift will easily propel your entire party to the level one hundred cap.
Reaching peak strength before attempting the simulation is the only way to ensure your baseline health pools and defensive statistics can withstand the massive area-of-effect attacks you are about to endure. Additionally, being at the level cap ensures your damage output is high enough to comfortably break the hyper-armor of the simulated bosses. Once your party is fully leveled and your skill panels are completely unlocked, you are finally ready to prepare your inventory.
Stockpiling Vital Consumables
The most defining and terrifying mechanic of the Reminiscence Device gauntlet is the complete lack of intermission. Once you officially tell the researcher that you are ready to begin the test, you will be thrown into seven consecutive battles. You cannot pause the sequence to visit a merchant, you cannot rest at a campfire to naturally restore your health, and you cannot easily adjust your equipment between rounds.
Your communal Cure Point gauge will be pushed to its absolute breaking point as your healers desperately try to keep everyone alive across all seven encounters. Therefore, your preparation at the local item shop is just as vital as your physical level. You must completely empty your wallet to ensure you are holding the absolute maximum carrying capacity of every important consumable item in the game.
Before starting the quest, verify that you have exactly fifteen Pineapple Gels and fifteen Orange Gels to manually restore your CP reserves. You also need fifteen Life Bottles for emergency resurrections, along with maximum stacks of Apple Gels, Peach Gels, Treats, and Specifics. Treating this gauntlet as a massive marathon of resource management is the true key to unlocking the trophy.
Revisiting the First Three Lords
The first three rounds of the simulation force you to fight the initial Renan Lords you defeated during the early chapters of the campaign. However, Balseph, Ganabelt, and Dohalim are no longer the pushovers they once were. They boast massively inflated health pools and deal devastating damage, but their core mechanical attack patterns remain exactly the same as your first encounters.
Round one pits you against Balseph and his towering Fire Avatar. You must utilize Kisara's Boost Attack to stop his aggressive charging animations and rely heavily on Alphen to break his guard. Round two brings Ganabelt, who will once again attempt to cast his lethal Indignation spell while hiding behind his summoned clones. Use Rinwell to constantly interrupt his lightning magic, and burn down the clones as rapidly as possible to break his barrier.
The third round features Dohalim, who relies on incredible speed and wide-sweeping staff attacks to dominate the close-quarters melee space. His attacks can frequently inflict the curse status ailment, so having Shionne ready with a quick recovery spell is highly recommended. Exploit his predictable aerial slams by perfectly timing your dodges and immediately countering with Alphen's flaming edge strikes.
Overcoming Almeidrea and Vholran
The fourth encounter reintroduces Almeidrea, who rides atop her massive wind-wielding dragon, Mesmald. This fight can quickly become incredibly chaotic due to the overlapping area-of-effect tornadoes and Almeidrea's constant spellcasting. Rinwell is absolutely mandatory for this round, as her Boost Attack is the only reliable way to steal Almeidrea's devastating divine magic and turn it against the dragon.
Round five puts you face to face with the Water Lord, Vholran. He remains one of the most aggressive and physically demanding bosses in the entire game, utilizing hyper-armor to completely shrug off your standard combo strings. You must play incredibly defensively against his dual-wielding ice and water strikes, relying entirely on perfect evasions and small counter-attacks. Do not get greedy with your damage windows, as Vholran can easily wipe out your frontline fighters with a single sweeping combo.
.jpg)
Surviving the Chaotic Tag-Team Encounter
If you manage to conserve enough Cure Points through the first five individual bouts, you will reach the sixth round, which serves as the true roadblock for most players seeking the trophy. Instead of a one-on-one duel, the simulation violently spawns the Renan Lords back into the arena to fight you simultaneously. Dealing with multiple endgame bosses on the screen at the exact same time creates an overwhelming sensory overload of overlapping magical spells and unblockable physical charges.
Target prioritization is the absolute most important strategy for surviving this chaotic tag-team nightmare. You must manually direct your entire party to focus their damage output on a single Lord to quickly reduce the number of threats on the battlefield. It is highly recommended to target the spellcasters, like Almeidrea or Ganabelt, first. Removing their screen-wide magical barrages makes dodging the remaining melee-focused Lords significantly easier.
During this specific round, you should ensure both Shionne and Dohalim are in your active party to serve as dual healers. The damage intake will be massive, and having two characters capable of casting Healing Circle and Resurrection is the only way to prevent a total party wipe. Do not hesitate to aggressively consume your stockpiled Pineapple Gels during this fight, as keeping your CP gauge full is your only lifeline.
The Final Bout Against Phantom Zephyr
Upon somehow surviving the tag-team onslaught, the simulation presents its final, emotionally charged challenge. The seventh and final round pits your exhausted party against a level one hundred phantom recreation of your fallen mentor, Zephyr. He fights exclusively using brutal, lightning-fast martial arts, delivering devastating physical punches and kicks that can easily break through your characters' defensive guards.
Unlike the Renan Lords, Zephyr does not heavily rely on flashy elemental magic, meaning you cannot easily exploit elemental weaknesses. This final bout is a pure test of mechanical spacing and evasion. Take manual control of a fast, agile character or a long-range fighter like Shionne to completely avoid his close-quarters brawling. Rely heavily on Law's Boost Attack, which is highly effective at shattering Zephyr's physical guard and opening him up for a final, decisive cinematic strike.
Utilizing the Retry Mechanic and Difficulty Scaling
While this seven-round gauntlet sounds incredibly punishing, the developers actually implemented a few generous safety nets to prevent intense frustration. If your party is completely wiped out by a bad combo during any of the encounters, you do not have to start the entire Reminiscence Device sequence over from the very beginning. The game graciously allows you to retry the exact battle you died on.
.jpg)
Even better, any consumable items you used during that specific failed attempt are instantly refunded to your inventory when you choose to retry. Furthermore, if you find yourself hopelessly stuck on the tag-team encounter or the final fight against Zephyr, there is absolutely no shame in utilizing the game's difficulty options. You can pause the game, drop the combat difficulty down to Story mode, and comfortably clear the hurdle. Altering the difficulty does not void the trophy or penalize your rewards in any way.
Claiming Your Ultimate Rewards
When the phantom iteration of Zephyr finally collapses and the simulation officially powers down, you will be teleported back to the Lower Level of the space station. The researcher will express his profound shock at your incredible combat data and formally conclude the sub-quest. Your screen will immediately light up with the highly coveted Putting the Past in Its Place achievement, proving your absolute mastery over the game's combat systems.
In addition to the shiny new trophy, the quest generously rewards you with a massive sum of Gald and a huge stockpile of Skill Points to finalize any remaining character growth. Most importantly, successfully clearing the Reminiscence Device grants you access to Law's ultimate endgame weapon. With the past firmly put in its place and the toughest challenge on Dahna conquered, your party is finally ready to hang up their weapons and enjoy the hard-earned peace.
Check out our Tales of ARISE - Beyond the Dawn Edition Review and other guides:
- Tales of Arise Guide | Unlock the Billowing Cyclone Trophy
- Tales of Arise Guide | Basic Combat Mechanics
- Tales of Arise Guide | All Recipe Locations
- Tales of Arise Guide | All Fishing Spots and Fish Locations
- Tales of Arise Guide | All the Locations of the Artifacts
- Tales of Arise Guide | All Astral Flower Locations
- Tales of Arise Guide | Unlock the Big Game Hunter Trophy
- Tales of Arise Guide | Unlock the Wall Smasher Trophy
- Tales of Arise Guide | Unlock the Raging Current Trophy
- Tales of Arise Guide | Unlock the Night Blossom Trophy
- Tales of Arise Guide | Unlock the Veteran Rancher Trophy
- Tales of Arise Guide | Get the Diligent Counterattacker Trophy
- Tales of Arise Guide | Conquering the Ultimate Group Training
- Tales of Arise Guide | Ultimate Level 100 XP Farming Strategy
- Tales of Arise Guide | All Dahnan Owl Locations
- Tales of Arise Beginner's Guide | Gameplay Tips & Tricks
Contributor, NoobFeed
Latest Articles
No Data.