
How to Set Up and Optimize Your ROG Xbox Ally for the Best Gaming Experience
Step-by-step guidance for powering on, updating, and securing the ROG Xbox Ally ensures smooth and optimized gaming performance.
Hardware by Tanvir Kabbo on Oct 27, 2025
ROG Xbox Ally is an intriguing new handheld gaming gadget that lets you play games at the same level as a console. Setting up your Xbox Ally correctly will make sure that everything goes smoothly from the start, whether you're opening it for the first time or waiting for it to arrive.
From powering it on to installing updates and connecting peripherals, everything about the setup process is built around convenience and customization.
.jpg)
Powering On and Initial Setup
To begin setting up the Xbox Ally, plug it into a power outlet using the included 65W charger, then press the power button. The Windows 11 setup wizard will guide you through signing in with an existing Microsoft account or creating one if you don't already have one. You'll also be prompted to connect to Wi-Fi so that the device can download essential Windows and software updates.
The Xbox Ally's built-in controls can be used to navigate the setup process, or you can use the touchscreen if preferred. Expect a few updates at this stage, so it's a good moment to step away while the system installs them. Once that's complete, it's time to name your device and set up security features. You can choose to use a PIN or a fingerprint scanner for easier and safer access.
When signing in, selecting "Sign-in options” enables a mobile security key for faster login via QR code. After completing the setup, the system will boot into Xbox, ready to play—but before that, a few important updates are recommended.
Installing System and Firmware Updates
To ensure optimal performance, we recommend checking for updates in two ways. The first way is to use the Windows settings menu. To accomplish this, hit the Xbox button, go to Settings, pick "More Settings," and then choose Windows Update. This will let you download all of the updates that are available. You can also access Armory Crate SE from the command center, choose Update Center, and install all the updates that are waiting.
This step is essential since Armoury Crate delivers key optimization updates for the AMD hardware powering the Xbox Ally. It's wise to check the Armoury Crate periodically for new updates to maintain top performance. Once everything is updated, reboot the device to finalize installation.
Signing In and Exploring the Xbox App
After rebooting, sign in to your Xbox account—the same one used during setup, or another if preferred. Once signed in, you'll arrive at the Xbox app homepage, which displays your recent activity and recommendations, including a "Jump Back In" section for quickly resuming past games.
The homepage also features a "Handheld Optimized" collection. These showcasing games have been thoroughly tested for compatibility with the Xbox Ally's screen size, control layout, and performance profile. Game Pass subscribers will see their benefits highlighted, but even if you're new to Game Pass, the Xbox Ally includes 3 months of Xbox Game Pass Premium. Redeem it via the top banner or through the notification bell.
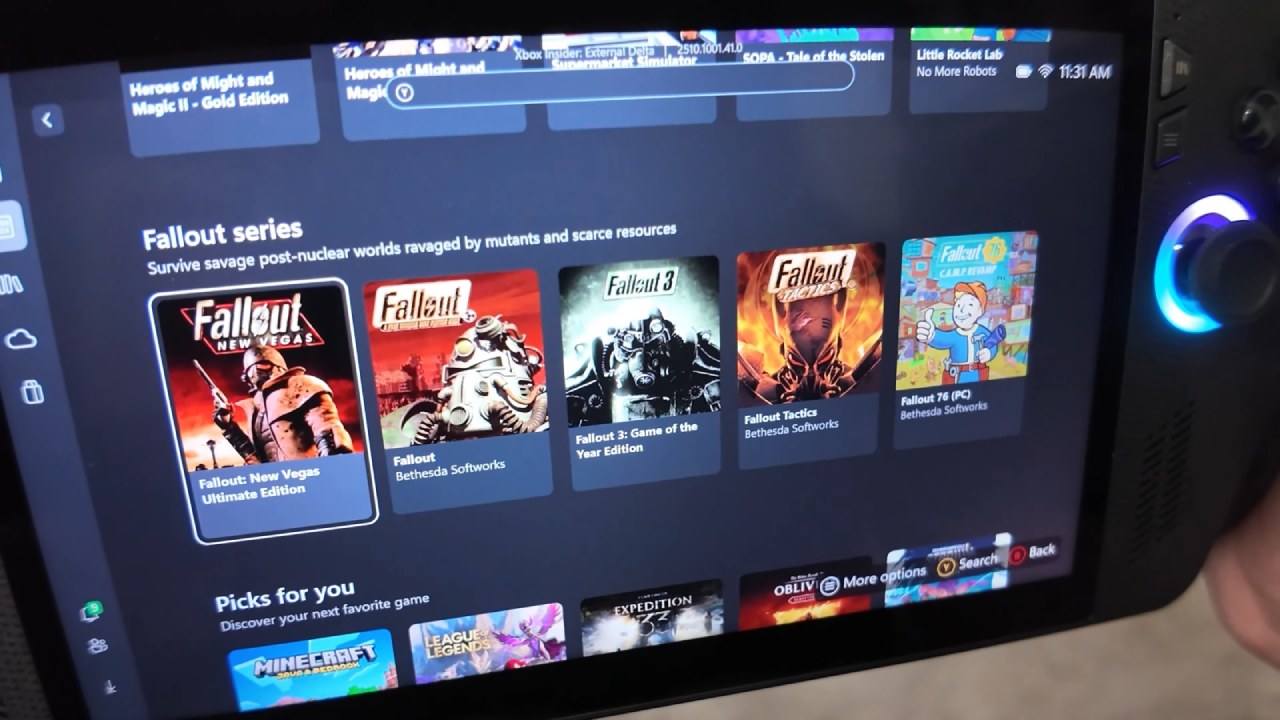
Once activated, visit the Game Pass section to browse and install titles. Many of these can also be streamed instantly via cloud gaming, allowing you to play without waiting for downloads. This option also provides access to popular console titles through Xbox Cloud Gaming.
Managing Other Game Storefronts
If you own games on other platforms such as Battle.net, head to the "My Apps" section of your library and install those storefronts. After logging in, you can download and play games from those services as well. The Xbox app aggregates all your installed titles in one place, letting you launch them directly without switching between apps.
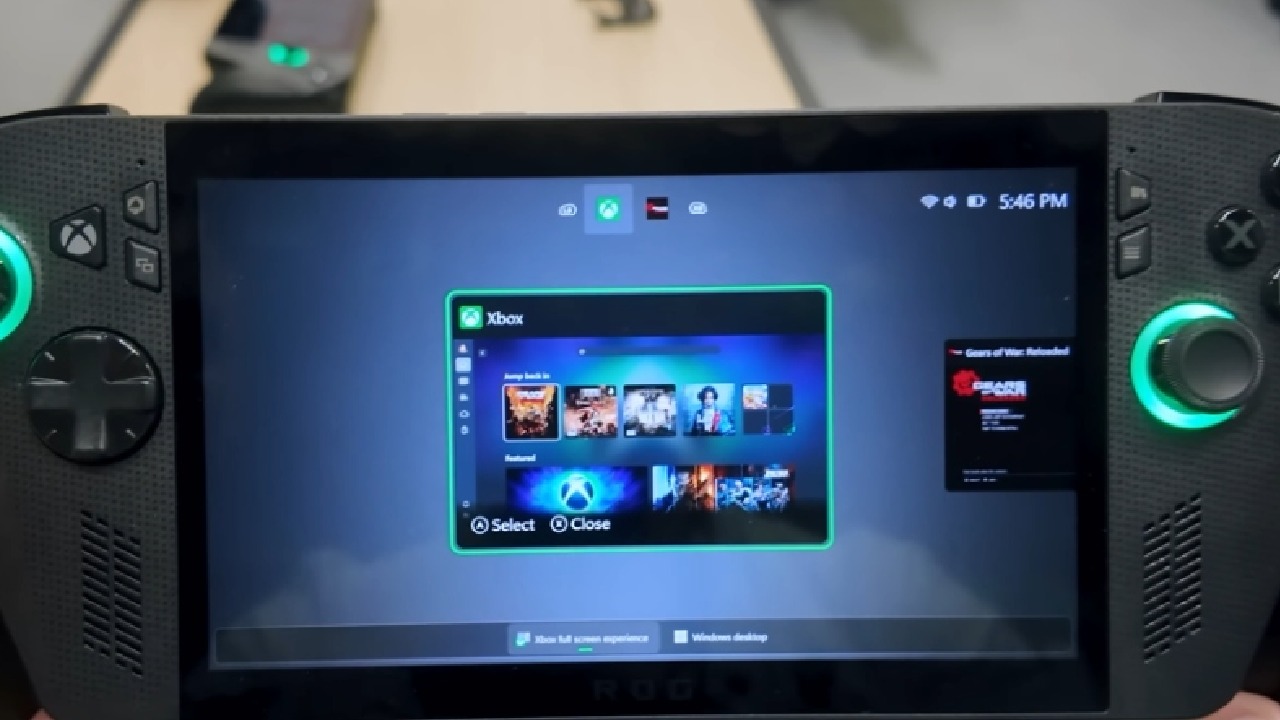
The Xbox full-screen experience makes navigation even faster. By holding down the Xbox button, you can access console-inspired tabs for quick transitions. If needed, you can also return to the full Windows desktop from this view.
.jpg)
Customizing Game Profiles and Performance
When playing games on the Xbox Ally, most titles will run smoothly by default. But for anyone who like to fine-tune or have performance problems, Armoury Crate has a lot of useful customization options. To access it, click on the command center button, choose a game, press X, and then "Set Game Profile."
Within these profiles, you can remap controls, adjust analog stick response curves, change trigger actuation points, modify vibration strength, and even configure gyro behavior. Under the Configuration tab, you can assign power modes to each game. For indie games, Performance mode offers great visuals and battery life. In contrast, Turbo mode is best for AAA titles to maximize frame rates and image quality.
The GPU settings menu offers advanced options, including Super Resolution, FMF, and Boost. These can be left at their default values for simplicity, or adjusted manually for more granular performance control.
Using the Command Center
The dedicated command center button, which is next to the Xbox button, gives you easy access to important tasks. You can alter the operating mode, make the controls act like a mouse and keyboard, change the brightness and volume, or turn off the gadget.
Pressing Y lets you customize the command center layout by adding or removing modules, such as airplane mode toggles, refresh rate selectors, FPS limiters, or battery tools. The Game Visual module is particularly useful for changing display color profiles, offering presets such as FPS, RTS, Vivid, and Eye Care for specific gaming scenarios.
Connecting Accessories and Peripherals
If you want to expand your Xbox Ally's capabilities, it supports a wide range of accessories. Wired headphones can be connected via the 3.5mm jack, while USB-C ports support keyboards, mice, or hubs. Bluetooth is also built in for pairing wireless devices such as controllers, headphones, or mice.
To connect a Bluetooth device, press the Xbox button, open Settings, select Bluetooth, and then "Manage Devices." Choose "Add Device," ensure the peripheral is in pairing mode, and select it from the list. Once paired, your accessory will be ready to use instantly.
Connecting to an External Display
The Xbox Ally can connect to TVs or monitors using a compatible cable or dongle. ASUS also sells a charging dock that not only powers the Ally but also provides HDMI output for easy display connection. To ensure the handheld screen turns off when an external display is in use, go to Windows Settings > System > Display and select "Only Display on 2" from the dropdown menu.
Final Steps and Enjoying Your Xbox Ally
It's time to install and play your favorite games after you set them up and customize them. The Xbox Ally is made for portable gaming with style and flexibility. You can stream games from the cloud, play downloaded PC games, or explore Game Pass.
To get the most out of your experience, make sure to check for updates in Armoury Crate, try out different profiles, and change the look of your command center to fit your playstyle. When everything is set up, sit back, relax, and play games on your Xbox Ally.
Also, check our other Handheld articles below :
- ASUS ROG Ally X Handheld Review: Double the Battery, Double the Comfort
- Nintendo Switch 2 Vs. Original Switch 1: A Full Comparison
- How To Connect A Camera And Join Voice Chat With Nintendo Switch 2
- Nintendo Switch 2 Review: Handheld Performance, Features & Value Breakdown
- ROG Xbox Ally X Vs. ROG Ally X: Display, Battery & Controls
- ASUS ROG Ally X vs. Steam Deck OLED: Display, Battery & Gaming Benchmarks
- MSI Claw 8 AI+ Review: Display, Controls & Gaming
- Nintendo Switch 2 vs. Steam Deck OLED: Gaming, Performance, Battery, Display and Value
- PlayStation Portal Review: Remote Play, Cloud Streaming & Travel Gaming
- PlayStation Portal vs. Lenovo Legion Go: Best Portable Gameplay
- Cyberpunk 2077 Patch 2.3 FPS Test on MSI Claw 8 AI+
Senior Editor, NoobFeed
Gaming Hardware Updates
No Data.