
Tales of Arise Guide | How to Beat The Mysterious Swordsman
Here's a guide on how to beat the mysterious swordsman in Tales of Arise.
Game Guide by Mash Rahman on Jun 02, 2026
As you journey across Dahna, and your party closes in on the dark truth behind the Renan lords, you will eventually find yourselves on the trail of a figure shrouded in utter mystery.
Halfway through your adventure, your group is suddenly ambushed by an unearthly warrior known as The Mysterious Swordsman. This encounter in particular is a massive story shift and is an absolute wall of a difficulty spike for players used to simply mashing buttons.
.jpg)
The Mysterious Swordsman is a hyper-aggressive human boss who is highly disciplined and specializes in single-target execution and devastating, lightning-fast sword techniques. Unlike the massive zeugles you fought in previous chapters, he doesn’t depend on slow monstrous swings or predictable stationary casting windows.
Instead, he uses supreme agility, immediate gap-closers, and unbreakable physical combos to single-handedly dissect your entire party. This guide shall describe the exact preparations, tactical formations, and ironbound combat disciplines necessary to survive his onslaught and shatter his red sword.
Basic Preparation and Equipment Tuning
If you mindlessly run into a duel with a master duelist without reloading your equipment, you’re guaranteed a quick, demoralizing party wipe. Before you get into the immediate trigger zone of this confrontation, you're going to want to make a big priority of visiting a local merchant or a campfire blacksmith to fully max out your team's gear tier. Getting Alphen his best possible forged blade is essential for punching through the boss’s tanky physical defenses and dealing competitive burst damage.
For this grueling endurance battle, your active four-person fighting roster should be Alphen, Shionne, Rinwell, and Law. The Mysterious Swordsman relies heavily on fast multi-hit physical artes and dark-elemental properties for his special techniques, so your accessory setup is critical to your survival. Protect Rings or Onyx Cloaks designed for your front-line melee fighters can save your party a ton of grief by greatly reducing the power of his deadly sword slashes.
You will also need to heavily resupply your medical supply of necessary consumables before entering the cutscene. Invest your hard-earned Gald in maxing out your supply of Apple Gels for flat health point recovery and loads of Orange Gels to keep your shared Cure Points pool topped up during the long-haul skirmish. While you’re at it, a maximum stash of Life Bottles is a must-have insurance policy, as the boss’s high-damage combos can easily kill a fully healed character in one unchecked sequence.
Setting up the Party AI for Defensive Surviving
Configuring your AI companions' behavior is critical to maintaining a stable battlefield because The Mysterious Swordsman moves with blinding speed and can seamlessly swap targets in the middle of an active combo. For this boss fight, you’ll want to manually control Alphen, using his heavy, short-range sword strikes to actively draw and hold the boss’s immediate attention. Before you engage the encounter, pause the game and bring up the Strategy menu to reconfigure your team's tactical logic.
Shionne should be ordered to be your number one, primary lifesaver, and to have no offensive duties whatsoever. Set her parameters to prioritize healing and resurrection entirely so that she automatically casts First Aid or uses your item pool the exact millisecond any character's health bar dips below a safe threshold. You should instruct Rinwell to stay as far out as possible in the outer ring, chanting her long-range elemental spells at all times to keep safe chip damage from afar.
Law should be built as a physical offensive attacker, using Alphen to keep up constant close-range pressure to stop the boss focusing down your spellcasters. If you keep your backline well spaced and safely away from each other, no one will get swept up in one blade sweep, and your ranged units will be free to cast away.
Phase One and Perfect Evade Mastery guide
The Mysterious Swordsman will open the fight by demonstrating his horrific offensive pressure, immediately closing the distance to Alphen. His primary arsenal of individual moves is lightning-fast forward thrusts, multi-hit sweeping slashes, and sudden aerial drops that can track your movement in a large radius. The first few minutes of this fight will be a test of how well you can fight the urge to just run up and mash your standard attack buttons.
The boss has a good deal of natural hyper-armor during his normal combat animations, which means your basic sword hits will not stagger or interrupt him while he is actively doing a technique. Instead you must take a very patient, defensive attitude and keep your eyes glued to his physical telegraphs. If you see the swordsman lower his stance or flash a faint crimson light, he is about to lunge and slash at high speed.
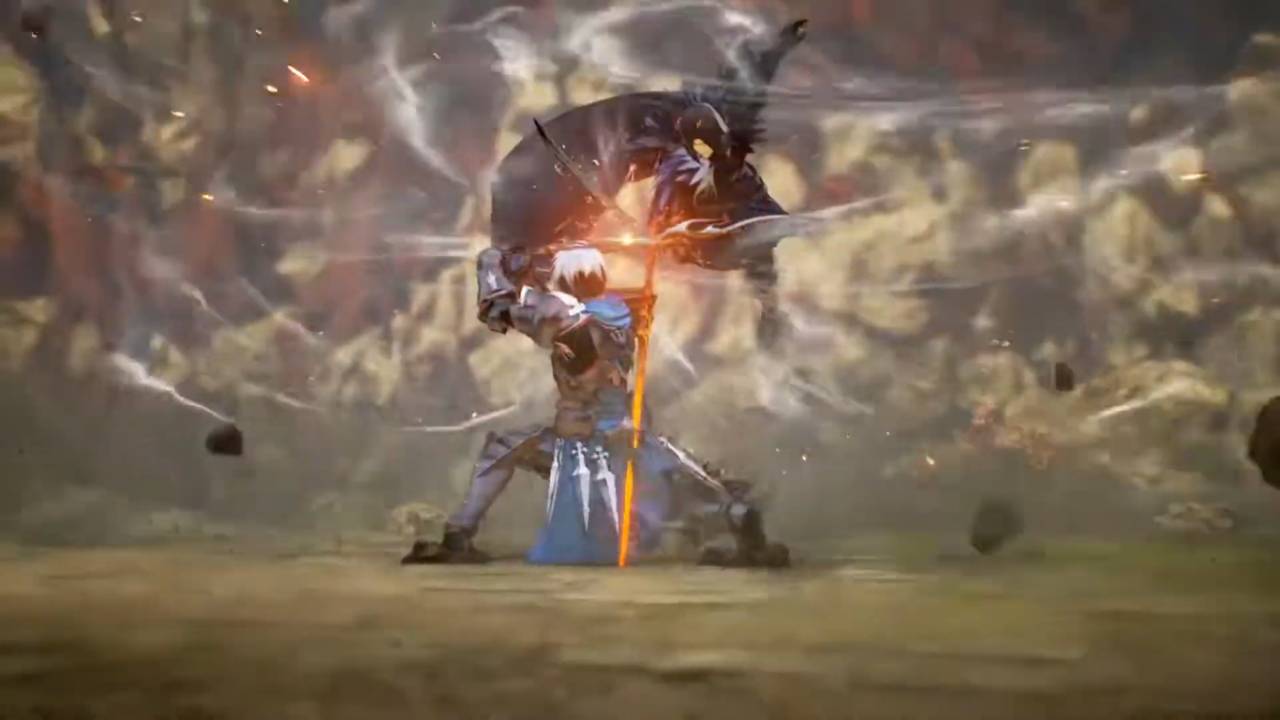
You have to time your dodge roll perfectly to trigger a Perfect Evade that slows down the action around you for a moment, allowing Alphen a brief period of invincibility. Follow this up right with a Counter Edge hit to make sure your critical damage lands on the boss's side. This disciplined cycle of defensive waiting and immediate counter-striking is the absolute safest way to slowly chip away at his massive health pool.
Insane agility and combos to handle
The Mysterious Swordsman is a different breed of dangerous than the other human bosses because he can cancel his own recovery animations to chain into yet another attack string. Dodge one hit and try to punish him, and he’ll often parry your incoming sword art and launch a devastating counter-attack that pins Alphen to the ground. So you have to learn to read the exact length of his physical combos before you commit to an offensive response.
The safest time to do damage of your own is right after the boss does a heavy two-handed downward slam or finishes a long spinning sword art. These particular top-end options cause him to do a very short, split-second recovery animation where he resets his guard. The artes of Alphen allow him to quickly lunge forward, and he can comfortably close the distance and hit two or three times before immediately falling back to a safe distance.
Never attempt to lock him into an infinite combo string, as his hyper-armor will often reset mid-attack, allowing him to easily trade hits and dish out massive damage to your face. Keep your spacing clean, stay light on your feet, and survive rather than focusing on greedy damage output.
Using Companion Boost Attacks that are Targeted
While you keep trading blows with the master warrior, the Boost Gauges of your party members will gradually fill to a bright blue glow at the bottom corner of your user interface. The absolute key to interrupting the boss’s momentum and prying open extremely generous damage windows is managing these companion assists correctly.
Alphen’s Boost Attack is uniquely suited for this battle. His fiery sword attacks are designed to knock down and stagger human-sized enemies, regardless of what animation they are currently in.
If you see The Mysterious Swordsman setting up a particularly long, unblockable combo string or targeting Shionne in the backline, immediately call in Alphen’s boost assist to forcefully slam him into the dirt. Law's Boost Attack can also be used effectively to chip at the boss's physical posture and break his guard as he tries to reset his positioning.
Rinwell's Boost Attack should be strictly reserved for defense purposes, as the boss will occasionally back away to cast quick earth and dark-elemental spells to zone your party out. Once you see a purple casting circle appear beneath him, immediately use Rinwell's boost assist to suck up his astral energy, negating the magical hazard and putting him in a massive Core Break state where he's completely paralyzed.
Surviving Phase Two Over Limit Fury
Once you’ve managed to drain The Mysterious Swordsman’s main health pool to below the midway point, the intensity of the duel will reach an absolute peak. The warrior will violently unleash a great shockwave of dark energy and envelop himself in an eternal burning blue aura, signaling that he has officially entered his Over Limit state. During this chaotic second half of the fight, his movement speed is completely doubled, his natural hyper-armor becomes completely unbreakable, and his physical strikes gain an absurd amount of tracking.
He will start teleporting around the throne arena frantically, doing high-speed phantom slashes and sending out massive shockwaves of energy that cut across the whole battlefield. If you see this hyper state coming on, drop all aggression immediately and switch to a completely defensive playstyle. Do not attempt to swing your sword or use standard attacks while he is glowing, as he will easily shrug off the damage and knock Alphen out in a single hit.
Just sprint around the outer edges of the arena in wide, continuous circles, spamming well-timed dodge rolls to get out of his tracking paths. Always keep an eye on your shared Cure Points gauge, and if Shionne needs help keeping the party functional until his Over Limit aura wears off naturally, pause the game yourself and use items from your inventory.
.jpg)
The last blow
When the grueling Over Limit assault finally ends and the boss takes a short break to regain his physical strength, he'll be very tired and very vulnerable to your final attack. This is your chance to capitalize on his weariness and win a hard-fought battle. Sync up Alphen’s fiery Flaming Edge with any remaining companion Boost Gauges to lock the weakened swordsman in a continuous, unbreakable stagger loop.
As your entire party continues to pour their strongest physical and magical resources into his vulnerable frame, the blue crosshair diamond floating directly above his body will quickly fill to maximum capacity. When the Strike indicator begins to flash rapidly on your screen, press the prompt on the D-pad to unleash a cinematic team-up finishing move. This finishing blow is spectacular and will break his combat stance permanently, leading to the climactic cutscene that officially ends the brutal encounter.
The monumental milestone of beating The Mysterious Swordsman is a testament to your absolute mastery of perfect evasion, spacing discipline, and coordination with your companions under extreme duress.
Having successfully repulsed this terrifying shadow, your battle-hardened party will gain invaluable experience and a deep insight into the true nature of the conflict. Gather up your scattered spoils, let your weary comrades rest at the nearest campfire, and prepare your minds for the even greater cosmic challenges that await your rebellion in the far reaches of the world.
Check out our Tales of ARISE - Beyond the Dawn Edition Review and other guides:
- Tales of Arise Guide | Unlock the Quaking Continent Trophy
- Tales of Arise Guide | Unlock the Billowing Cyclone Trophy
- Tales of Arise Guide | Basic Combat Mechanics
- Tales of Arise Guide | All Recipe Locations
- Tales of Arise Guide | All Fishing Spots and Fish Locations
- Tales of Arise Guide | All the Locations of the Artifacts
- Tales of Arise Guide | All Astral Flower Locations
- Tales of Arise Guide | Unlock the Big Game Hunter Trophy
- Tales of Arise Guide | Unlock the Wall Smasher Trophy
- Tales of Arise Guide | Unlock the Raging Current Trophy
- Tales of Arise Guide | Unlock the Night Blossom Trophy
- Tales of Arise Guide | Unlock the Veteran Rancher Trophy
- Tales of Arise Guide | Get the Diligent Counterattacker Trophy
- Tales of Arise Guide | Unlock Putting the Past in Its Place Trophy
- Tales of Arise Guide | Conquering the Ultimate Group Training
- Tales of Arise Guide | Ultimate Level 100 XP Farming Strategy
- Tales of Arise Guide | All Dahnan Owl Locations
- Tales of Arise Beginner's Guide | Gameplay Tips & Tricks
Contributor, NoobFeed
Latest Articles
No Data.