
Tales of Arise Guide | How to Beat Zacarania
Here's a guide on how to beat Zacarania in Tales of Arise
Game Guide by Mash Rahman on Jun 02, 2026
Your insurrection has spread beyond the frozen boundaries of Cyslodia, into the green and vibrant domain of Elde Menancia. It’s a nice change of scenery from all that sand and stone, but the wilds here can be volatile. Deep within the winding paths of the Gilanne Woodland, your party will be assaulted by a large, plant-like, flying creature called Zacarania.
This particular boss encounter is a significant tactical shift from the previous humanoid duels. Zacarania is a hovering, stationary terror that relies heavily on environmental control, physical appendages, and sudden wind-elemental magic to tear through your team’s defenses. It uses its height to pelt you with constant physical hits and magical hazards, forcing you to adjust your normal offensive angles. This guide will detail the preparations and maneuvers required to prune this deadly flower.
.jpg)
Important Prepping and Equipment Tuning
If you run into the middle of the woods without checking your character equipment thoroughly, your party will definitely be wiped out quickly. Before you head into Zacarania's nesting grounds, make a pit stop at the closest campfire and merchant hub to optimize your setup. I'd strongly suggest crafting the new Flare Claw weapon in Alphen for this particular zone, as it has inherent fire energy which causes serious damage to the local flora.
For this fight, your active four-person party should be Alphen, Shionne, Rinwell, and Law. Zacarania has attacks of both the earth and wind elements, so be sure to equip your party with defensive accessories to reduce damage. Equip Opal accessories for your front-line fighters to ensure a strong natural resistance against the beast's magical arsenal.
You'll also want to restock your inventory with a LOT of healing consumables before starting the fight. Grab a good max supply of Apple Gels to get flat health points back and lots of Orange Gels to keep topping up your shared Cure Points pool. And a handful of Life Bottles serves as a good insurance policy should a character get suddenly knocked out by a rogue vine strike.
Configuring the Party AI for Fair Support
Zacarania is capable of easily overpowering your team with a combination of physical appendages and magic, so it is important to establish proper behavioral parameters for your AI companions. For this fight, take control of Alphen and go right to work with his heavy upward slashes to contest the boss that is hovering overhead. You can change your backline logic before entering the encounter by pausing the game and going to the Strategy menu.
Shionne needs to be ordered without any wiggle room to concentrate solely on healing and saving resources. Program her to cast First Aid immediately or use status-recovery items the moment any character’s health bar dips below a safe threshold. Tell Rinwell to keep well clear of the main body, and constantly cast her long-range spells of wind and light to match the elemental flow.
Set Law as an aggressive secondary physical attacker to help Alphen keep constant pressure on the boss's weak points. If you have your support spellcasters positioned safely along the outer edges of the arena, this reduces the chances of your entire team getting caught in a single sweeping radial blast. This division of labor is unique and allows you to comfortably focus on the immediate threats in front of you.
Appendage Mechanics and Phase One Navigation
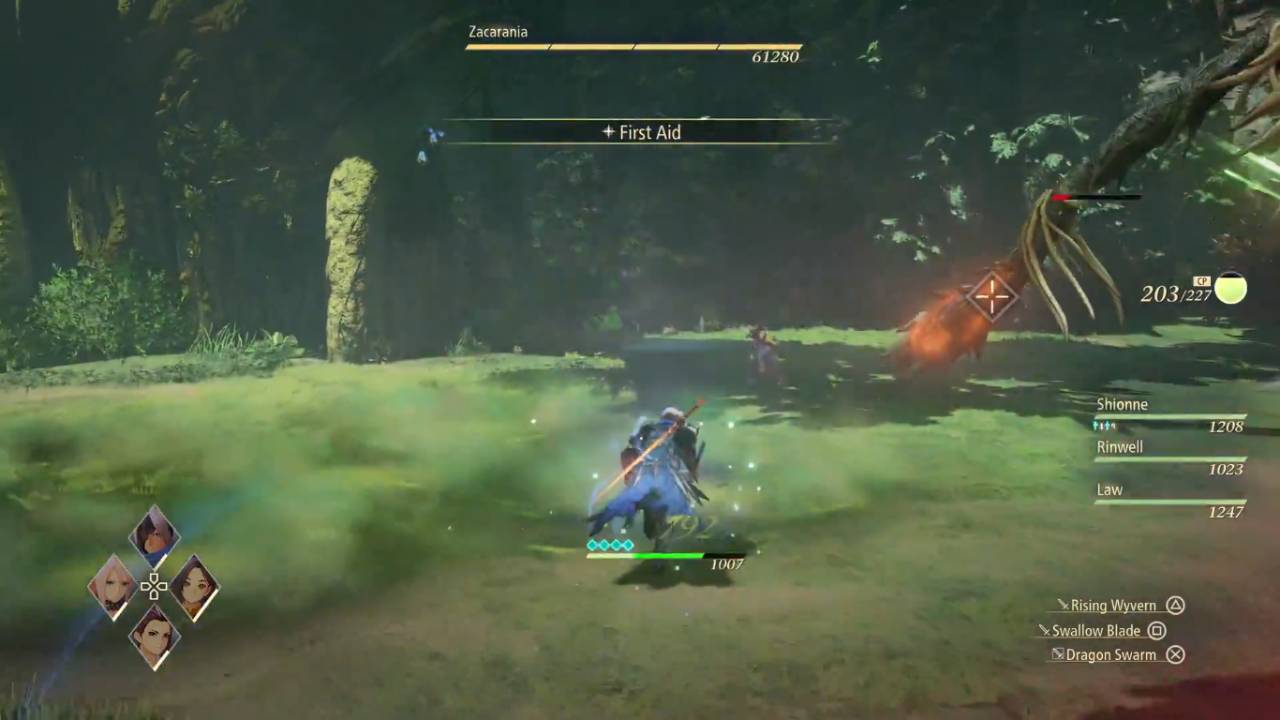
As the fight starts, you’ll quickly learn that hitting Zacarania’s main central body is very difficult due to its high, hovering stance. The boss compensates for this by relying heavily on massive vine-like appendages that extend out from its core down to the forest floor. Its main form of physical attack is swinging limbs, with wide, sweeping strikes and heavy slam attacks that cover a large radius.
You can’t go after the main central mass at all for the first few minutes of the fight to get past its defenses. Instead, direct all your party's direct offensive output to the extending appendages. These limbs are the boss’s main weaknesses, and only by damaging them effectively can you compromise the creature’s structural integrity.
Be patient as you attack the vines, stay defensive, and keep an eye on the ground. When you see a vine coil or retreat, it's preparing to make a high-speed sweeping strike across the dirt. Time your dodge roll just right to get a Perfect Evade and then immediately follow up with a Counter Edge to do a ton of physical damage right to the target appendage.
Boomy Reinforcements Management
As you grind down the boss’s limbs, Zacarania will violently shake its core, and call waves of smaller minion reinforcements called Boomies. These little aggressive critters swarm the battlefield fast, actively trying to screw with your backline spellcasters. These little adds are something you want to ignore, but if you ignore them completely, they can easily interrupt Rinwell's long magical chants.
As soon as the Boomies spawn, you should momentarily shift your main offensive away from the boss. Use Alphen’s wide-sweeping sword artes to round up and slice through the minion groups before they can break apart. You can also trigger Shionne’s special battle actions manually during this phase to clear out the field quickly.
If you want to control the battlefield, you want to get rid of these little nuisances as quickly as possible. Once the subordinate pack is completely cleared, you can safely turn your full attention back to the main plant mass. But be warned, the boss will try to call in some reinforcements a few times during the fight.
Using Wind Weaknesses and Rinwell’s Magic
Zacarania has a clear elemental weakness to wind-based attacks, making Rinwell your best offensive asset for this encounter. During the skirmish, you should be actively looking for opportunities to exploit her high-tier magical arsenal. Tell her to spam and chain her specialized wind spells and the boss’s structure defenses will be gone in no time.
Rinwell’s Gusty Nail can be stored and cast, allowing her to easily upgrade the spell into Cyclone, a massive vortex of wind energy that deals continuous elemental damage over a very wide area. If you fire Cyclone right under Zacarania, you'll hit the central mass and all active appendages at the same time, building up massive hit counts within seconds.
This constant elemental battering greatly speeds up how quickly you can stagger the boss. The elemental damage overlap will quickly wear down the creature’s total durability in tandem with Alphen’s fire-infused Flare Claw strikes. Pay attention to the flow of the fight, and always make sure that Rinwell has space to finish her devastating spells.
Exploiting the Stagger Windows
When you deal enough concentrated damage to Zacarania’s extending appendages, the massive plant beast will completely lose its balance and fall heavily into the forest floor. This gives a very generous stagger window and removes its natural hyper-armor completely and significantly reduces its defenses. This downtime is your absolute green light to unleash your most resource-heavy combos.
Alphen was to rush at high speed to the exposed central core and release his most potent Flaming Edge techniques. You will get the most damage out of these fiery strikes by sacrificing small portions of your own health while the boss is completely helpless. Keep using your most powerful physical artes until the creature starts to move.
.jpg)
Always be aware and don’t try to stretch your combos too long. Zacarania will instantly activate its natural hyper-armor as it slowly lifts its bulk back into the air. If you are caught swinging greedily through this recovery animation, the boss will immediately punish you with an unblockable point-blank radial blast that does heavy physical damage.
Performing the Last Blow
Once you’ve dealt with the overlapping minion spawns and survived the boss’s mid-fight offensive shifts, Zacarania’s health pool will drop into the critical zone. Now is the time to make your last all-out aggressive offensive push. Use your remaining companion Boost Gauges with your regular physical attacks to keep the injured plant beast in a never-ending stagger loop.
As your whole party is pumping damage into the central core, the blue crosshair diamond that is floating directly over the boss will quickly fill up to max capacity. When you see the Strike indicator flashing wildly on your screen, hit the directional prompt that matches it to perform a cinematic team-up finishing move. This spectacular finishing blow will shatter the heart of the beast forever, ending the battle.
Zacarania is a massive achievement that shows you can deal with airborne weak points, handle swarms of minions and utilize elemental advantages efficiently. The flower terror in the Gilanne Woodland has been successfully cleared and the way ahead will finally be open. Your battle-hardened party can collect their rewards safely, rest up at the nearest campfire and prepare for the next major trials that await you in Elde Menancia.
Check out our Tales of ARISE - Beyond the Dawn Edition Review and other guides:
- Tales of Arise Guide | How to Beat Menancia Guard Captain Kisara
- Tales of Arise Guide | How to Beat Lord Dohalim il Qaras
- Tales of Arise Guide | How to Beat Venoflage
- Tales of Arise Guide | How to Beat The Mysterious Swordsman
- Tales of Arise Guide | Unlock the Quaking Continent Trophy
- Tales of Arise Guide | Unlock the Billowing Cyclone Trophy
- Tales of Arise Guide | Basic Combat Mechanics
- Tales of Arise Guide | All Recipe Locations
- Tales of Arise Guide | All Fishing Spots and Fish Locations
- Tales of Arise Guide | All the Locations of the Artifacts
- Tales of Arise Guide | All Astral Flower Locations
- Tales of Arise Guide | Unlock the Big Game Hunter Trophy
- Tales of Arise Guide | Unlock the Wall Smasher Trophy
- Tales of Arise Guide | Unlock the Raging Current Trophy
- Tales of Arise Guide | Unlock the Night Blossom Trophy
- Tales of Arise Guide | Unlock the Veteran Rancher Trophy
- Tales of Arise Guide | Get the Diligent Counterattacker Trophy
- Tales of Arise Guide | Unlock Putting the Past in Its Place Trophy
- Tales of Arise Guide | Conquering the Ultimate Group Training
- Tales of Arise Guide | Ultimate Level 100 XP Farming Strategy
- Tales of Arise Guide | All Dahnan Owl Locations
- Tales of Arise Beginner's Guide | Gameplay Tips & Tricks
Contributor, NoobFeed
Latest Articles
No Data.